Resource management
The newly introduced resource management feature provides monitoring of resource usage, extending the admin capabilities of Altair AI Cloud.
The visibility and control of resource usage helps users to avoid over consuming or exceeding quota limits.
Note that all tenants have a resource quota set up for them. When the quota is exceeded, you cannot start a new workload. Workloads (e.g., designing a workflow, having a deployment, using Workspaces or Notebooks) use resources while they are running, so the available resources vary from moment to moment.
Resource management allows you to:
- secure resources for special groups of projects (these are allocated to them and cannot be used by others) -- for example, projects running deployments in production
- optimize usage of available resources, by seeing historical usage patterns -- for example, a scheduled job runs every two days, during which time users should not start Workflow Studio sessions with large amounts of data
- monitor resource usage, helps determine sizing, detect when upgrading (purchasing more resources) will be needed – for example, when new teams start using the platform, overall usage is increasing, more workloads are started, and you cannot further optimize your usage
- identify the most costly projects and calculate a project’s ROI (return on investment) -- especially important when generative AI use cases increase the need for resources
Resource management via resource pools
The concept of a resource pool is that a resource quota is allocated to a special group of projects. A resource pool can be created by users with Admin and Manager rights.
By default, each tenant has a resource pool including all the projects, with the same resource quota as the tenant. There is no need to create additional resource pools if you do not need them.
Admin users can create resource pools on the resource management page: from the left hand menu Controls > Resource Management.
-
First they can define which projects to add to it – any project can be selected and moved between pools. All running workloads will continue to run in the given project.
-
Then they define resource quota for the Pool which is a hard limit of CPU and memory that the projects in this pool can use and others cannot. Only unallocated resources can be added here (so actively used up and dedicated resources of other Pools cannot be stolen). What is Unallocated is visible on the screen.
-
Lastly, GPU resource can be added to the Pool. We treat GPUs as a special resource, the exact type of GPU can be selected (not like with CPUs). The type of GPUs available depends on what the tenant has purchased before. Only those types can be purchased that are supported by the cloud service the tenant is on (it can be different in AWS or in GCP).
The resource management overview page is available from the left menu (under Controls), the same as other admin features. It shows resource consumption split by resource pools. It lists the resource pools and shows historical usage charts and quotas.
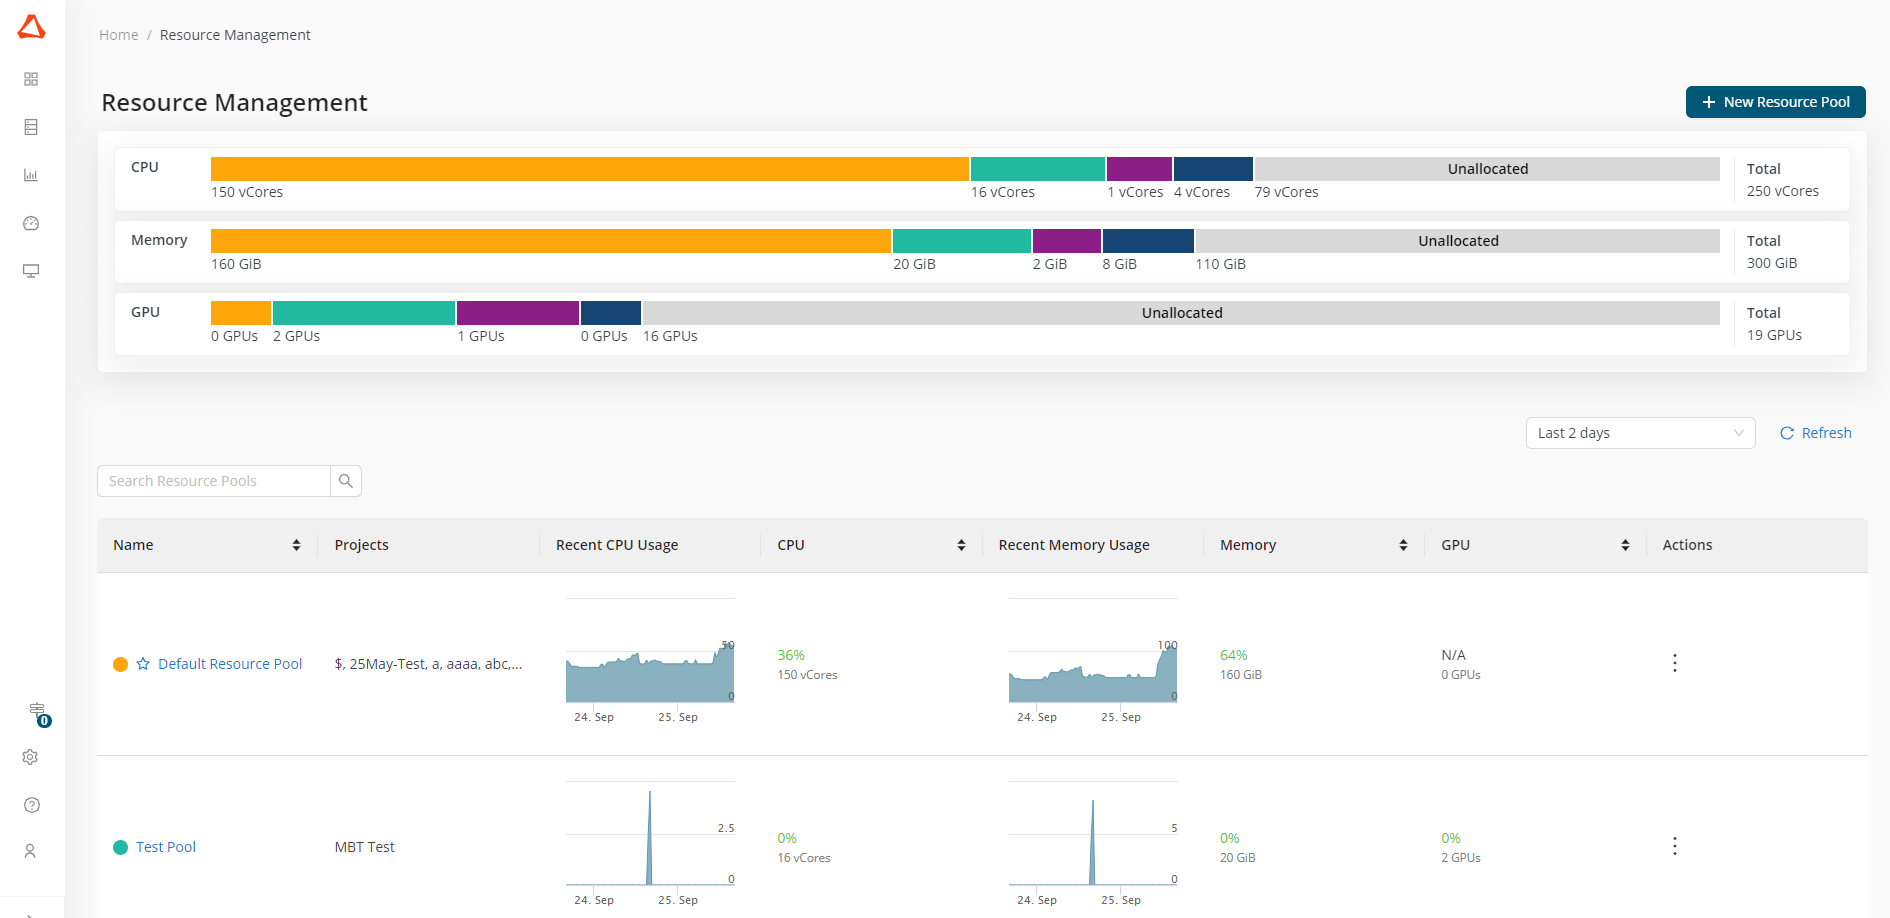
Each resource pool has a detailed page, where projects belonging to the pool are listed and more granular usage charts are available, e.g. resource usage by workload type.
Moving projects between resource pools
On the resource pool details page all projects belonging to the pool are listed. With the Delete action in the table, any project can be removed from this list and then the project and its resource consumption will be moved to the default resource pool. You cannot delete projects from the default pool with the delete action. To add these projects to other pools, you should start by editing the target resource pool and adding the project from the list of Projects not in this resource pool.
Similarly, you can change the project list of any resource pool in bulk under the Edit Resource Pool action.
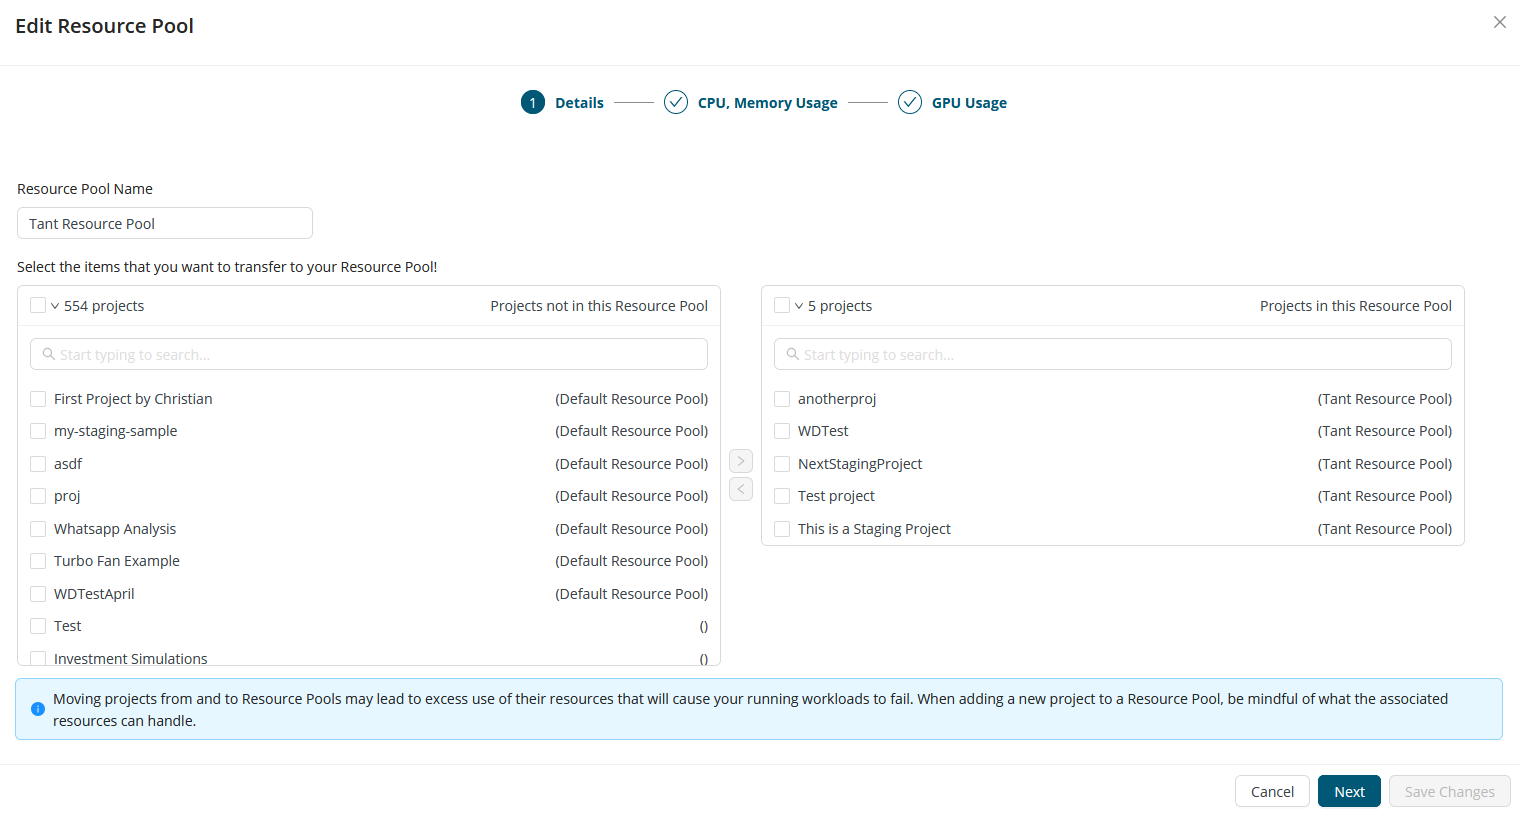
Please note that longer running workloads (like deployments, workspaces) will not be moved immediately, to keep active work unaffected. In general, moving projects from and to resource pools may lead to excess use of their resources, causing running workloads to fail. When adding a new project to a resource pool, be mindful of what the associated resources can handle.
Unallocated resources
Projects can use those resources that are allocated to the resource pool they belong to. When a tenant's resources are increased, these are added to Unallocated resources. An admin or manager can then decide how to allocate these resources to each of the resource pools. Adding more resources to an existing resource pool can be performed under Edit action.
While editing a resource pool, the available resources can be decreased, removed as well. These resources are transferred back to Unallocated resources, after which an admin or manager action can allocate them for use to another pool.
Warnings help users to keep resource pools healthy. When you decrease resources, you don't want the running workloads of projects to be affected. Note that these warnings only reflect recent load on the projects -- they can say nothing about future needs. Users should be careful to remove resources only when they are not needed by the projects in the given resource pool.
Project resource usage charts
On each project’s Details tab, information on the resources and usage is added. It shows
- which resource pool the project belongs to,
- what resource quotas it has, and
- if it is allowed to use GPU.
This information is visible to all members of the project, helping them to schedule their work effectively for optimizing resource usage. For example they can see here if there are big jobs running currently that use up available resources and might block them when they start work. They can see when usage spikes appear and adjust their work (or request more resources) accordingly.
In addition, there are charts showing how a project contributes to the resource use of the resource pool.
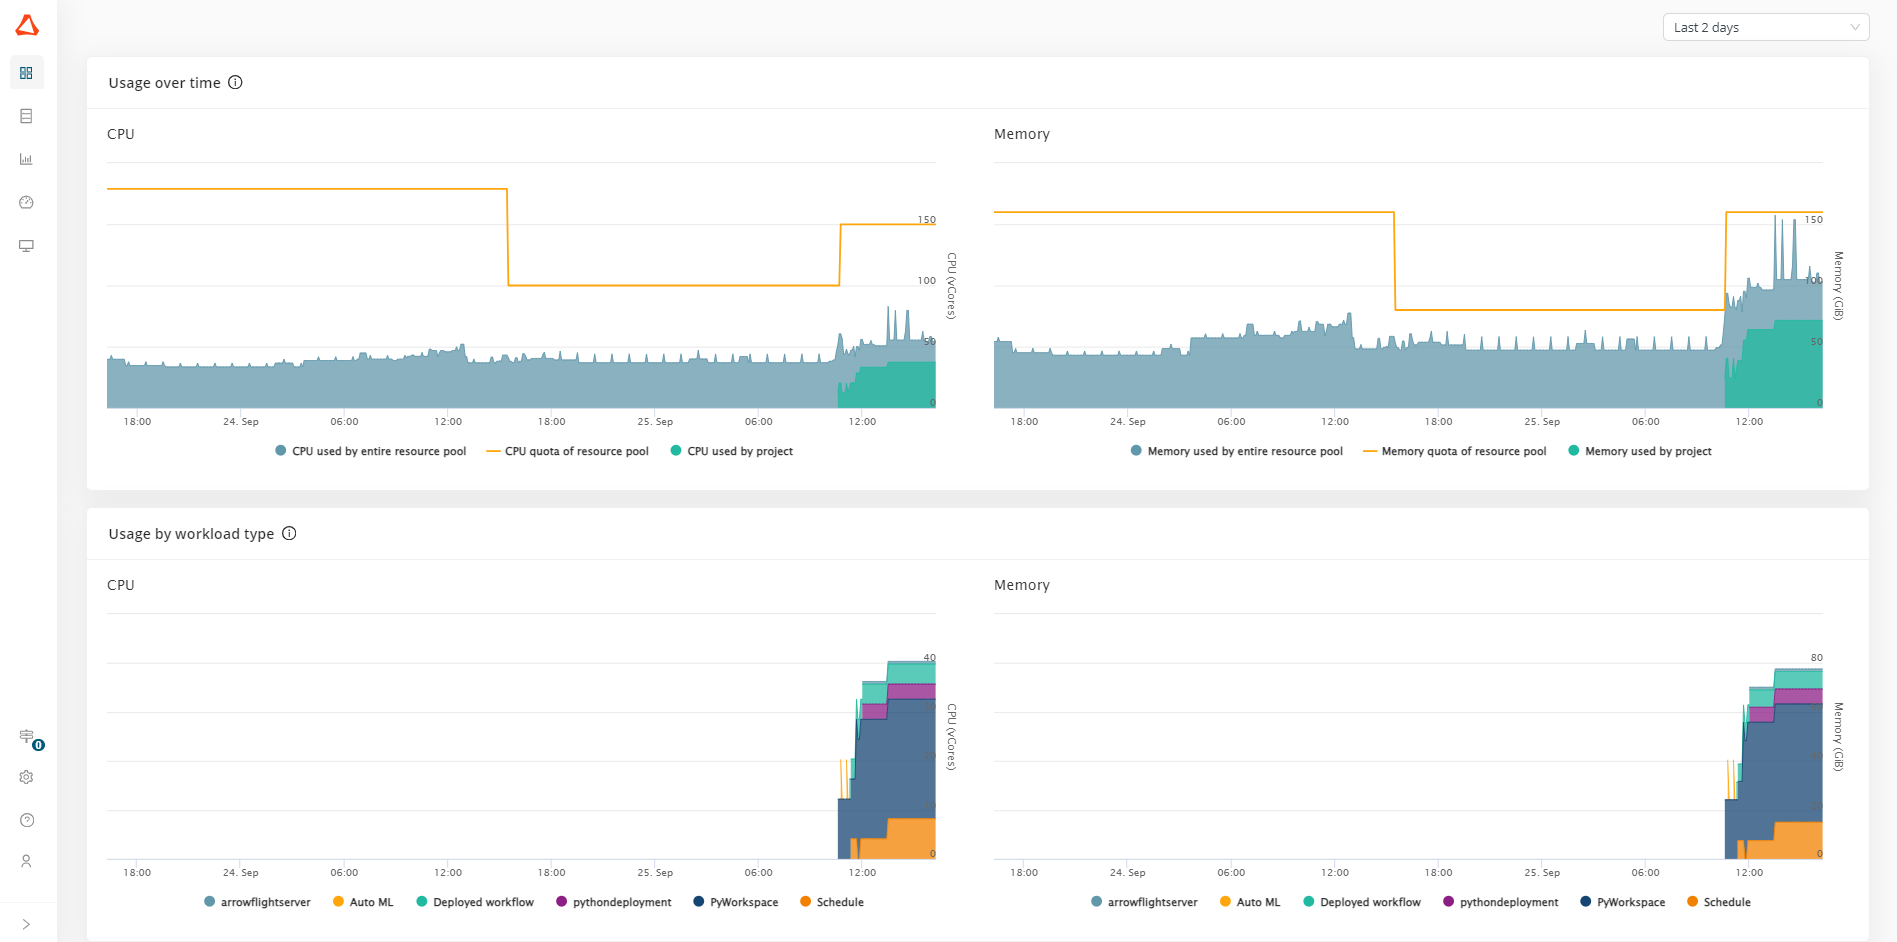
Resource usage over time
These charts display:
- the resource consumption of the current project,
- the overall resource consumption of the resource pool that the current project belongs to (including the current project), and
- the resource quota for the current resource pool.
If consumption approaches the limit set by the quota, starting new activities (i.e., creating deployments, opening Workflow Studio or launching Auto AI tasks) might fail. Such cases can be resolved by stopping workloads that are no longer needed, or by reaching out to your administrator to increase the quota.
Resource usage by workload type
These charts show how the different workload types contribute to the resource consumption of this project. You may optimize resource usage by analyzing the high consumption areas and patterns over time.