Prompt Studio
Prompt Studio is a workspace for designing, testing, comparing, and saving prompts for LLMs inside a project. You can iterate on prompt wording, evaluate responses, manage context and test cases, save reusable prompt objects, and send saved prompts to workflows.
A useful distinction:
- Prompt Studio is the workspace where you create and test prompts.
- A prompt object is a saved prompt stored in the project as an .rmprompt file.
Saved prompt objects are available from the project’s Content tab and can be deleted from here the same way as other artifacts.
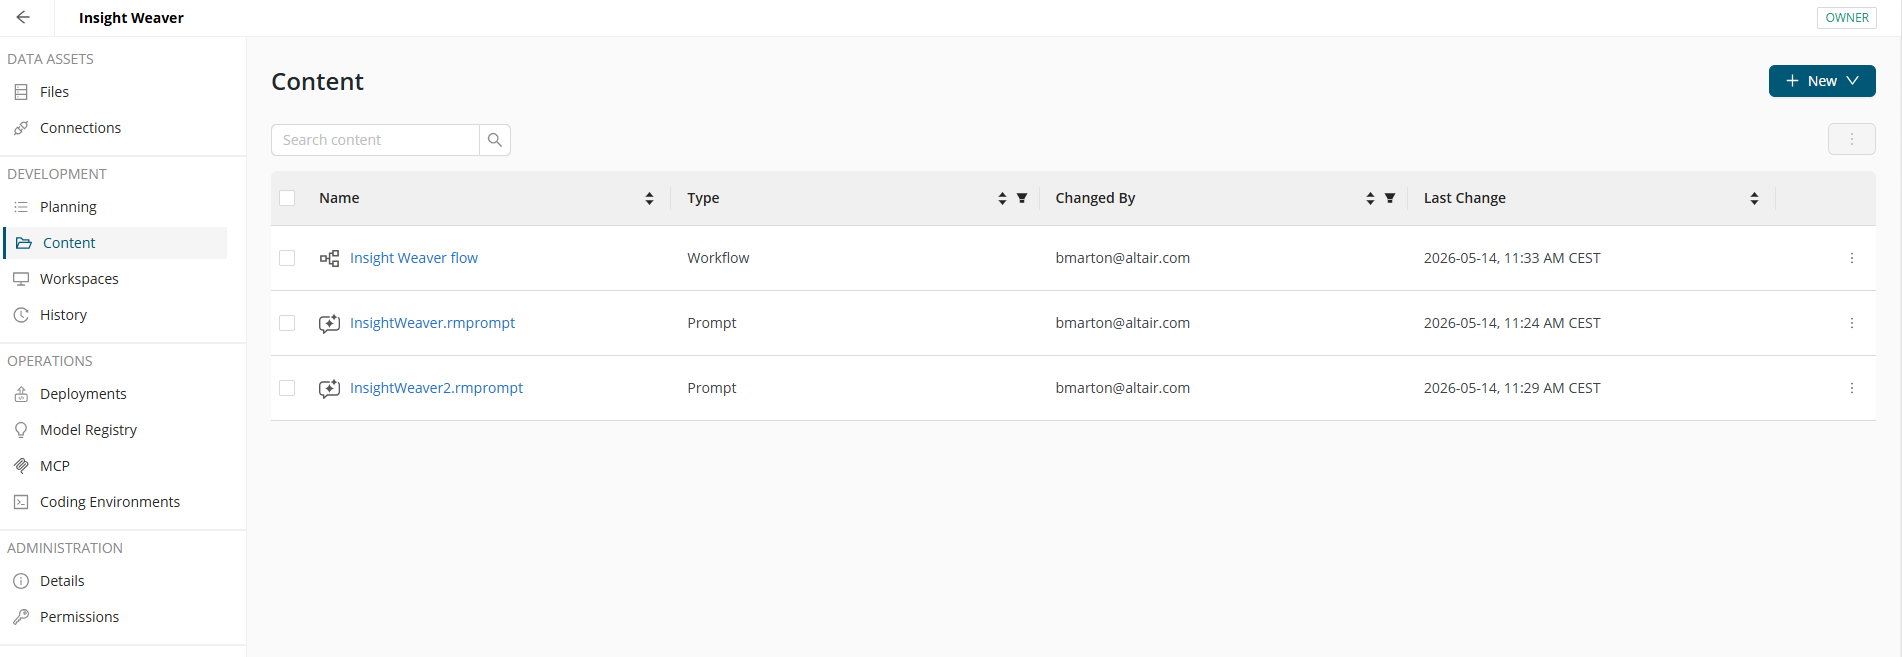
You can open Prompt Studio from the Content tab of a project. After naming it, you should select a connection. Prompt names must be unique within the project.
Navigation
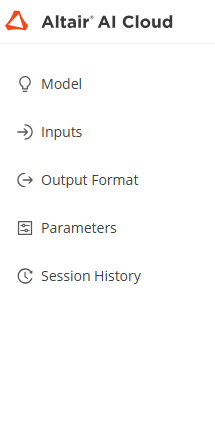
Prompt Studio is organized around the left-hand global menu. From here, you can access session history, input management, and prompt configuration.
Main areas include:
- Model
- Inputs
- Output format
- Parameters
- Session history
Typical workflow
A common Prompt Studio workflow looks like this:
- Select the model from your available connections.
- Write or refine the system and user prompt.
- Optionally add context from the Inputs menu.
- Test the prompt.
- Review the response and refine prompt text, output format, or parameters.
- Test again.
- Optionally add test cases from the Inputs menu if you want to validate the prompt against multiple inputs or prepare it for use with a dataset in a workflow.
- Compare prompt runs if needed.
- Save the most effective prompt as a prompt object.
- Use the saved prompt in a workflow.
Prompt engineering overview
Prompt engineering is the practice of designing prompts so the model produces useful, consistent, and relevant outputs. In Prompt Studio, this usually means refining the system prompt, user prompt, inputs, output format, and parameter settings through repeated testing.
Some practical guidelines:
- Be clear and specific: state the task, expected output, tone, and constraints.
- Separate instruction from context: use the prompt text for instructions and use context inputs for supporting material.
- Define the output structure: specify whether you want plain text, a list, JSON, or another structured result.
- Iterate based on results: test, review the response, refine the prompt, and test again.
- Use test cases: validate how the prompt behaves across different examples, not just one input.
- Adjust parameters carefully: if responses are too broad, inconsistent, or repetitive, refine parameters as part of the iteration.
A simple pattern is:
- Start with a clear instruction.
- Add supporting context if needed.
- Define the expected output.
- Test and refine.
Model, output format, and parameters
Below settings in Prompt Studio determine which model is used, how the response is structured, and how the model behaves during generation. These settings are available from the left menu and can be refined as part of the prompt iteration process.
- Model lets you select the model to run the prompt against from your available connections.
- Output format defines the structure of the response.
- Parameters control model behavior.
Model
Use Model to select the model from your available connections. The selected model determines which LLM processes the prompt.

A valid connection to an LLM is required to test a prompt. Without a connection, Prompt Studio cannot send the prompt for execution.
Read more: Create a connection
In Prompt Studio, we show you the full range of available providers, but you’ll see a warning if there is no connection selected or if the selected one does not support the selected provider. The connection can hold a secret for multiple local deployments, but they are optional - we only show you which deployments you have access to.
Read more: Deploy an LLM
These settings can be adjusted as you iterate and are transferred when the prompt is used in a workflow.
Output format
Use Output format to define how the response should be returned. This can help make responses easier to review in Prompt Studio and easier to reuse in workflows.
Depending on your configuration, output format may be used to:
- request plain text output
- request json output

Parameters
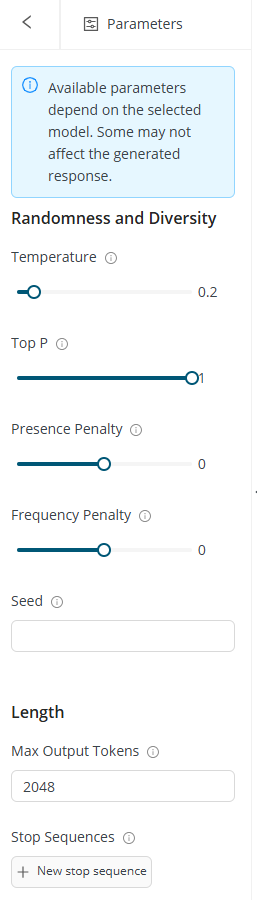
Use Parameters to control generation behavior. Parameter availability can depend on the selected model.
Common parameters include:
- Temperature: controls randomness. Lower values usually make outputs more focused and consistent, while higher values can make outputs more varied and creative. It is available for most providers.
- Top P: controls token selection by limiting the model to a probability range. Lower values can make output more focused.
- Presence penalty: encourages the model to introduce new topics or wording instead of repeating what has already appeared.
- Frequency penalty: reduces repeated wording by lowering the likelihood of repeating the same tokens frequently.
- Seed: sets the starting point for random number generation, ensuring reproducible outputs for the same input. It is only available for OpenAI, Gemini on Vertex AI, and open-weight models.
- Maximum output tokens: sets the maximum length of the generated response.
- Stop sequences: define where the model should stop generating text.
Parameter effects can vary by model, so the best approach is usually to make small adjustments and test again.
How to use settings effectively
A few practical recommendations:
- Start with the default settings unless you have a reason to change them.
- Change one setting at a time when testing.
- If responses are inconsistent, lower creativity-related settings such as Temperature.
- If responses are too short, increase Maximum tokens.
- If responses repeat themselves, adjust repetition-related penalties if available.
- If the output needs to follow a strict structure, combine a clear prompt with an appropriate output format.
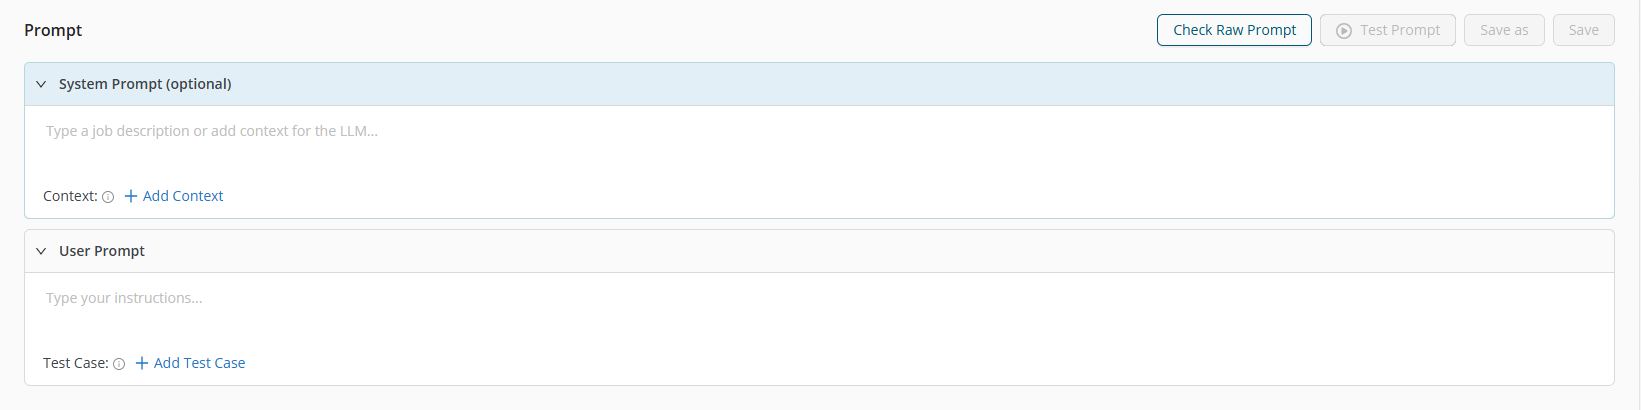
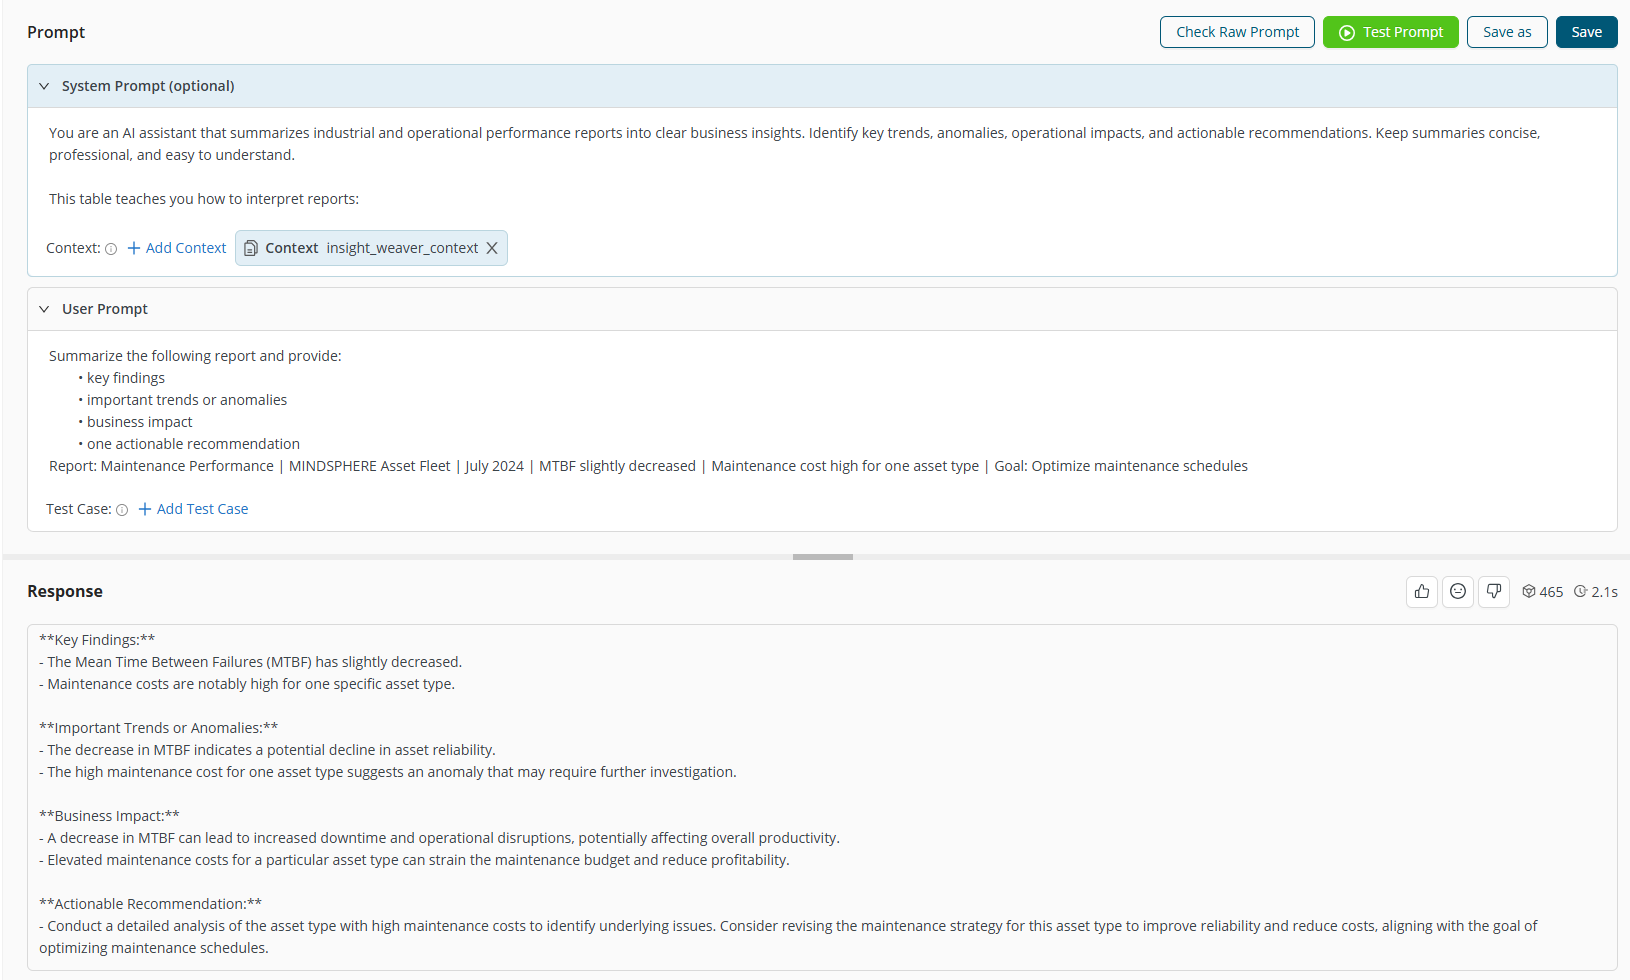
Design view
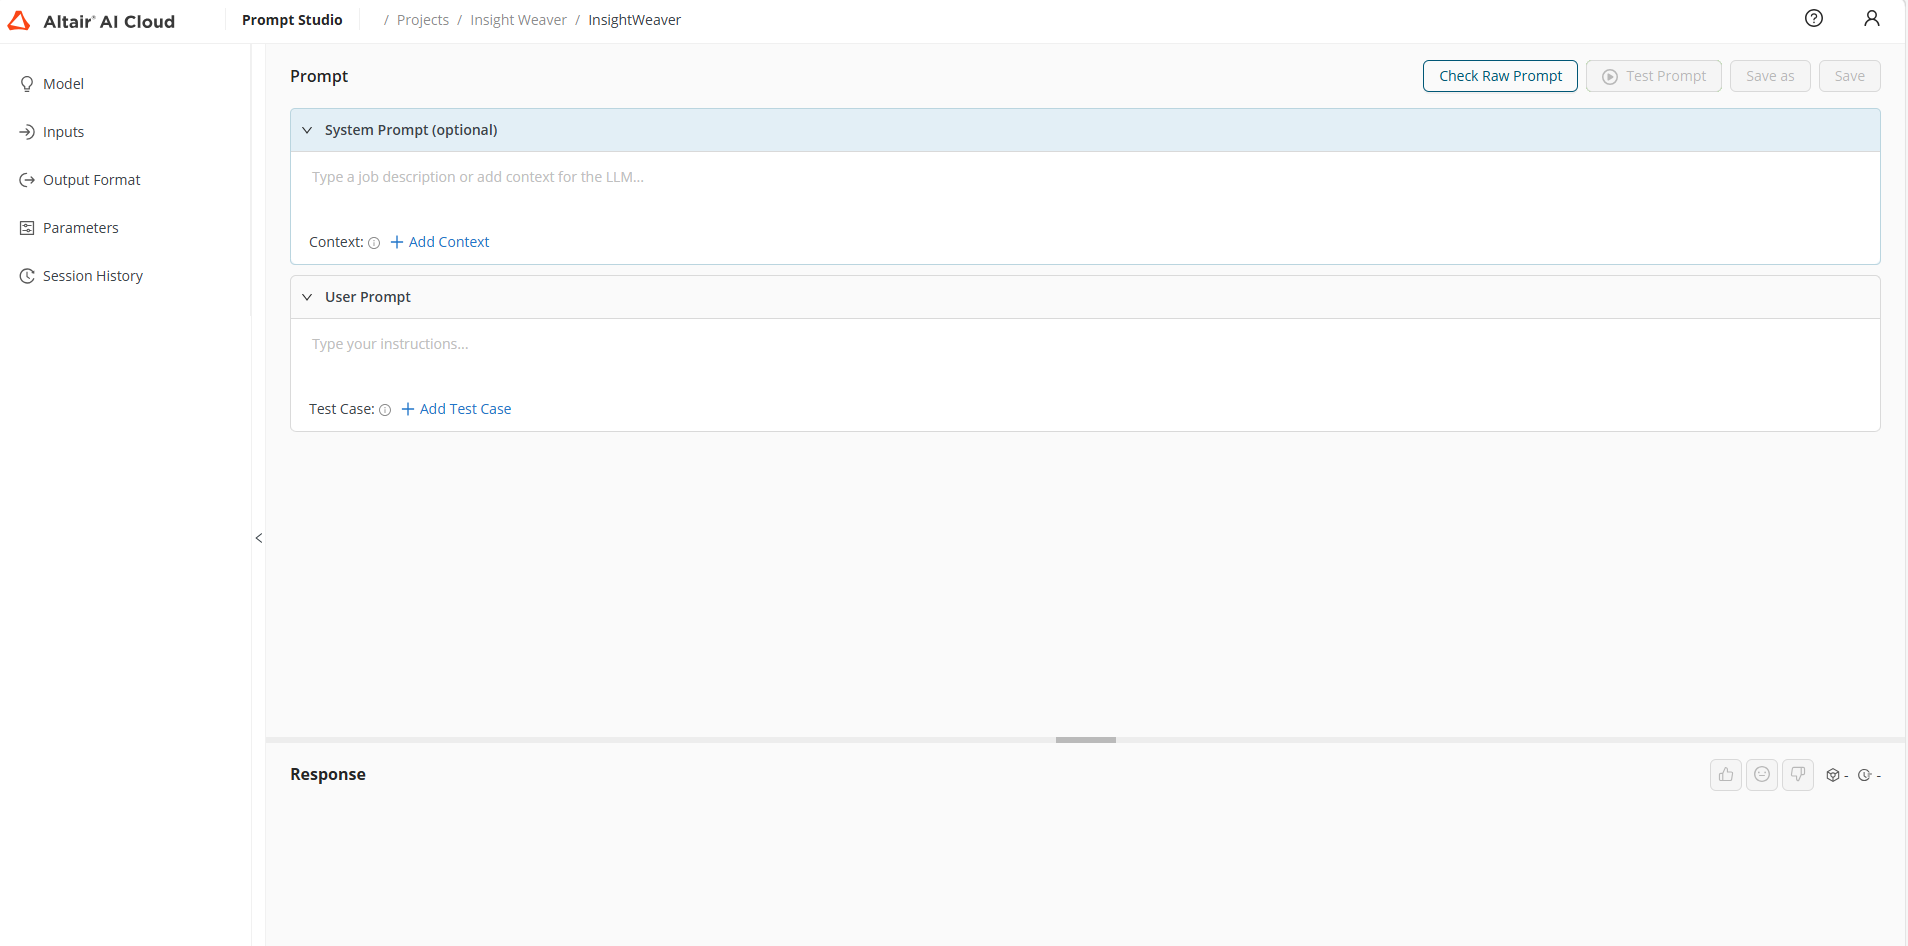
Design view is where you create and refine prompts. It includes the prompt editing area and access to previously added inputs.
Editing area supports two prompt sections:
- System prompt: instructions that define the model’s behavior, tone, or constraints
- User prompt: the task-specific request for the model
Inputs
Use the Inputs menu to manage the information that can be used by the prompt. Prompt Studio supports two input types:
- Context
- Test cases
Inputs are added and edited from the left menu. Only inputs that have already been added there can be used in Design view.
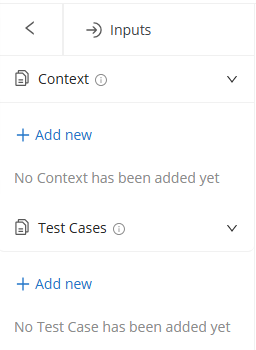
Context
Context provides supporting information for the model. You can add context to the system prompt and remove it using x. Context items can also be managed from the Inputs menu using the available actions.
Test cases
Test cases help evaluate prompt behavior against predefined examples. Adding test cases is optional. You can test prompts without any test case inputs.
If you add test cases, Prompt Studio uses the selected dataset both for testing and as the data reference when creating a new workflow from the prompt. You can add test cases to the prompt, remove them using x, and manage them from the Inputs menu.
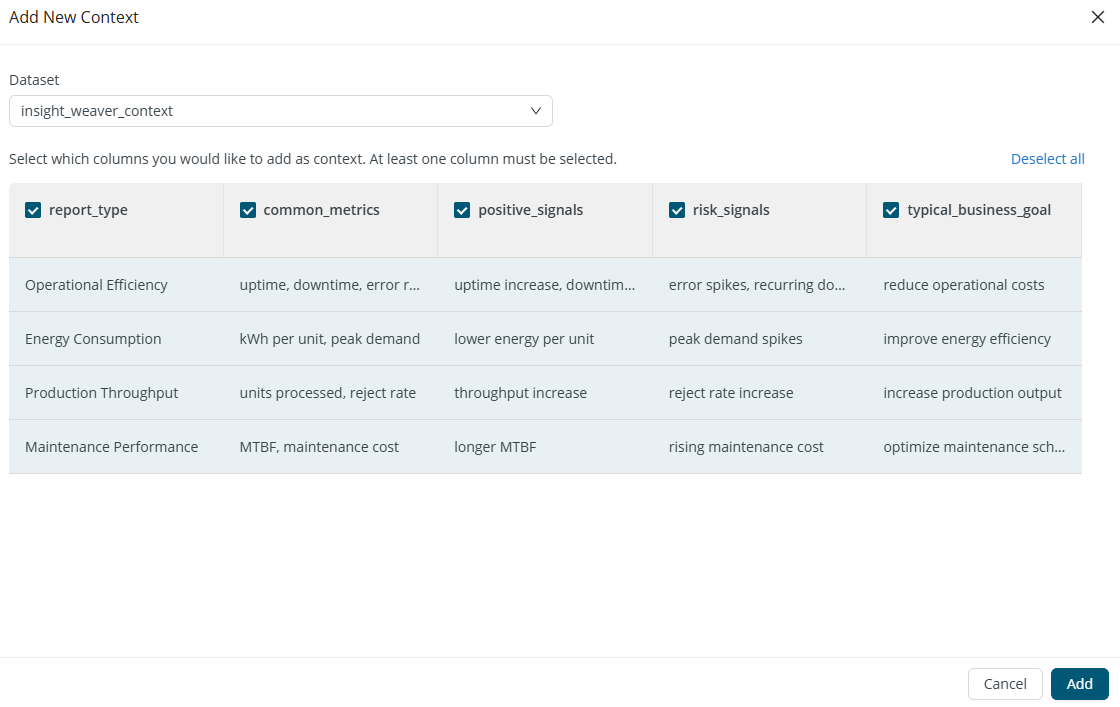
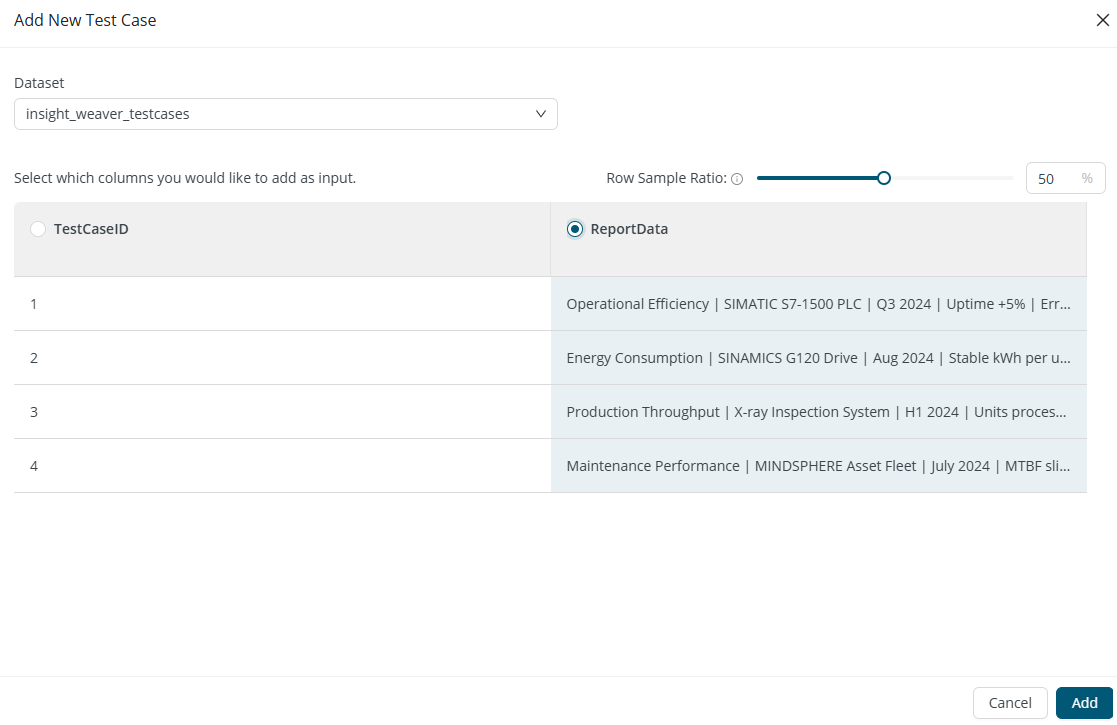
Add input modal
The Add input modal is used to add either context or test case files. Dropdown includes tables in rapidminer-supported format.
When adding context, you can select which columns you would like to add as context. At least one column must be selected.
When adding test cases, you must select which column you would like to add as input. Only one column can be selected. With the sample ratio slider, you can control how many test cases to send to the LLM.
Testing prompts
Once the model, prompt text, and optional inputs are configured, you can test the prompt. Test cases are optional - if none are added, Prompt Studio sends a single prompt to the selected model and displays a single response. If test cases are included, Prompt Studio executes the prompt for each selected test case and displays the corresponding results.
After each test, you can review the response and related metrics, or the test case results (if applicable).
Prompt Studio is designed for iteration. After reviewing the result, you can assign a rating to compare iterations more easily later, refine the prompt text, output format, or parameters and test again.
Iterations can be reviewed in the session history. Session history is bound to the Prompt Studio session and is temporary. When the session ends, test history is lost. Only saved prompt objects persist.
Session history
The Session history menu shows prompt runs from the current session. It is the main place to revisit and act on prompt runs while working.
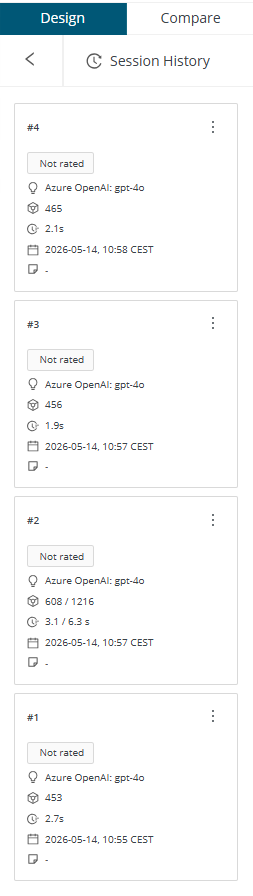
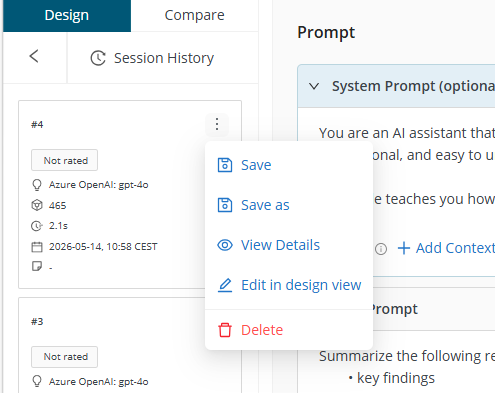
You can open actions from each prompt card to:
- save
- save as
- view details
- edit in Design view
- delete
Only unsaved history items can be deleted. Saved prompt objects cannot be deleted from session history.
If you choose Edit in Design view from a prompt card action on the left, Prompt Studio focuses the selected prompt.
Editing a previous prompt is considered a draft until it’s sent to the LLM. Draft prompts cannot be saved/used.
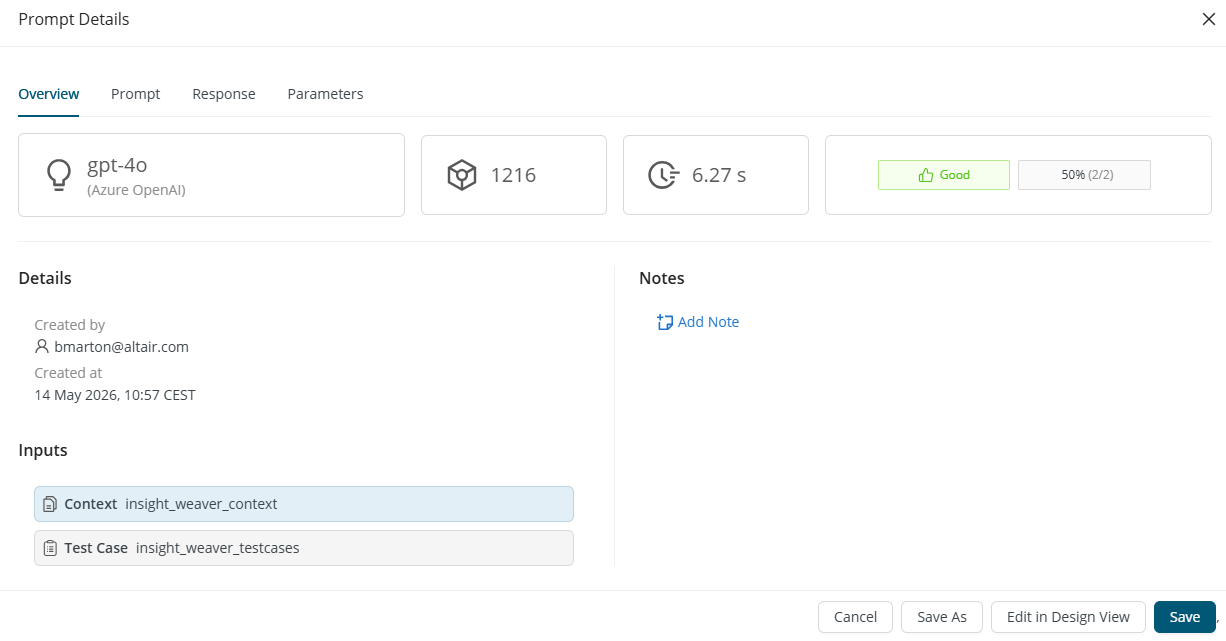
Prompt details
You can inspect prompt information in the Details modal.
The modal includes:
- Overview: details, inputs, notes, rating, metrics like number of tokens used and latency
- Prompt: system and user prompt sections, with normal and raw display options
- Response: response text, rating, and test case result table (if applicable)
- Parameters: parameter values used for the run
You can also add notes from the Details modal.
Notes
Notes can be added from:
- the Details modal
- Compare view
Users can submit a quick note and/or a description. Notes help document observations and make prompt runs easier to review later.
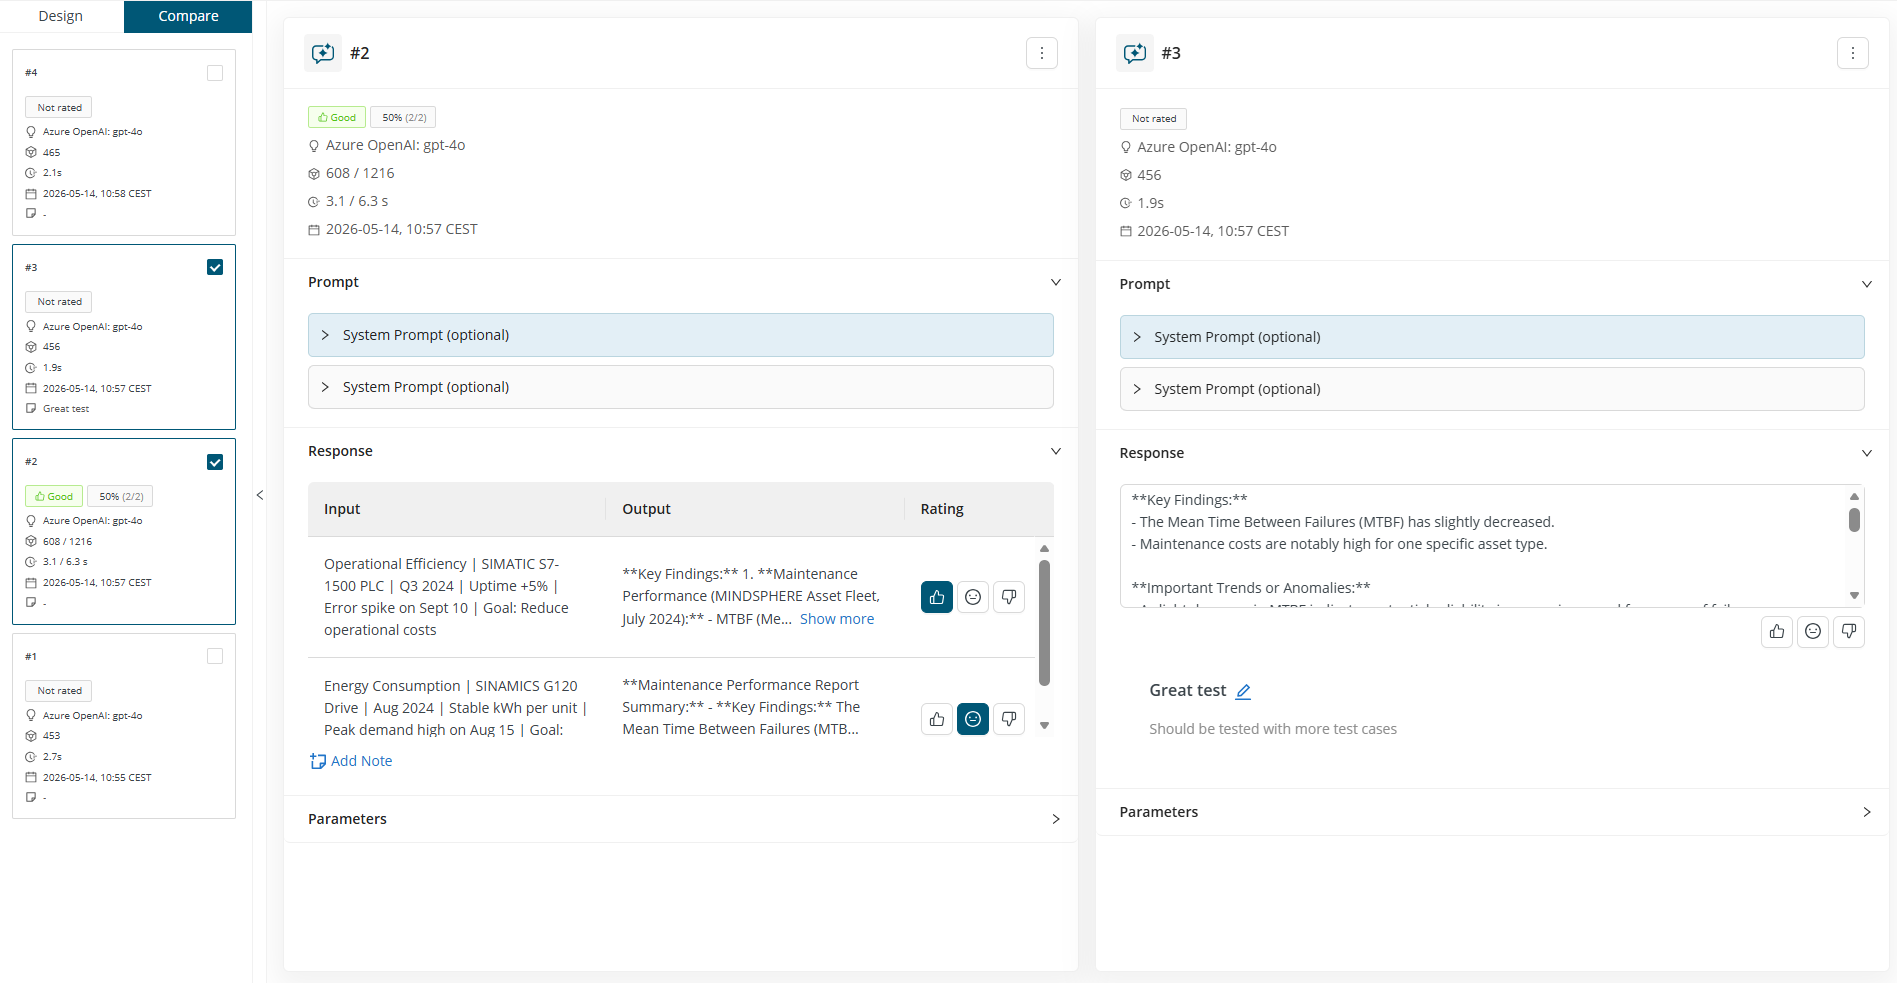
Compare view
Compare view lets users inspect selected prompt runs side by side. This helps evaluate differences in prompt text, model configuration, responses, metrics, ratings, and notes.
All actions previously available on prompt cards can be performed within the Compare view as well.
Save and Save as
Save
Save is available for unsaved prompt runs only. Saving creates a prompt object in the project with the previously defined name.
Save as
Save as is available for both saved and unsaved prompts. It creates a copy of the selected prompt under a new name.
The new name must be unique within the project. If the name is already taken, validation prompts the user to enter a different one. Prompt Studio confirms successful completion with a success message.

Using prompts in workflows
Only saved prompts can be used in workflows.
After clicking Use prompt, users can choose one of two options:
- Select existing workflow: opens a modal listing workflows available in the project
- Create new workflow: opens a modal for creating a new workflow
If you choose an existing workflow, Prompt Studio opens the workflow in Workflow Studio, where you must add the prompt manually. Prompt Studio does not insert it automatically into existing workflows.
If you create a new workflow, Prompt Studio automatically inserts an operator. Which operator is created depends on whether the prompt includes test case data.
A workflow without test cases
If the prompt was tested without any test cases, Prompt Studio creates a Prompt operator.
The generated operator contains the saved prompt configuration but is not connected to any dataset. Since it has no data reference, it cannot be linked directly to tabular input.
If you later want the prompt to process rows from a dataset, replace the operator with Prompt with Data and configure a data reference as described below.

A workflow with test cases
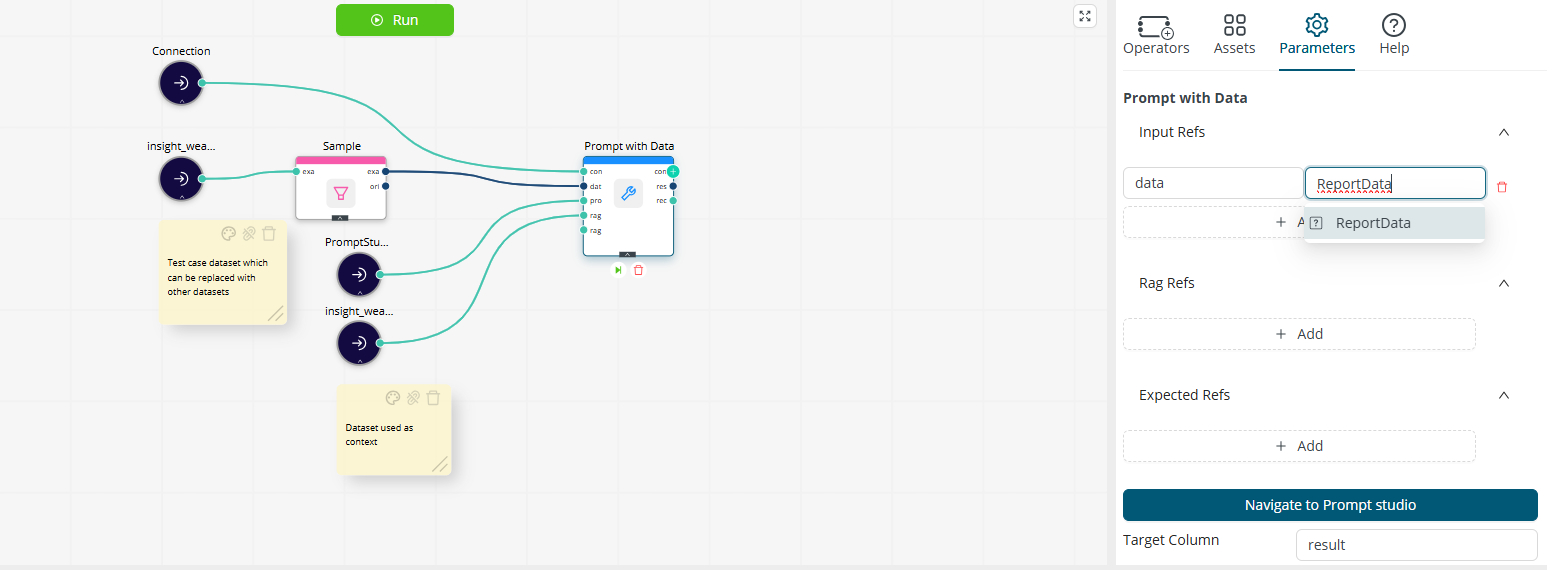
If the prompt includes a test case dataset, Prompt Studio creates a Prompt with Data operator.
The selected test case dataset is referenced as data inside the generated operator.
You can replace the original test case dataset with another compatible dataset in Workflow Studio. After connecting the new dataset, update the operator parameters by selecting desired input column reference value for data reference key.
A dataset without test cases
If you do not want to use test cases in Prompt Studio but know the prompt will later process datasets in a workflow, include a data placeholder directly in the user prompt before saving: [[data]]

When creating the workflow from Prompt Studio:
- Replace the generated Prompt operator with Prompt with Data.
- Connect the desired dataset.
- Update the operator parameters to reference the desired columns by using
[[data]]as the variable name and selecting the appropriate column of the dataset.
Key behaviors to know
- Saved prompt objects are stored as .rmprompt files in the project.
- Only saved prompt objects persist after the session ends.
- Test history is session-based and is not retained after the session closes.
- Prompts can be tested without adding test cases.
- Prompt names must be unique within the project.
- Only saved prompts can be used in workflows.
- Creating a new workflow without test cases generates a Prompt operator. Creating one with test cases generates a Prompt with Data operator.