Notebooks
A notebook is a shareable document that combines computer code, plain language descriptions, data, rich visualizations like 3D models, charts, graphs and figures, and interactive controls. Your Python workflow can be displayed in a notebook.
What sets the notebook apart from the rest of Altair AI Cloud is that the notebook opens in a user-specific container, apart from the workflows. In this dedicated space, you can write and test your code, store your changes in a private Git repository, and share the results with the rest of the team only when you are ready:
- by using the notebook's Git functionality to share notebooks with projects, and
- by using the rmpy library to share data with the Data Assets
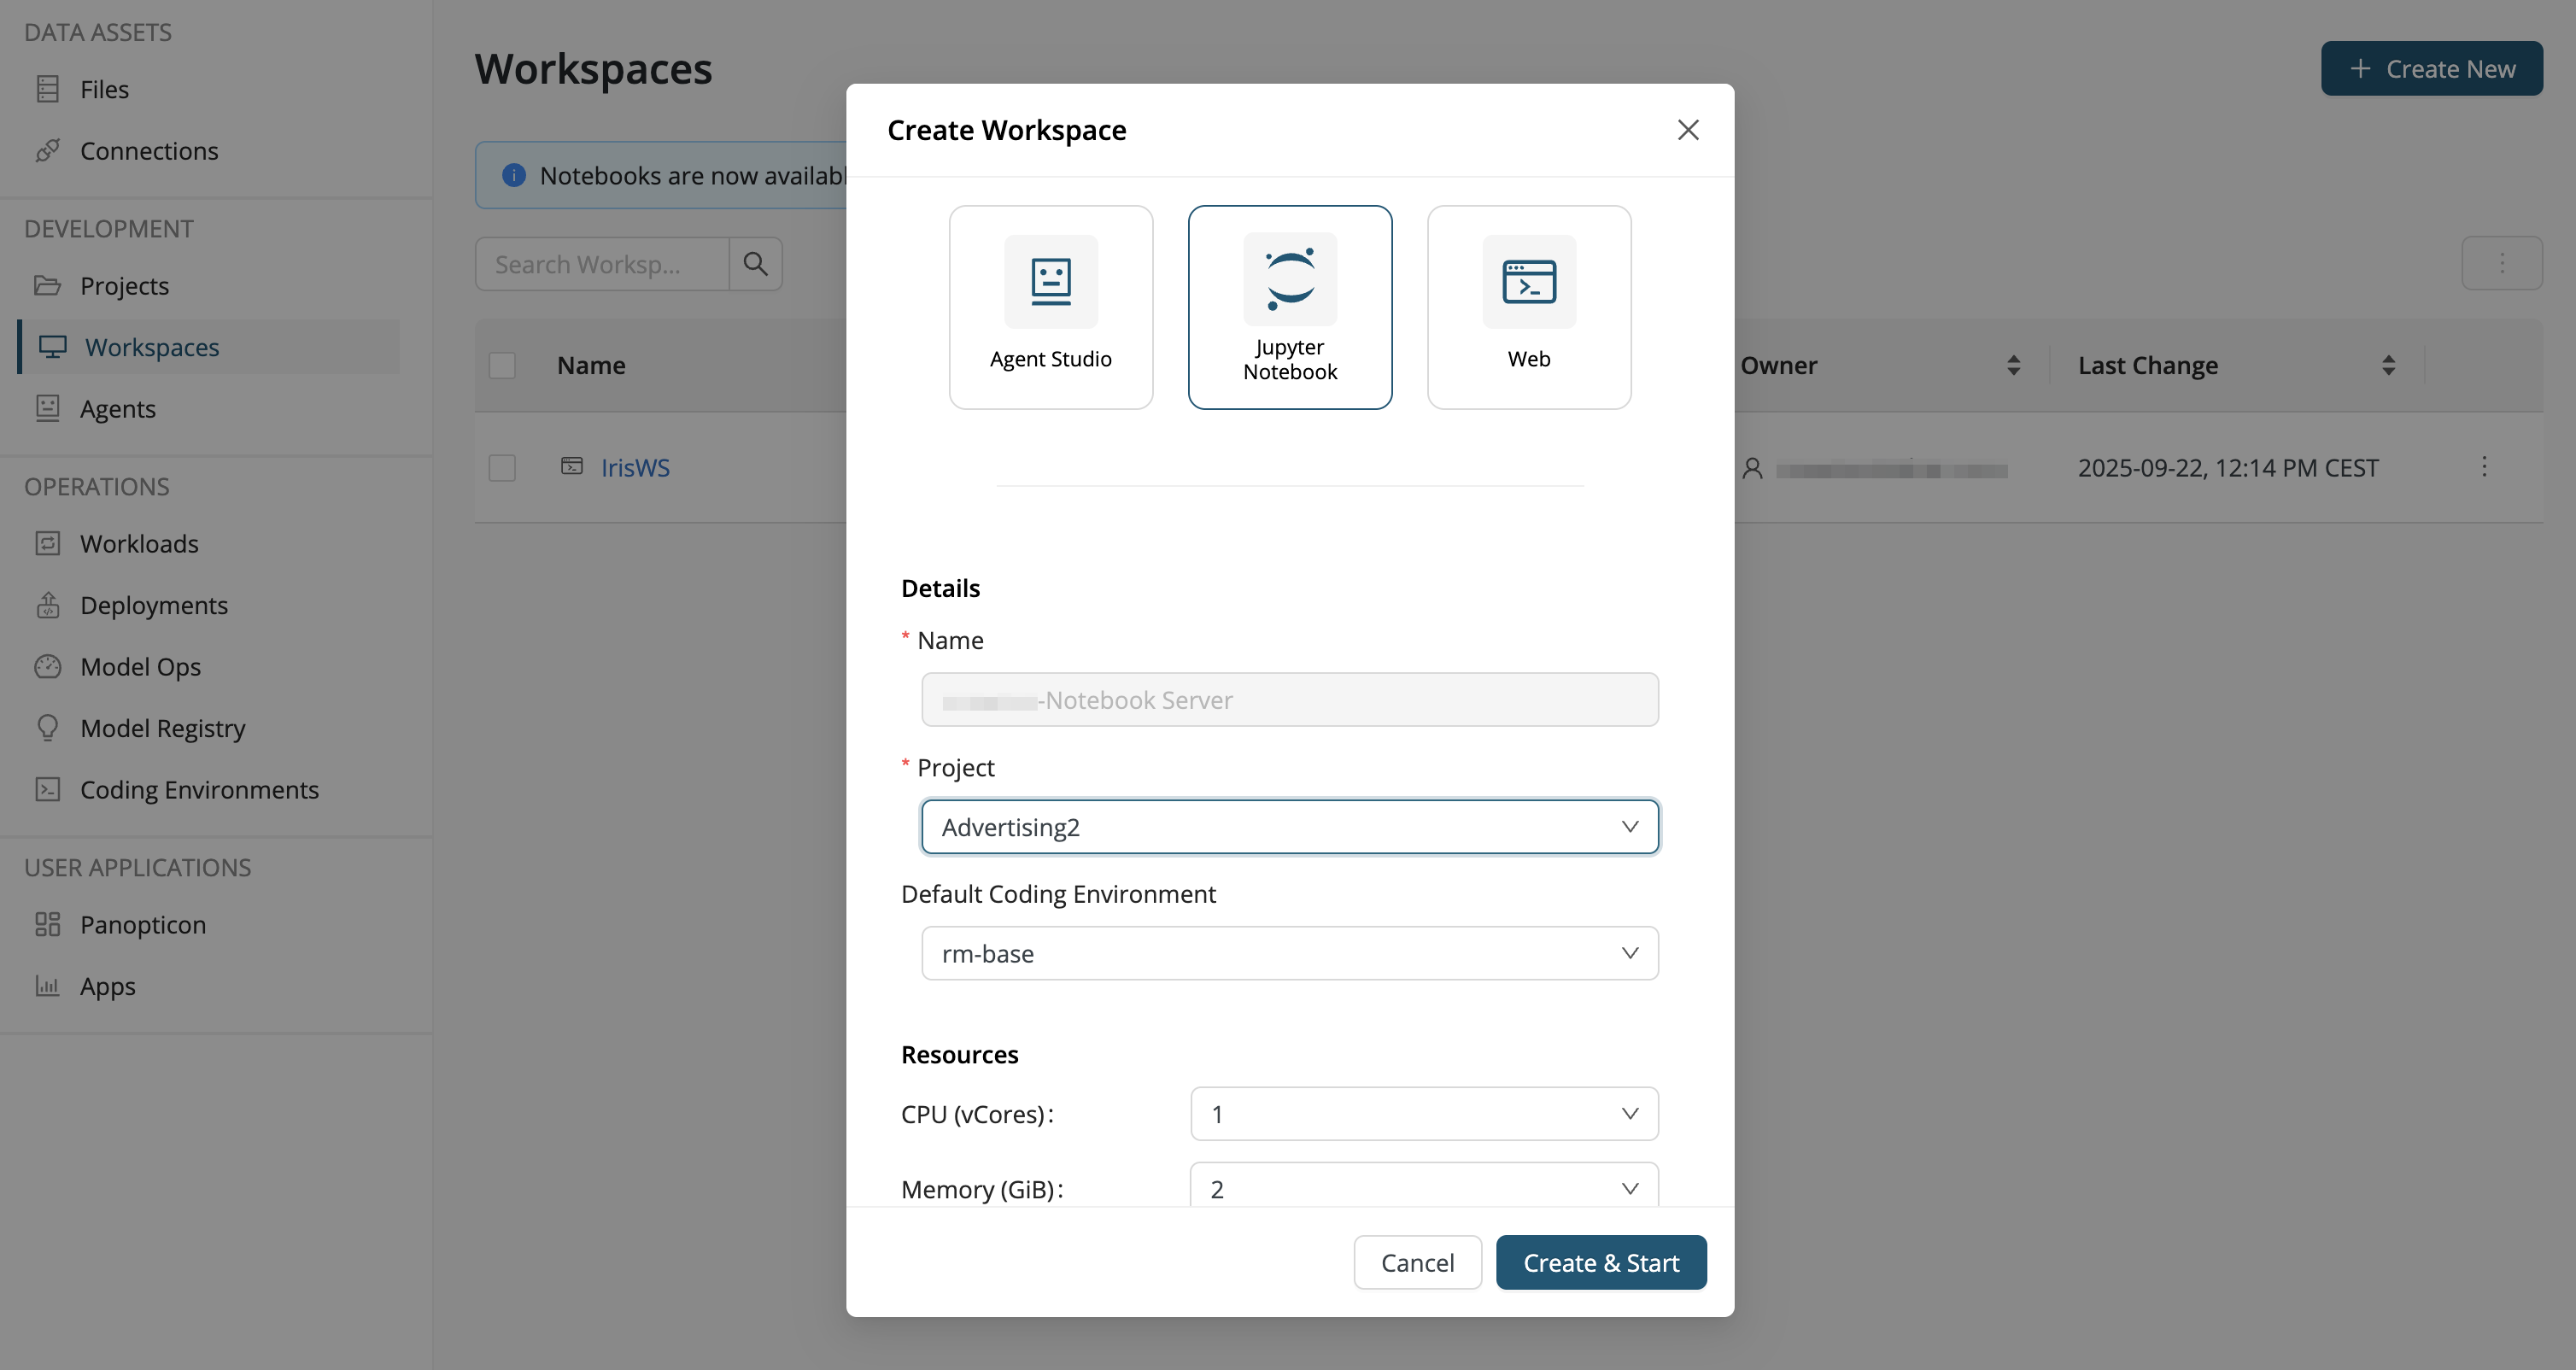
Create a Jupyter Notebook workspace
To create a Jupyter Notebook workspace:
- From the left side menu, select Development > Workspaces, then
- click the Create New button on the top right and select Jupyter Notebook.
Provide the following details:
- Name: Give a name to your notebook workspace.
- Project: Choose a project from the dropdown list, if you created the workspace from outside a project.
- Default Coding Environment: See the discussion below.
- CPU (vCores): The number of CPU cores available
- Memory (GiB): The amount of memory available
Then click Create & Start.
When the notebook server starts, it clones the projects from where it's launched. You can use the git functionalities to commit your work to the project's content. See the section below for using Git with notebooks.
Coding environment
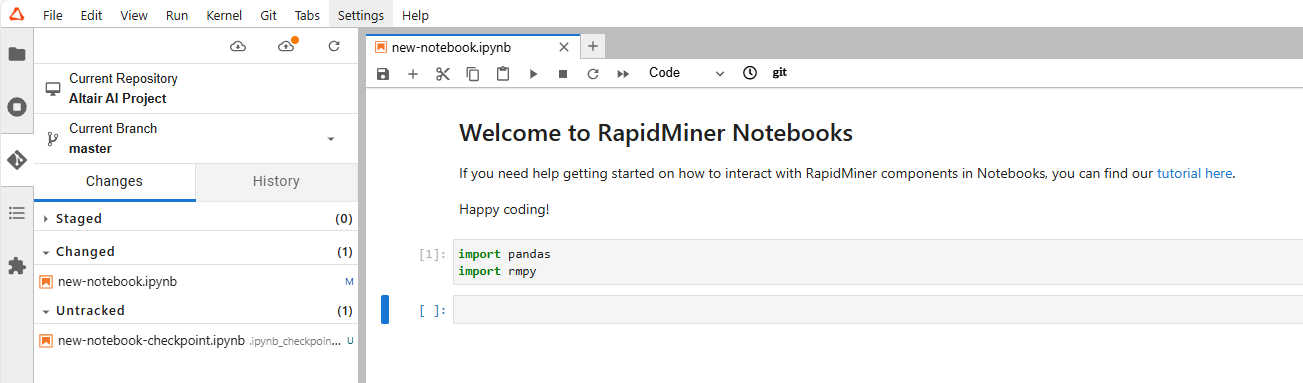
The notebooks are pre-loaded with global and local coding environments. The launcher (File > New Launcher) opens in a user-specific container. Under Notebook or Console, select one of the coding environments, for example rm-base, to launch a new notebook, or use the file browser to locate and open an existing notebook:
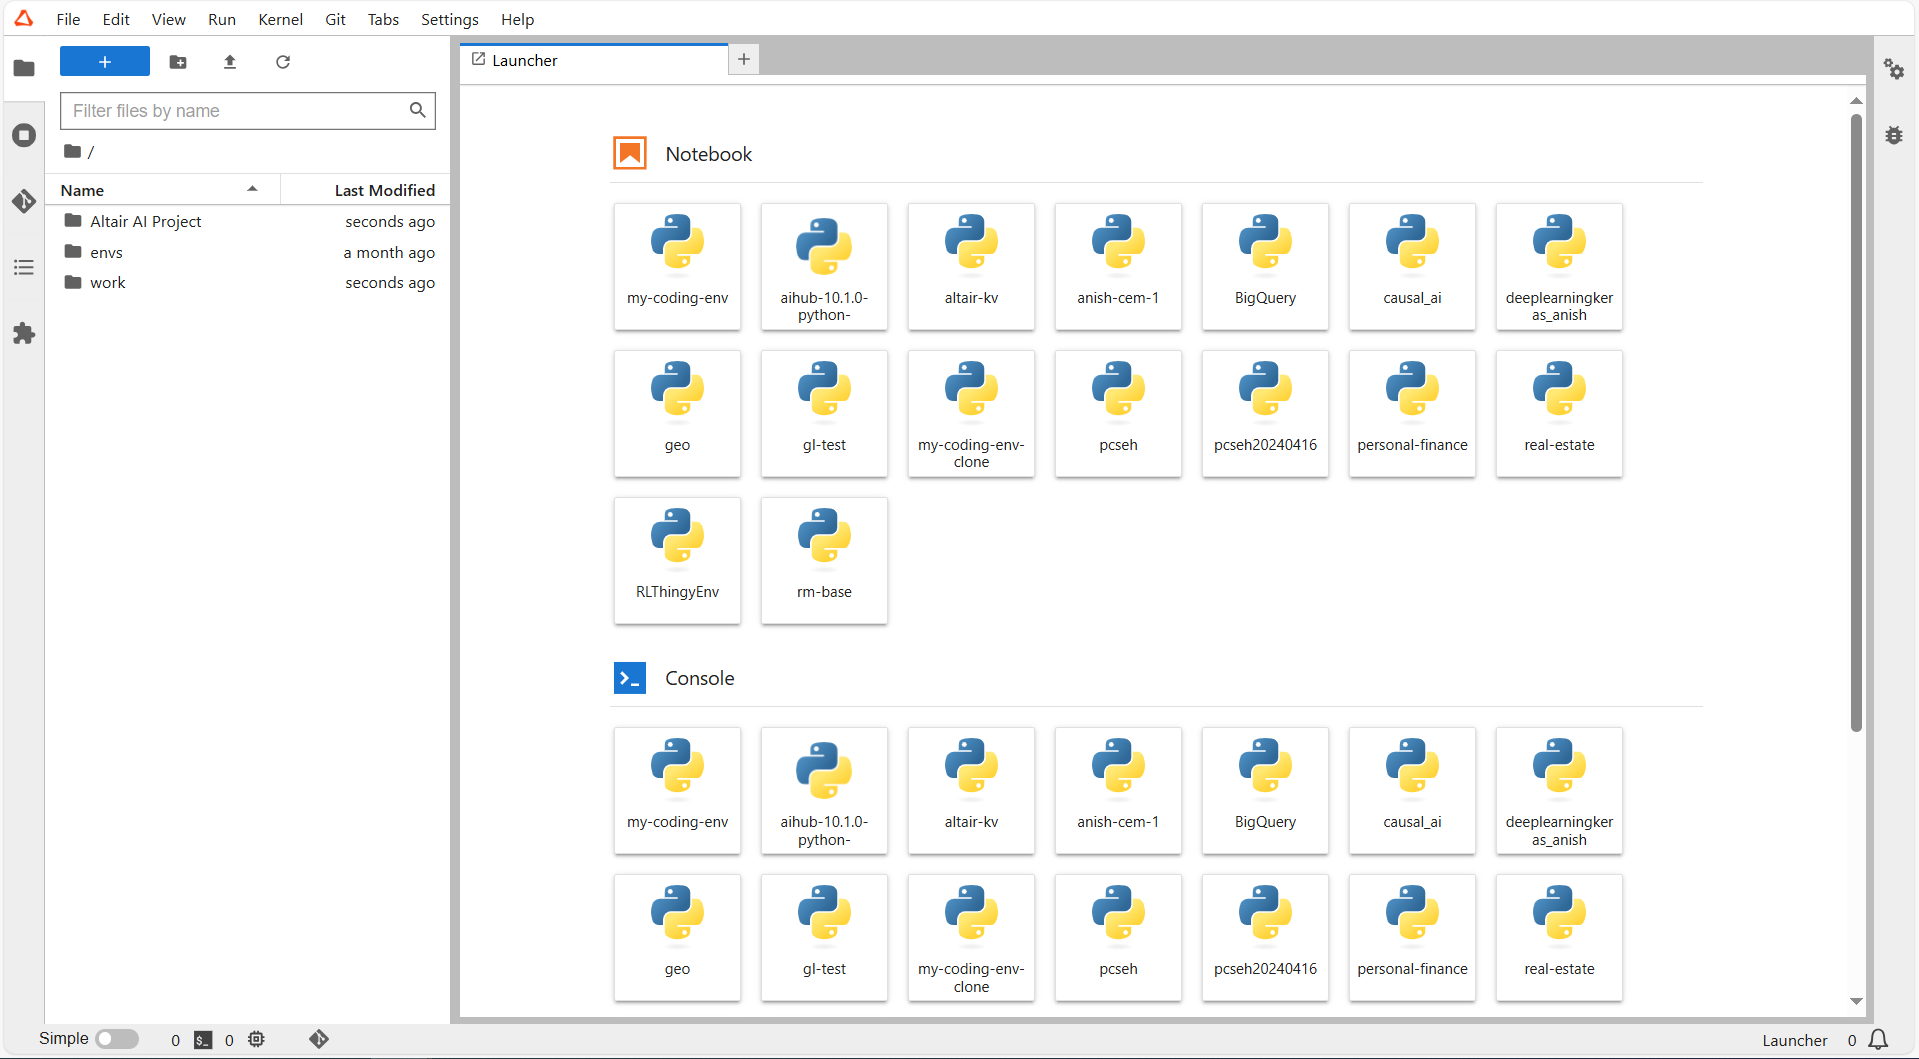
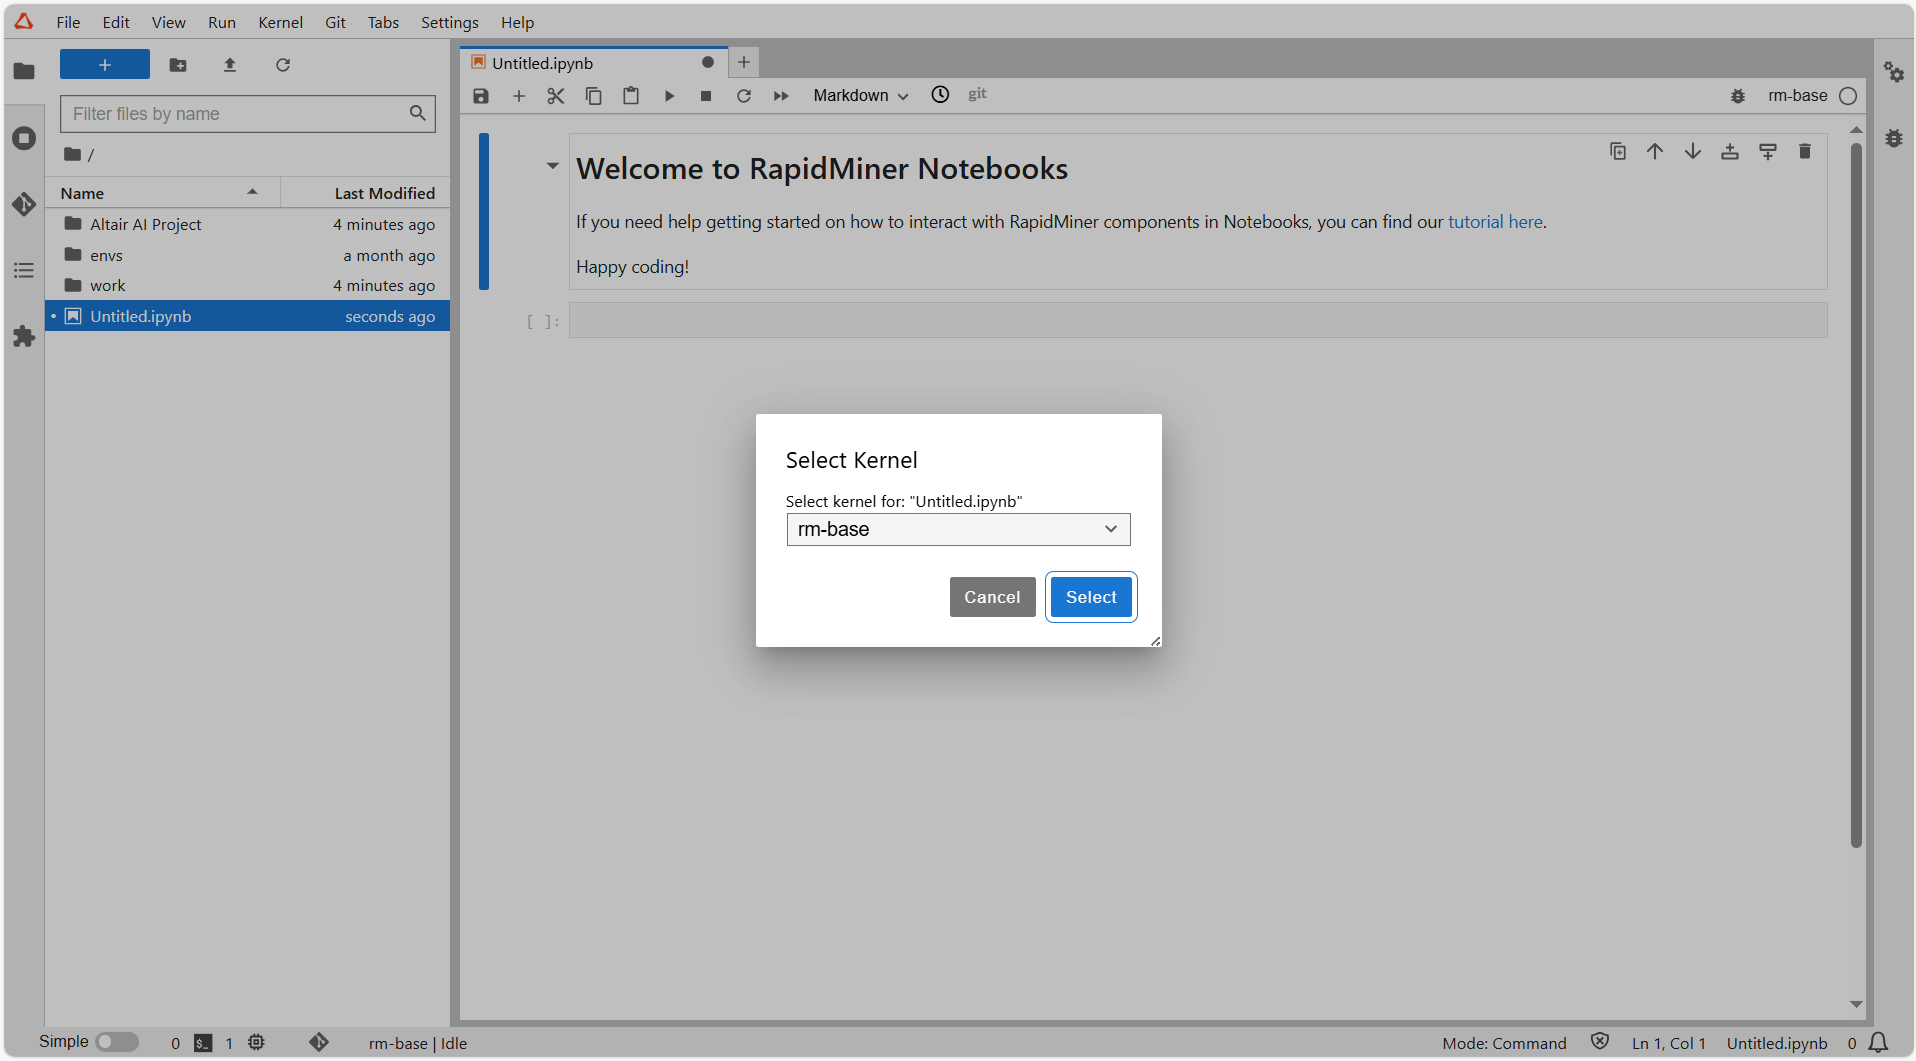
Notice that the coding environment associated with the notebook is identified in the top right corner; by default, it is rm-base. You can click on the current coding environment and from the Select Kernel dialog, choose a new coding environment.
Use Git to share notebooks
You can use the notebook's Git functionality to share your notebook with a project.
Clone a repository
The project folder is cloned when you create a notebook, so there is no need for you to clone a repository.
git add / commit / push
Once your notebook is saved inside the project folder, the following additional steps make it available to others. If you have not already done so, start by using the file browser to navigate into the project folder. The procedure here is standard Git, but with a notebook user interface.
-
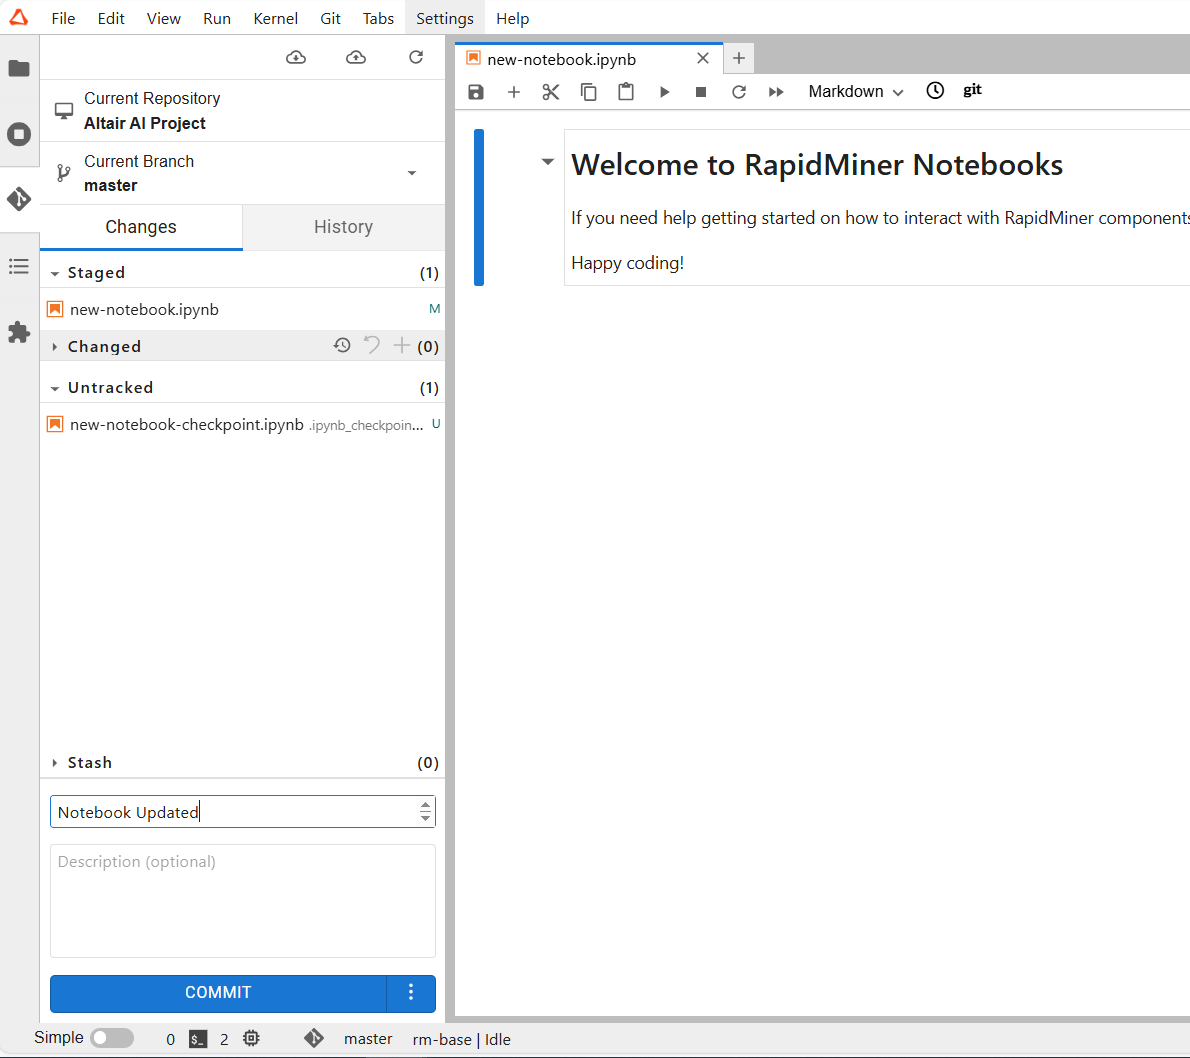
git addIf your notebook is unknown to the project, you first have to make it known. Click the + sign next to the file name under Untracked.
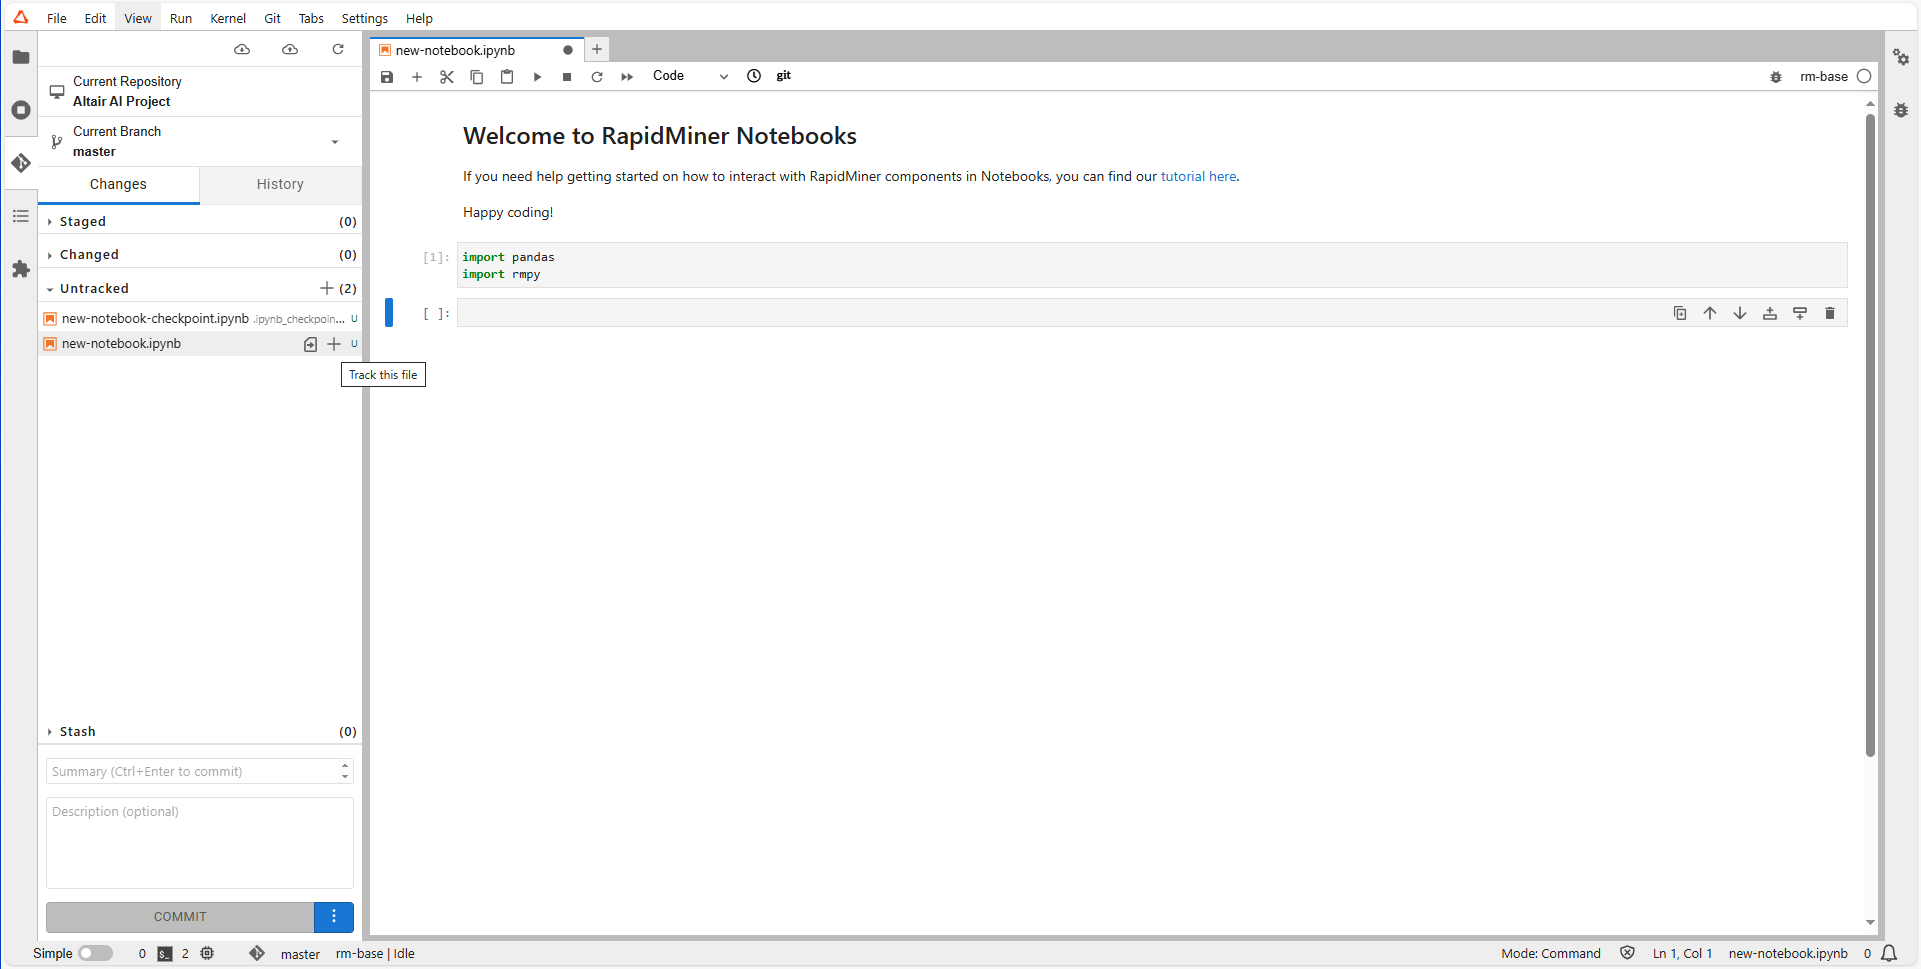
The file moves from Untracked to Staged.
If your notebook is known to the project, but you have made changes, it will appear in Changed. Note that any changes you make are not registered until you save the notebook (File > Save Notebook). Click the + sign next to the file to stage this change.

The file moves from Changed to Staged.
-
git commitWhen you commit your Staged changes, the changes are stored in your local copy of the Git repository. On the lower left of the user interface, write a summary and (optionally) a longer description. Then press Commit.
-
git pushTo share your changes with others, you have to push them to the project, storing them in the remote repository.
- If both cloud icons have orange notifications, first click the cloud icon on the left (Pull latest changes). Alternatively, from the top menu, select Git > Pull from Remote,
- Otherwise, click the cloud icon with the orange notification (Push committed changes), as illustrated below. Alternatively, from the top menu, select Git > Push to Remote.
If you now return to the project user interface on Altair AI Cloud, you will see that your notebook is included in the Content tab.
Read more:
Use rmpy to share data
Recall that the Data Assets may contain any sort of file, not merely data files. Nevertheless, data files with Altair AI Cloud's native HDF5 format have in some respects a special status.
Question:
As discussed previously, you can use Git to share any objects stored in a project, but what about objects that are not inside a project? In particular, how do you get access to the Data Assets?
Answer:
Altair AI Cloud's rmpy package makes it possible for notebooks users to interact with the Data Assets, as discussed in some detail in the rmpy tutorial.
In summary, the following functions allow you to inspect the Data Assets from within the notebook environment, and to move arbitrary files back and forth between the two.
rmpy.data.show_list()- lists the files in the Data Assetsrmpy.data.upload('data/wine.rmhdf5table')- uploads a file from the notebook environment to the Data Assetsrmpy.data.download("wine.rmhdf5table", "./data/another_wine")- downloads a file from the Data Assets to the notebook environment
whereas the following functions apply only to files in .rmhdf5table format:
rmpy.data.store(wine, 'wine')- stores the Pandas DataFrame wine in the Data Assets as wine.rmhdf5tablermpy.data.fetch('wine')- fetches the data file wine.rmhdf5table from the Data Assets and reads it into a Pandas DataFrame named wine. Note thatfetchis only capable of downloading and reading data files in HDF5 format.
More details are provided below.
rmpy tutorial for notebooks
You can find a copy of this document on Altair AI Cloud, within Projects, by
This is a tutorial notebook to show how to interact with the cloud platform using Python.
Uploading data to the Data Assets
We offer convenient functions to interact with the Data Assets.
First, let's check the data available to us. (get_list function is available from rmpy version 0.0.5)
If your working directory is inside a project folder cloned to your Notebook workspace, the function will show Data Assets entries belonging to that project. Otherwise, it will show all Data Assets entries.
import rmpy
print('rmpy version is: ', rmpy.__version__)
rmpy.data.show_list()

# Alternatively, rmpy.data.get_list() returns a list of dictionaries
Let's upload some data to the Data Assets.
import pandas
from sklearn.datasets import load_wine

sklearn_wine = load_wine()
wine = pandas.DataFrame(sklearn_wine["data"], columns=sklearn_wine["feature_names"])
wine["target"] = sklearn_wine["target"]
Now that you have this dataset, you need to write it to your notebook's file system first, and then upload it to the Data Assets.
import os
os.makedirs("data", exist_ok=True)
rmpy.data.write(wine, "data/wine")
This write method uses Altair AI Cloud's HDF5 data format (rmhdf5table). It is recommended to upload data to the Data Assets in this format to leverage all the functionality of the Altair AI Cloud.
rmpy.data.upload("data/wine.rmhdf5table")
Now you can use show_list and check if our dataset made it into the Data Assets.
rmpy.data.show_list(with_metadata=True)
The with_metadata parameter can be added if you want more information shown. If you have a lot of entries in the Data Assets and you are using tags to organize them, you can also filter by specifying tags.
rmpy.data.show_list(tag=["some_tag_1", "some_tag_2", "etc"])
In case you would like to upload data in e.g. CSV format, you can use the Pandas to_csv function to save, then upload it.
wine.to_csv("data/wine.csv")
rmpy.data.upload("data/wine.csv")
rmpy.data.show_list()
A new store function was intruducted in rmpy version 0.0.5. It allows to directly push a Pandas DataFrame into an rmhdf5table Data Assets entry. (This is a combination of write and upload.)
rmpy.data.store(wine, "wine")
Fetching and using data stored in the Data Assets
Now that we uploaded data to the Data Assets, we can download any of them by simply calling the download function and specifying a location for the data file.
rmpy.data.download("wine.rmhdf5table", "./data/another_wine")
After downloading the data, we can read the dataset into a Pandas DataFrame using the read function (this only supports rmdhf5table data format).
df = rmpy.data.read("data/another_wine.rmhdf5table")
display(df)
A new fetch function was intruducted in rmpy version 0.0.5. It allows to directly pull an rmhdf5table Data Assets entry into a Pandas DataFrame. (This is a combination of download and read.)
df = rmpy.data.fetch("wine")
display(df)
Working on data in projects
Data Assets entries are most useful when they belong to a project. For the next steps, let's assume you have a project named Getting Started with Altair AI Cloud.
You can use the show_list function to list Data Assets entries belonging to your project.
rmpy.data.show_list(project_name="Getting Started with Altair AI Cloud")
If the result is empty, you don't have any data belonging to your project. Go to Data Assets and link some data using the link to project button or create a project and add some data to it directly. Now let's try again.
This function can be used in three different ways:
- If you don't pass it a project name, it will show all entries in the Data Assets.
- If you don't pass it a project name, but your working directory is inside a project folder cloned to your notebook workspace, it will show data belonging to that project.
- If you pass it a project name, it will only show the data belonging to that project.
Jupyter AI extension
The notebooks in AI Cloud workspaces include the Jupyter AI extension. This extension lets you interact with AI models directly from your notebooks via a chat interface and magic commands. You can configure your own personal LLMs or use the LLM connections included in the Data Assets.
Note: The use of the Jupyter AI extension is optional. Unless you configure it to do so, the extension does not transfer data to LLMs.
Read more: Jupyter AI
Getting started
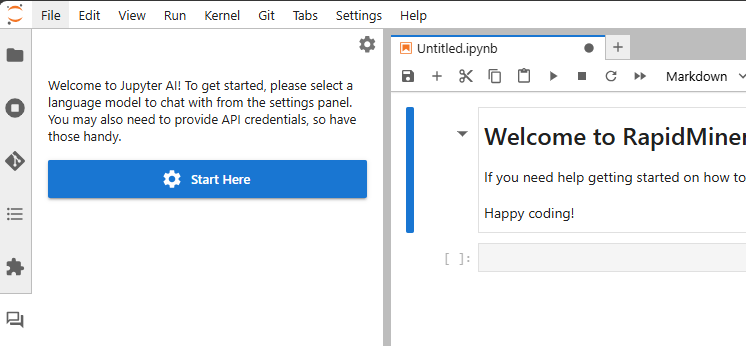
The Jupyter AI extension is integrated into your Jupyter Notebook workspace. You can access it via the Chat UI or through Magic Commands.
-
Chat UI: This is a chat window where you can ask questions and get responses from AI models. You can access it by clicking the Start Here button in the chat section and starting by configuring a model from the settings panel.
-
Magic Commands: These are commands you can run directly in your notebook cells. They are prefixed with
%aiand%%ai.
Configure the AI Model

You can configure your AI models in the chat's settings panel.
-
Language Model: Select a model from the dropdown menu. In the screenshot,
azure-openai-conn : gpt-4ois selected. The list of models contains all the major LLM providers as well as the LLM connections from your project. -
Embedding Model: This is optional and can be set to "None" if not needed.
-
Inline Completions Model: This is also optional and can be set to "None" if not needed.
-
API Keys: Some models may require API keys. However, the selected models in the example do not require API keys, since they are already configured in the LLM connection.
Chat UI

The Chat UI is designed for conversational interaction with AI models inside Jupyter Notebooks.
-
Accessing the Chat UI: After configuring the model, you can start accessing the chat UI directly.
-
Commands in the Chat UI: You can use the following commands in the chat window:
/ask: Ask a question about your learned data./clear: Clear the chat window./export: Export chat history to a Markdown file./fix: Fix an error cell selected in your notebook./generate: Generate a Jupyter notebook from a text prompt./help: Display this help message./learn: Teach Jupyter AI about files on your system.
-
Adding Context: You can include the contents of selected files by using the @file command.
Magic commands
Magic commands let you interact with AI models directly in your notebook cells.
-
Available magic commands:
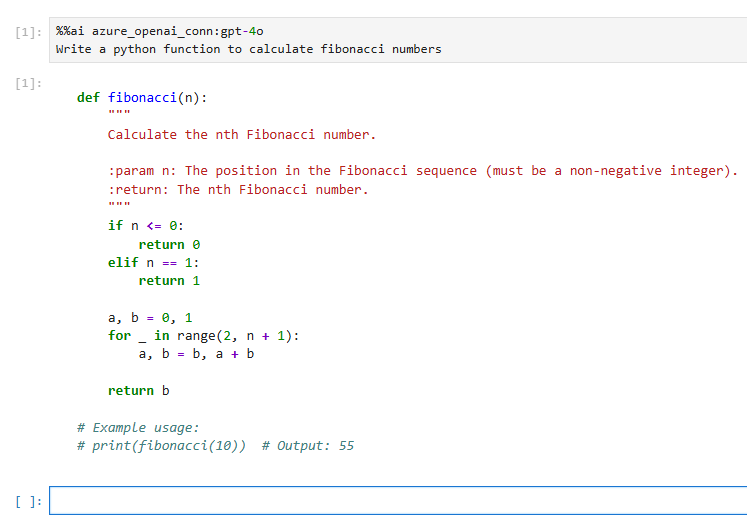
%ai help: Show available AI magic commands.%ai list: List all available AI models and providers.%ai <provider>:<model>: Generate content using a specific model. For example,%%ai azure_openai_conn:gpt-4owill use the Azure OpenAI model gpt-4o.
-
Example: In the screenshot, the user used
%%ai azure_openai_conn:gpt-4oto generate a Python function for calculating Fibonacci numbers. The generated code is shown in cell 1.
Inline completion
You can also configure inline completion for the code cells and select the same model as chat.
To enable inline completion, click on Enable completions by JupyterNaut from the toolbar at the bottom of the page.

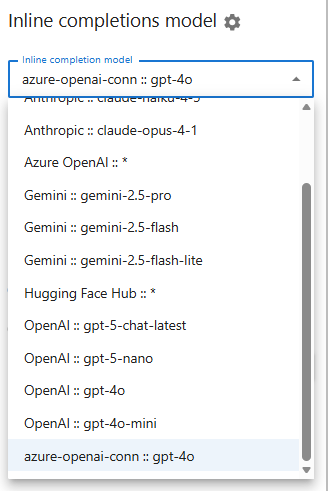
Once inline completion is enabled, you can select the AI model from the Inline completions model dropdown list.
To use inline completions, start typing the code in the Juptyer Notebook cell, and the suggestions will appear in the Notebook cells.

Troubleshooting
If the following issues arise, take the appropriate steps.
-
No Models Available: Make sure that you have selected a valid model in the settings panel.
-
API Key Issues: If you encounter issues with API keys, make sure that you have provided the correct credentials.
-
Connection Issues: If you encounter connection issues, try restarting the notebook workspaces or the kernel.
-
Azure Open AI model not listed: When using the Azure Open AI LLM connection, you need to specify the model name in Azure. If you want to use the connection in notebooks, this model name should be added to the connection details.
Best Practices
-
Use Magic Commands for Code Generation: Use
%ai <provider>:<model>to generate code or content directly in your notebook cells. -
Use the Chat UI for more complex or conversational interactions.
-
Use the
/generatecommand if you want to create a full notebook and you can wait a few minutes. -
Save Settings: Always save your settings after making changes to make sure they are applied.