Workspaces
Looking for a lightweight, but powerful source code editor to help you contribute Python code to your project?
A workspace provides exactly that: a source code editor, connected to a specific project. It runs in your browser and it comes with all the features you expect:
- Code completion
- Debuggers
- Version control with Git
- A large set of available extensions
Like a notebook, a workspace opens in a user-specific container, apart from the workflows in the rest of cloud.rapidminer.com. In this dedicated space, you can write and test your code, store your changes in Git, and share the results with the rest of the team only when you are ready:
- by using the workspace's Git functionality to share code with the project, and
- by using the rmpy library to share data with the catalog
Creating and debugging Python code in a workspace, before sharing it with the project via Git, can be the first steps in a workflow that includes the Execute Python operator, using the Python file as an external input.
While the container for notebooks may contain numerous cloned repositories, a workspace is only connected to a single project.
Create a workspace
From Home
- Click the Workspaces icon on the left of the screen, and
- Click the button Create Workspace on the upper right.
The Create Workspace dialog appears.
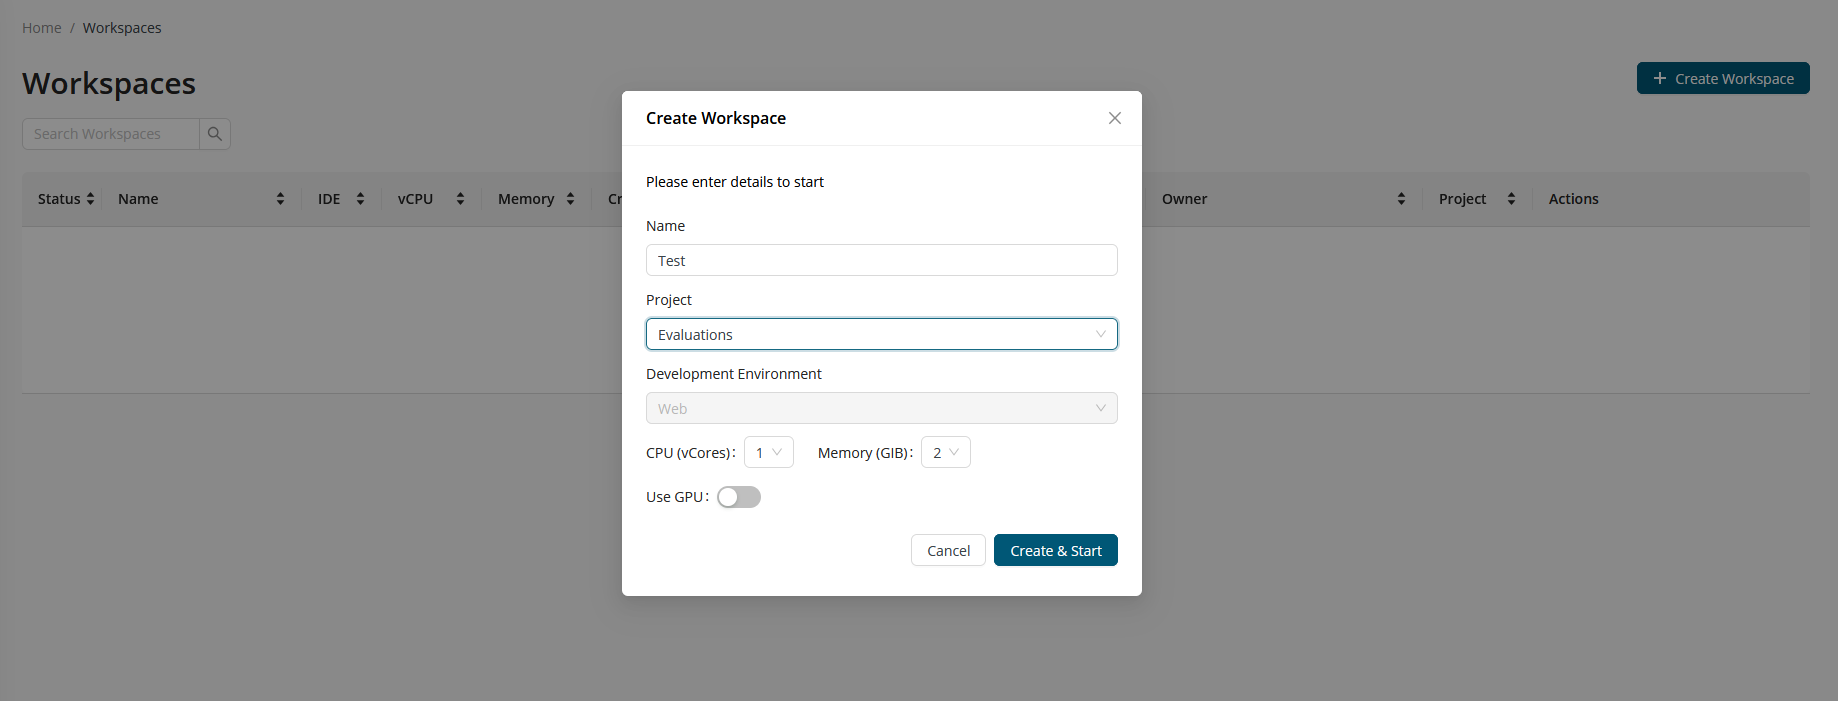
Insert the following items:
- Name: Give the workspace a name, in this example my-python-code.
- Project: The project to which this workspace is connected, in this example Wspaces.
- Development Environment: Web implies that the editor runs in your browser.
- CPU: (optional) If necessary, you can increase the number of CPU cores.
- GPU (optional): You can add GPU resources to your Workspace if your work requires it.
- Memory: (optional) If necessary, you can increase the amount of available RAM.
Then click Create and Start to create the workspace.
From within a project
Alternatively, from any of the tabs in your project,
- click the New button on the upper right, and
- select Workspaces.
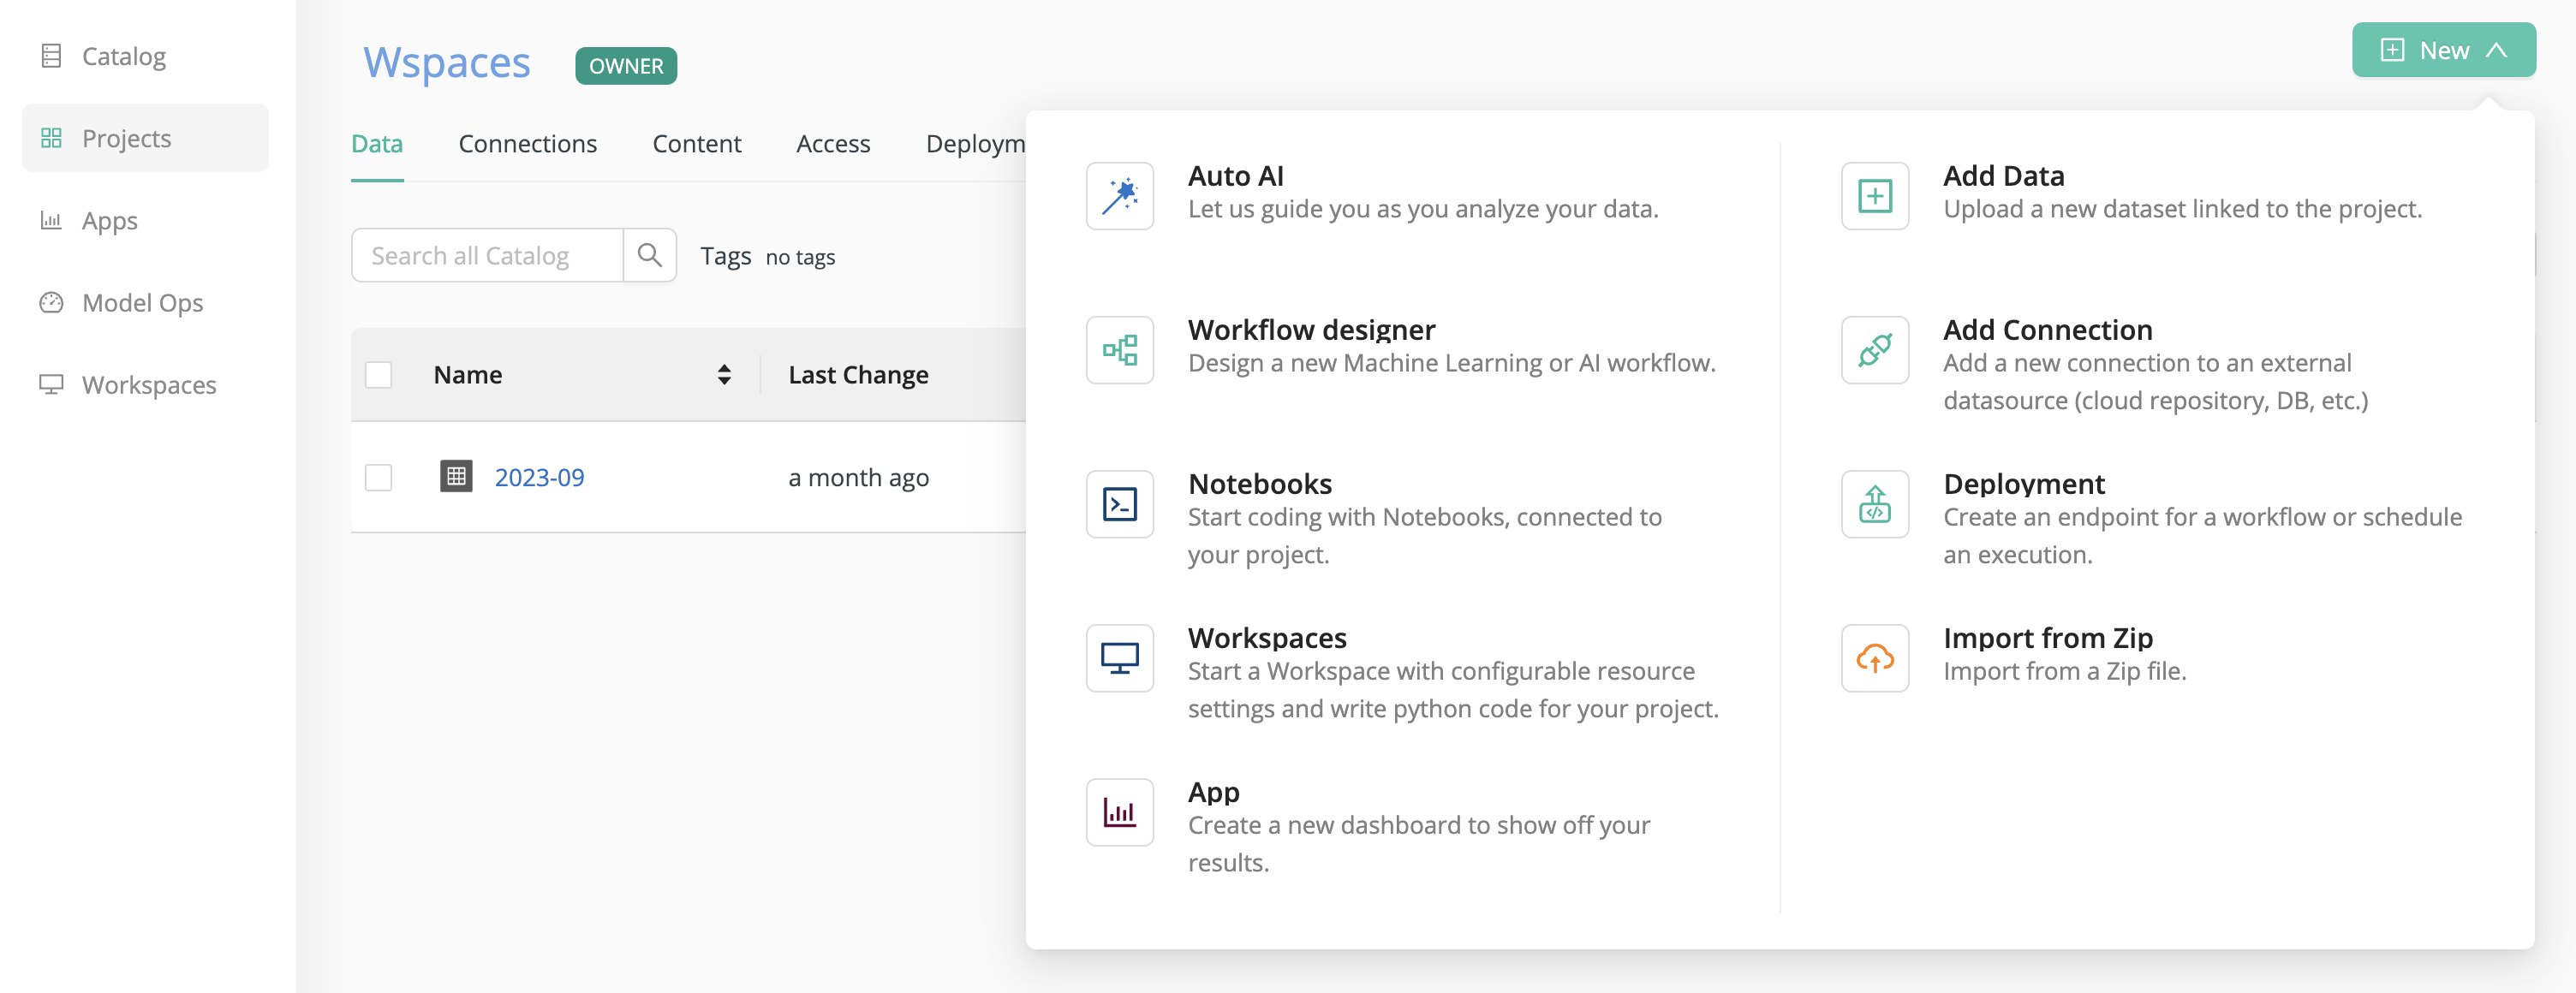
The Create Workspace dialog appears, this time with the Project name pre-filled.
As before, click Create and Start to create the workspace.
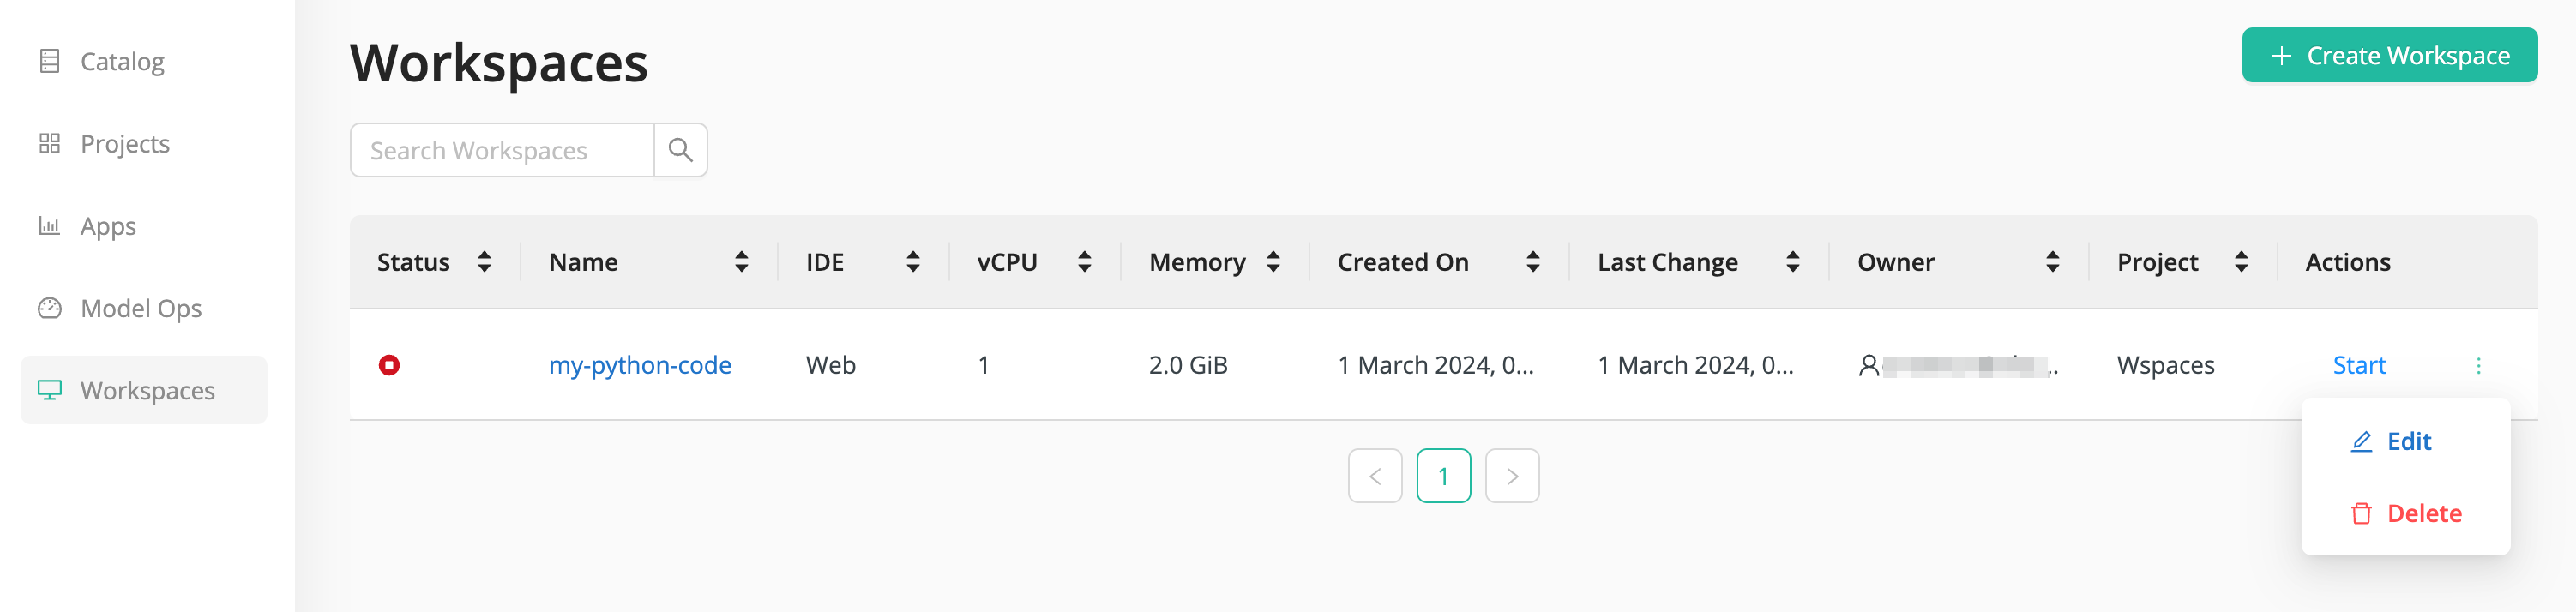
Workspace status

The green Status icon on the left implies that the workspace is running. Besides Open, additional actions are available from the dot menu on the far right:
- Open: Open the workspace to reveal the source code editor.
- Stop: Stop the workspace container to conserve resources, but persist the data, so you can Start later where you left off.
- Edit: When the workspace is stopped, you can Edit it. The most likely reason is that you need to increase or decrease the resources (CPU/RAM) assigned to the workspace.
- Delete: If you are done and all your files have been committed to the project, you can safely delete the workspace.
The red Status icon on the left implies that the workspace is stopped. Under Actions, click Start to restart the workspace.
Open the workspace
To open the workspace, click Open and the editor appears:
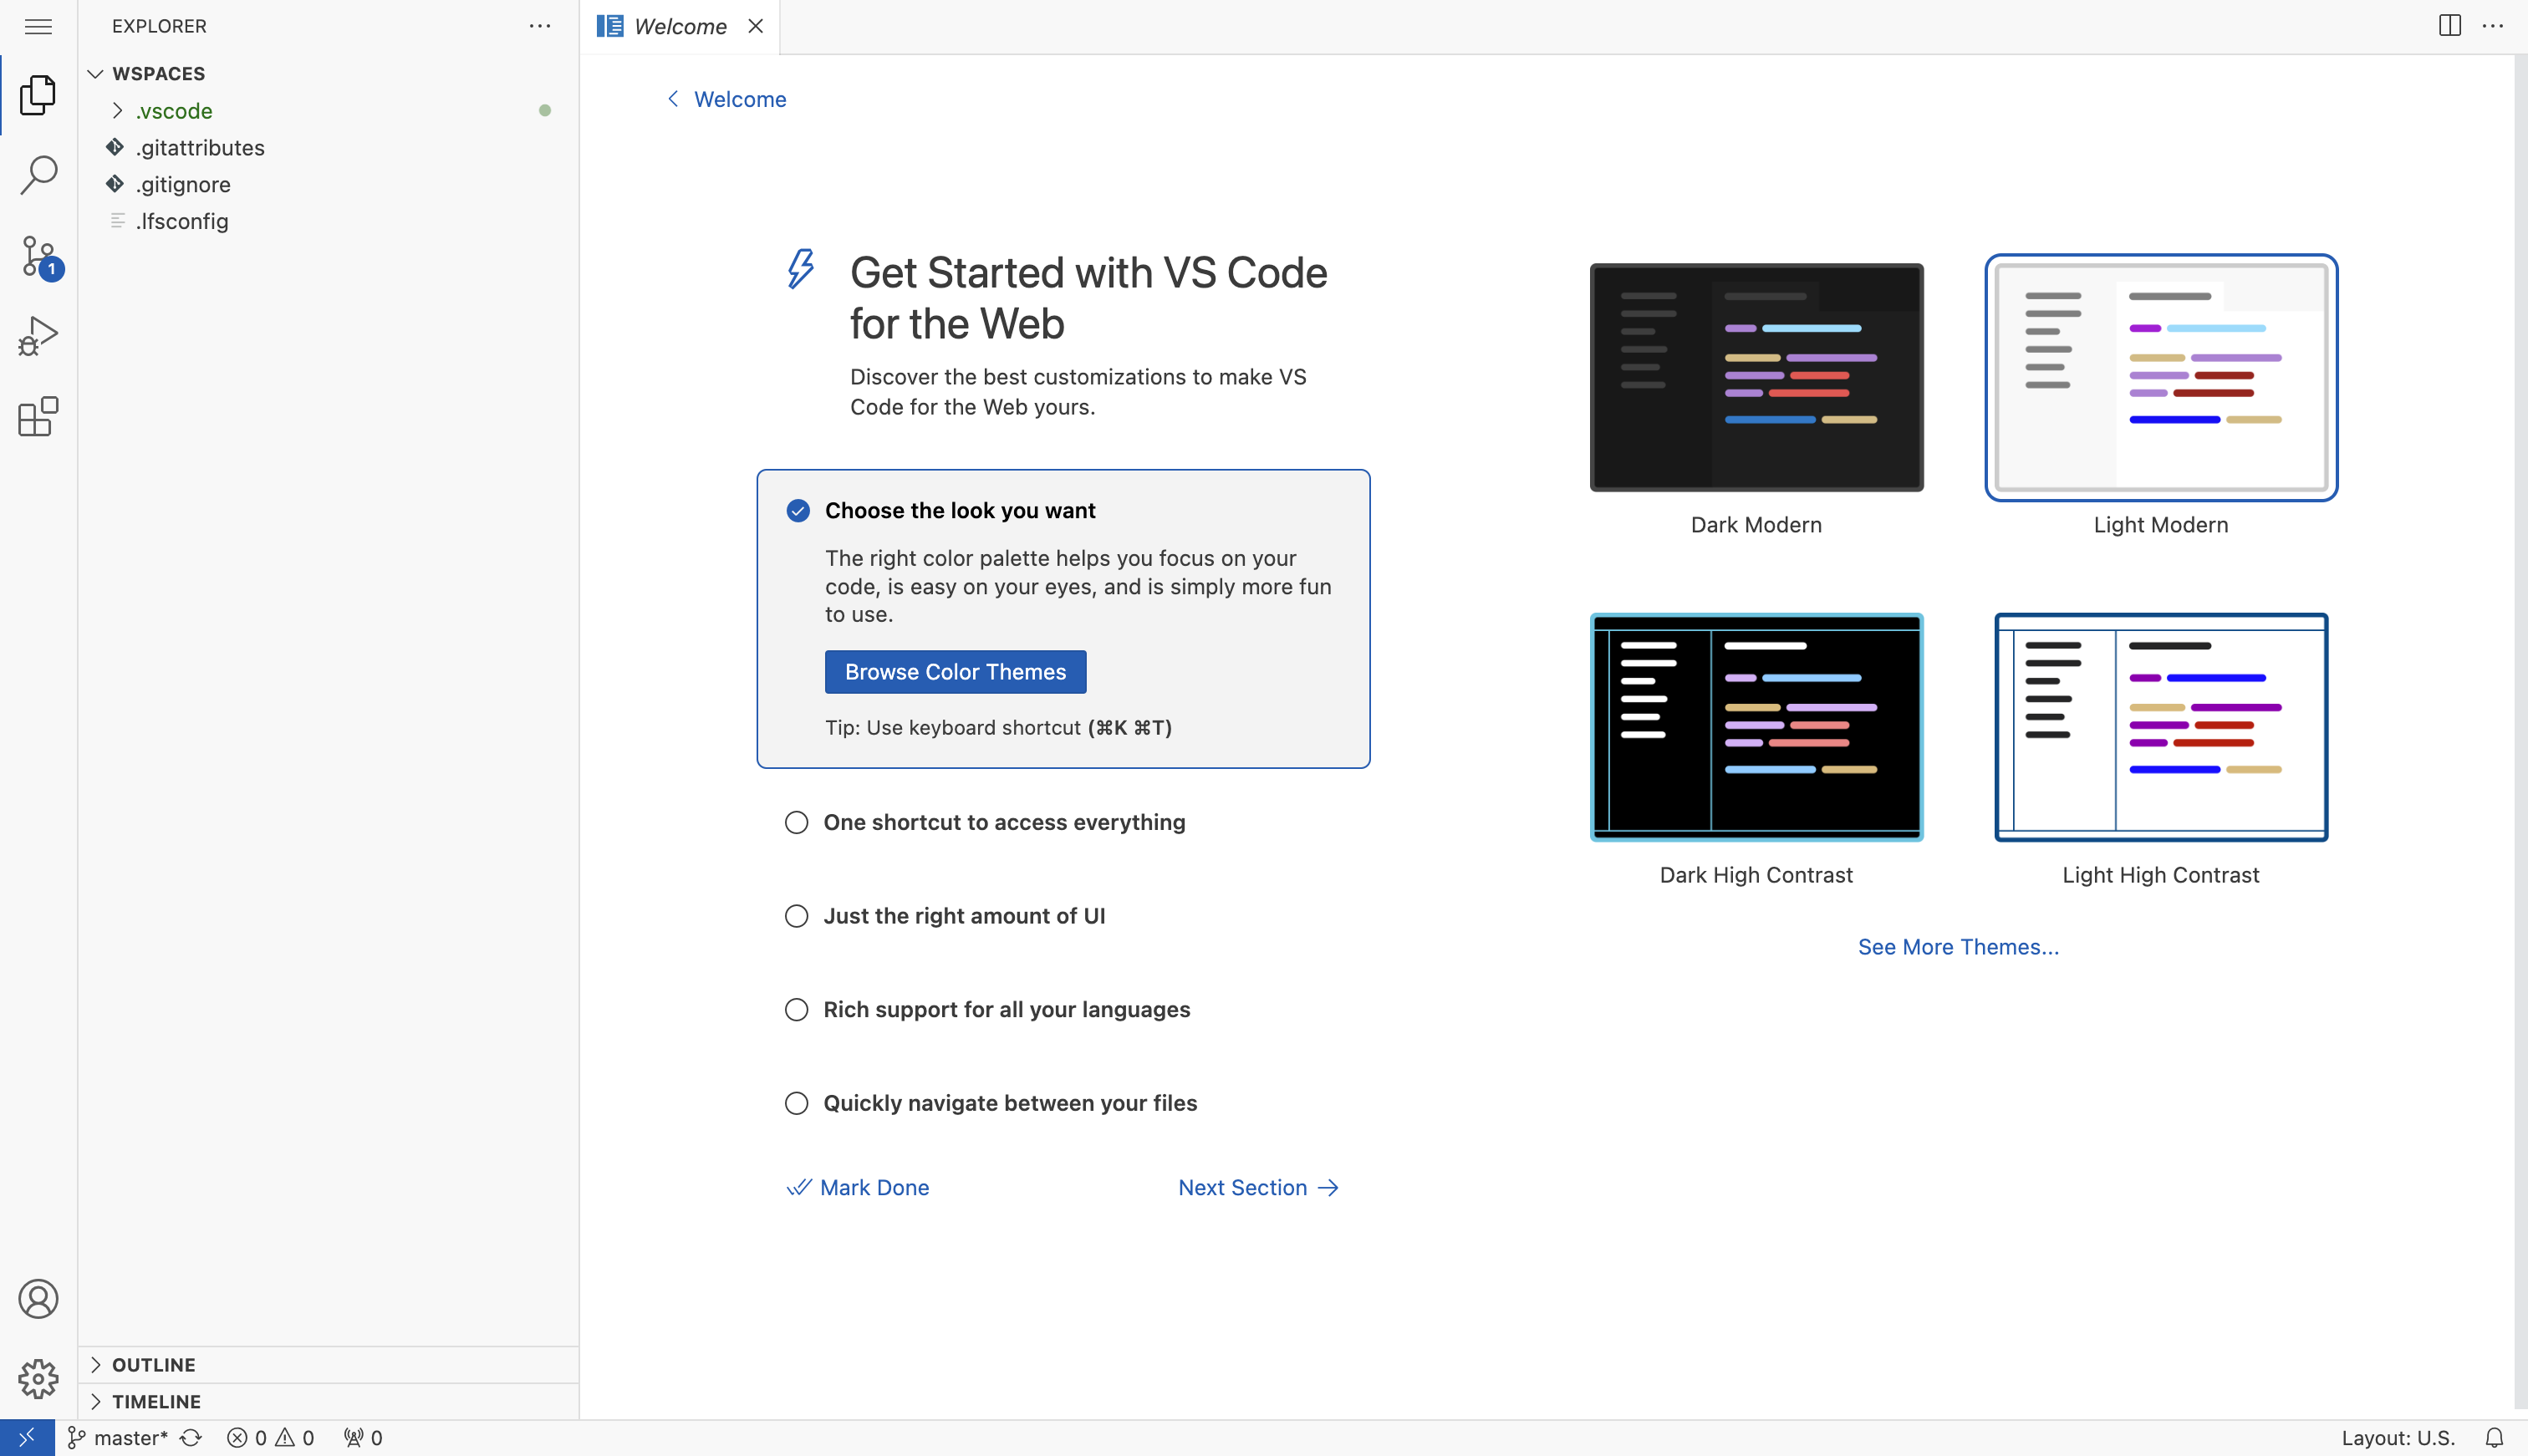
Here are some tips to get you started:
-
You can recall this welcome page at any time via the menu item Help > Welcome.
-
In the initial setup there are several files preceded with a dot (.) and also a folder that starts with a dot. Neither these files nor the contents of the folder are visible when you commit files to the project.
-
To create a file, you can select the menu item File > New File, or simply drag and drop a file from your laptop into the user interface.
Coding environment
When you open a new Python file, it comes with the following default settings:
- a recent Python intepreter
- the default coding environment, rm-base
If you wish to change the coding environment, go to the lower right corner of the workspace user interface and click on the current environment:

All the shared coding environments are then visible in a drop-down list. To create your own coding environment, you need to have the admin role.
Since there is no metadata associated to your file, you may want to include information about the coding environment in the comments to your code.
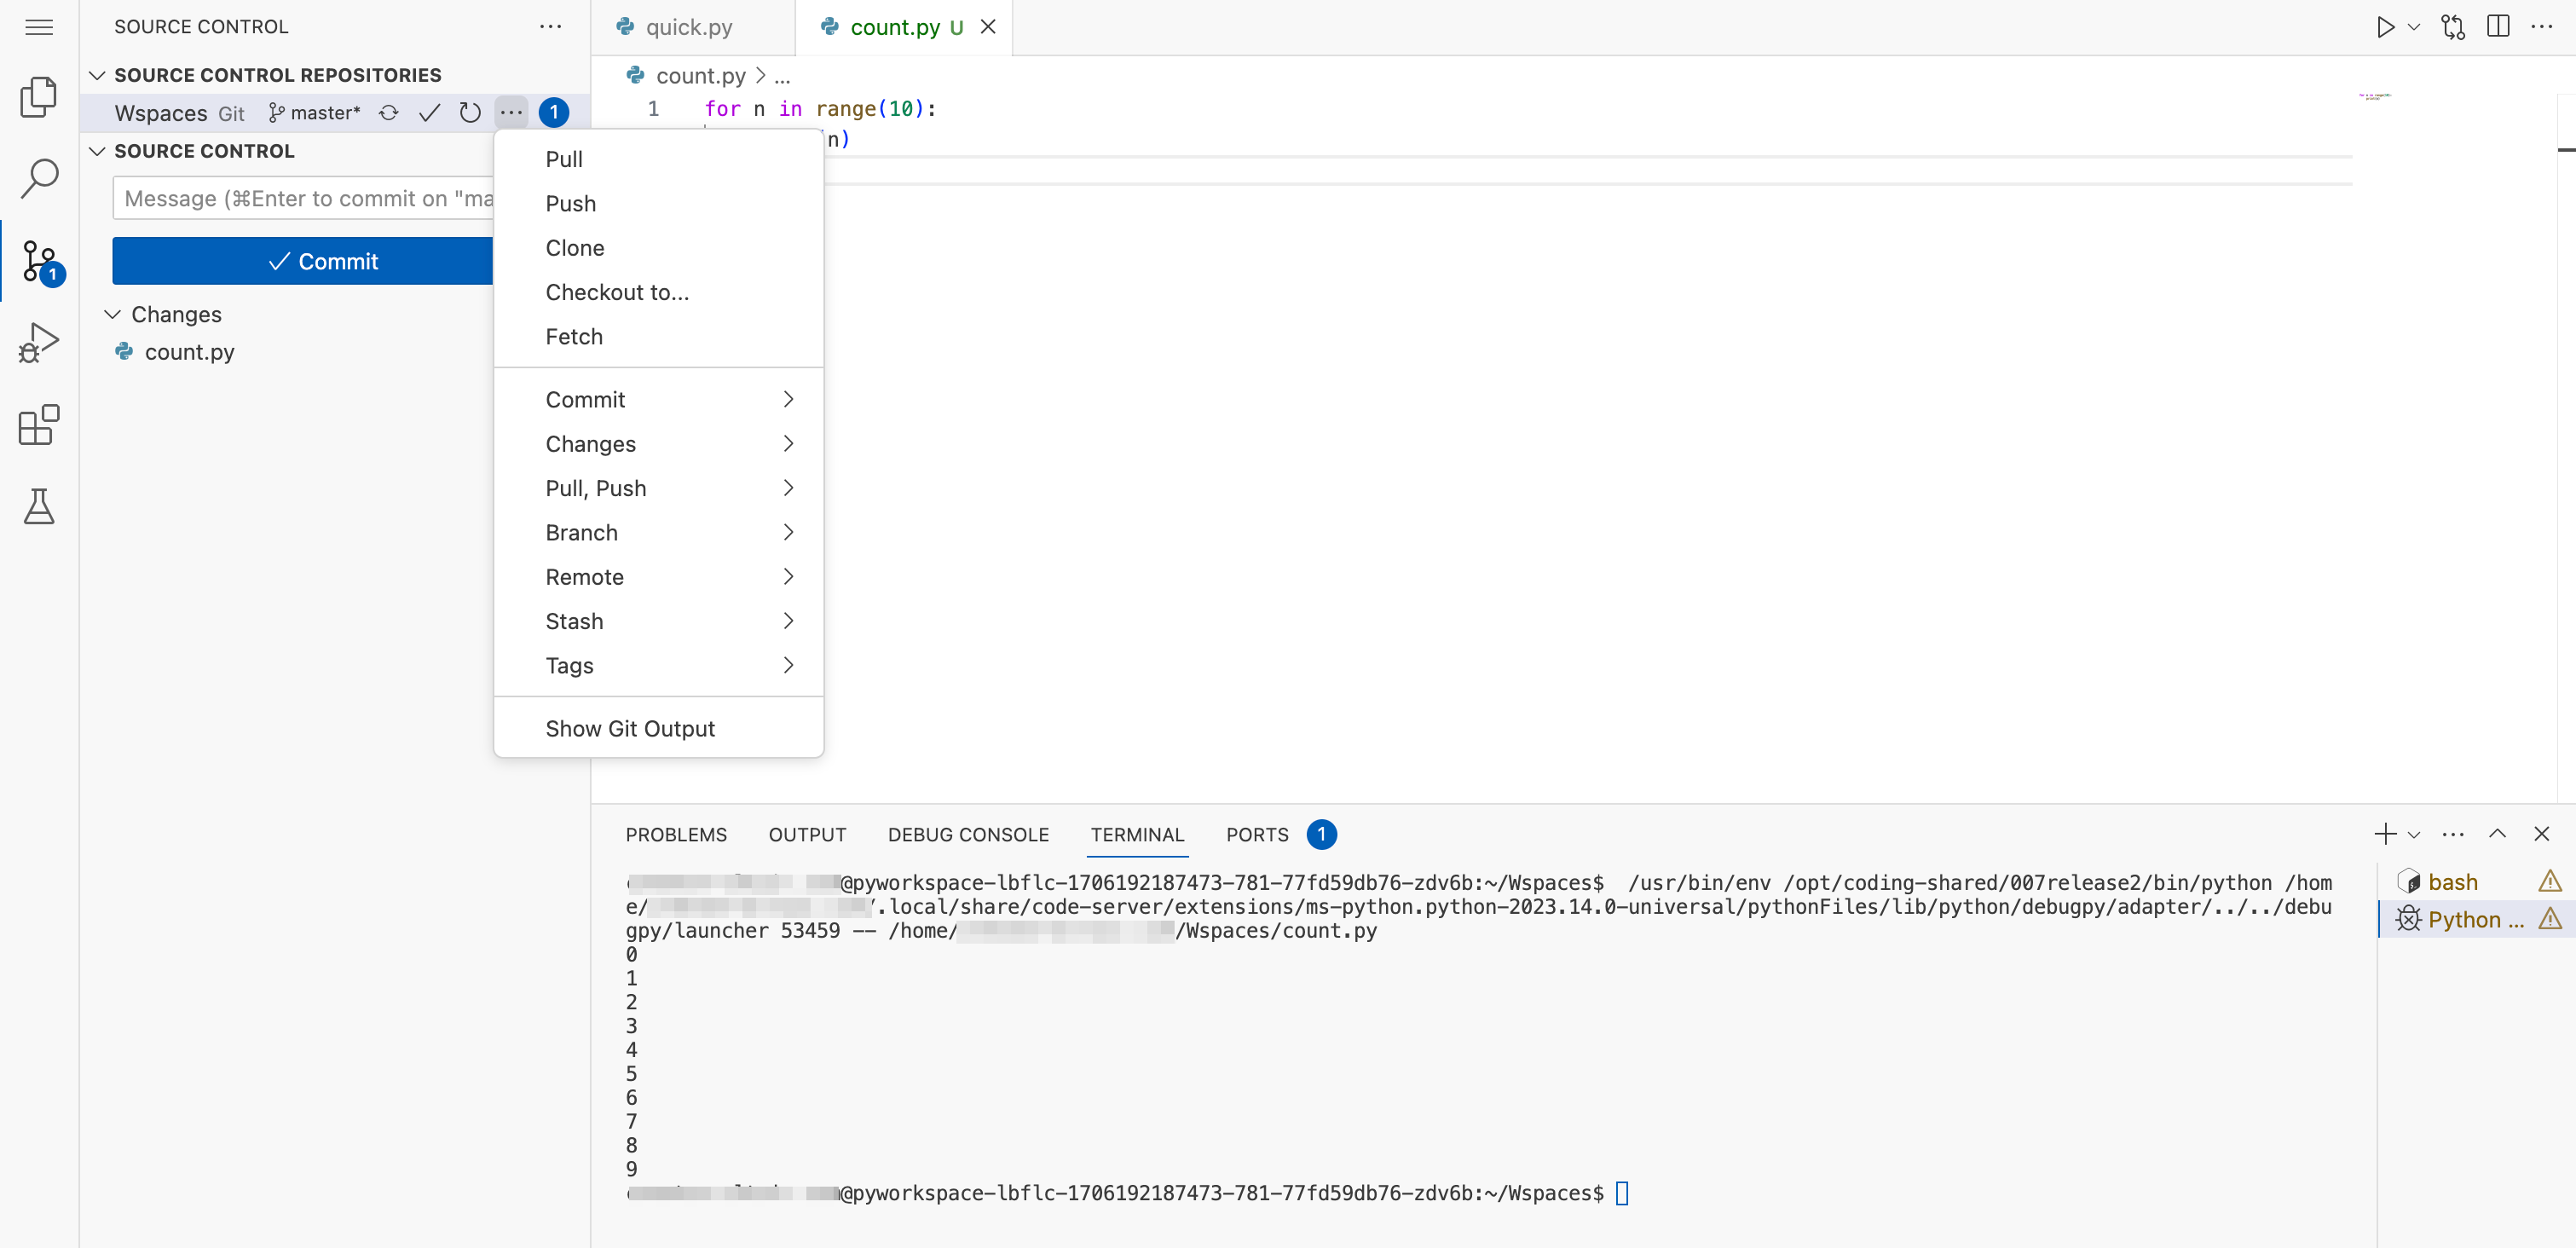
Use Git to share code
When the workspace is created, the Git repository for the associated project is cloned automatically.
The workspace is only connected to a single project, i.e. a single Git repository. Since that repository was cloned automatically when you created the workspace, you only need to commit your work and push any commits to the project.
The procedure here is standard Git: you can use the menus or the terminal.
If after pushing your commits, you return to the project user interface, you will see that your work is now included in the Content tab. If you have committed a Python file, it is now ready for use by the Execute Python operator in the workflow designer.