Deploy a workflow as MCP Tool
What you'll learn: How to turn an Altair AI Cloud workflow into an MCP tool so that AI assistants can call your predictive model directly in a conversation.
Prerequisites: You should be familiar with the following topics:
Overview
In this document, we will show how to expose an Altair AI Cloud workflow as an MCP tool.
- Using the classic Titanic data set to build a predictive model,
- we will create a REST API deployment,
- which the MCP tool then makes available to the AI assistant.
Note that the setup is not limited to predictive workflows. You can turn any workflow deployment into an MCP tool.
Build the workflows
We will build two simple workflows:
- Train Survival Predictor for training a simple machine learning model, and
- Apply Survival Predictor for applying the model to new data.
The second workflow will be used for the deployment.
Build the training workflow
To build the workflow Train Survival Predictor, we can use the Titanic data sets available from the Generate Sample Data operator:
Titanic Trainingfor training a machine learning model andTitanic Unlabeledto obtain unlabeled samples.
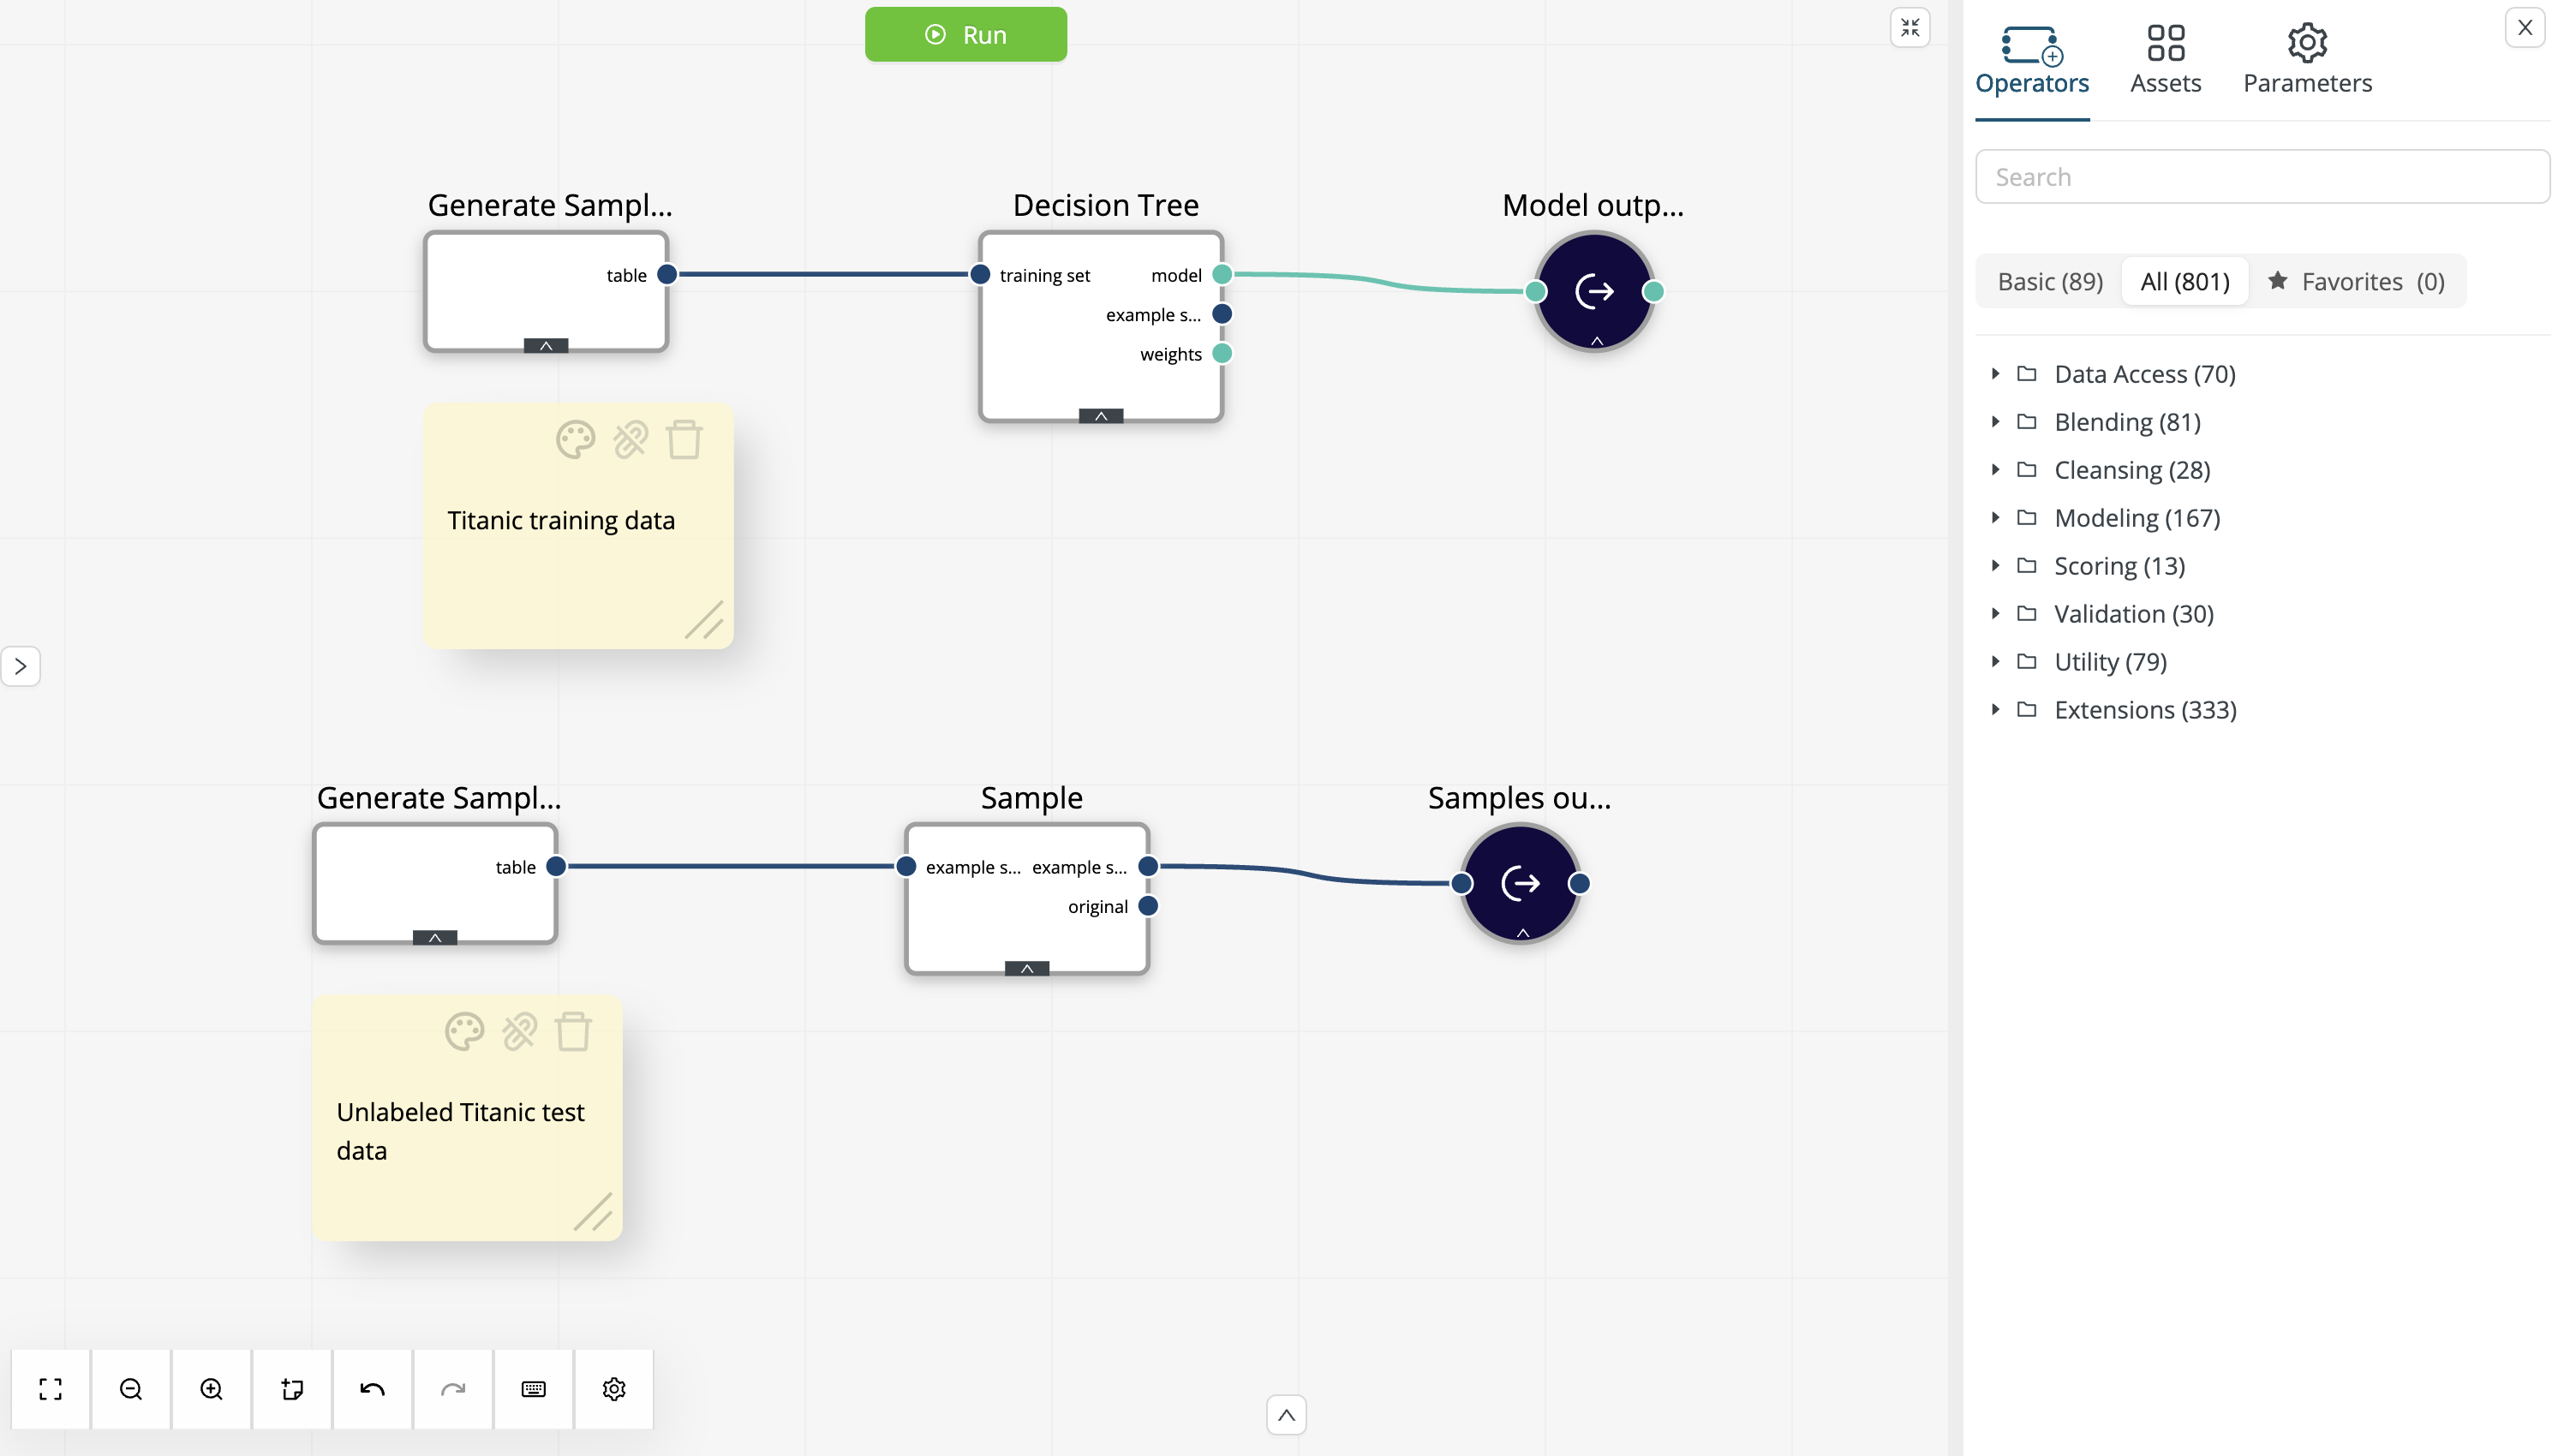
-
Using the Generate Sample Data operator with the
Titanic Trainingdata set as input, train a simple decision tree using the default parameters. Next, store the model in the project (e.g., as Decision Tree). We will use this model later to build the scoring workflow. -
Using the Generate Sample Data operator with the
Titanic Unlabeleddata set as input, sample 3 records and store them as data (e.g., as Titanic Samples). We will use these samples later for the MCP tool description. You can configure the Sample operator using a local random seed (e.g.,2026), to ensure that you get a representative sample: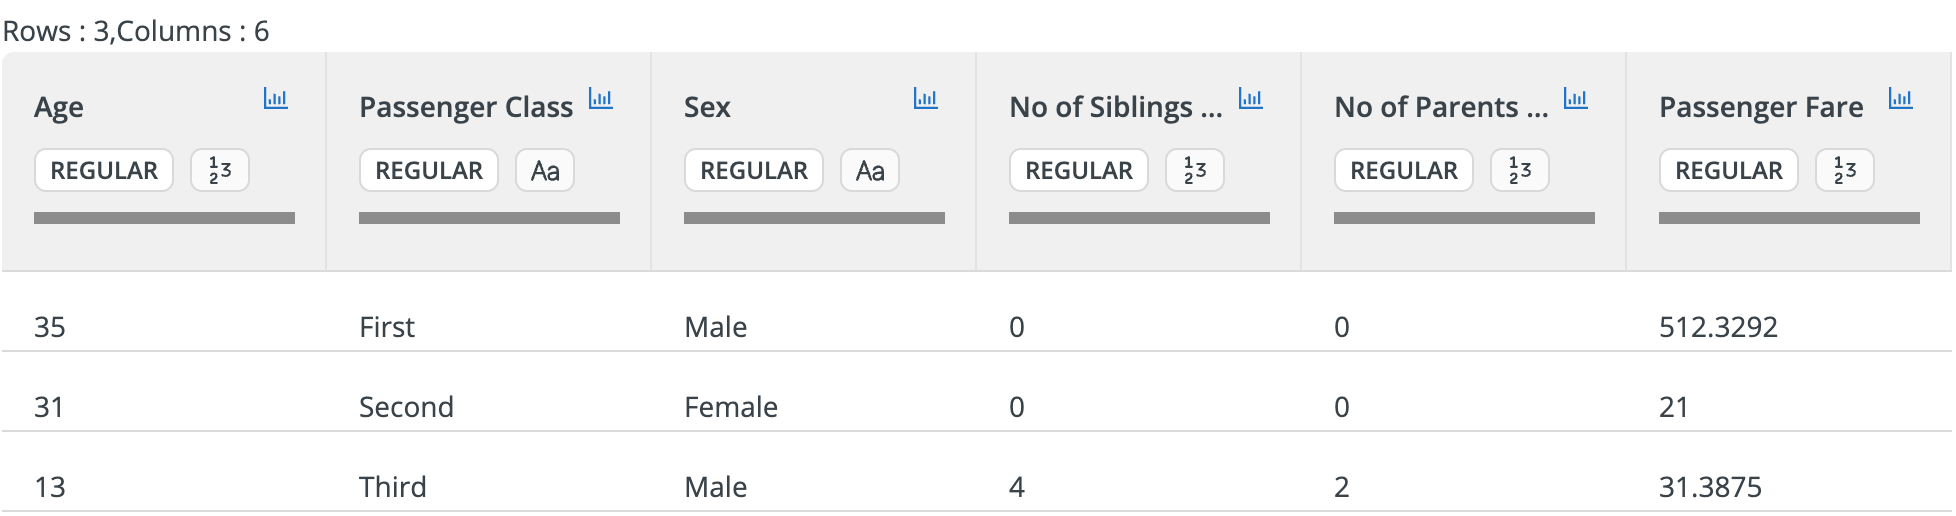
-
Run the workflow to train the model, sample the unlabeled data, and store the results.
Build the scoring workflow
The scoring workflow loads the Decision Tree from the project content and the Titanic Samples from the Data Assets. It then applies the model to the new data and selects columns to be delivered to the output:
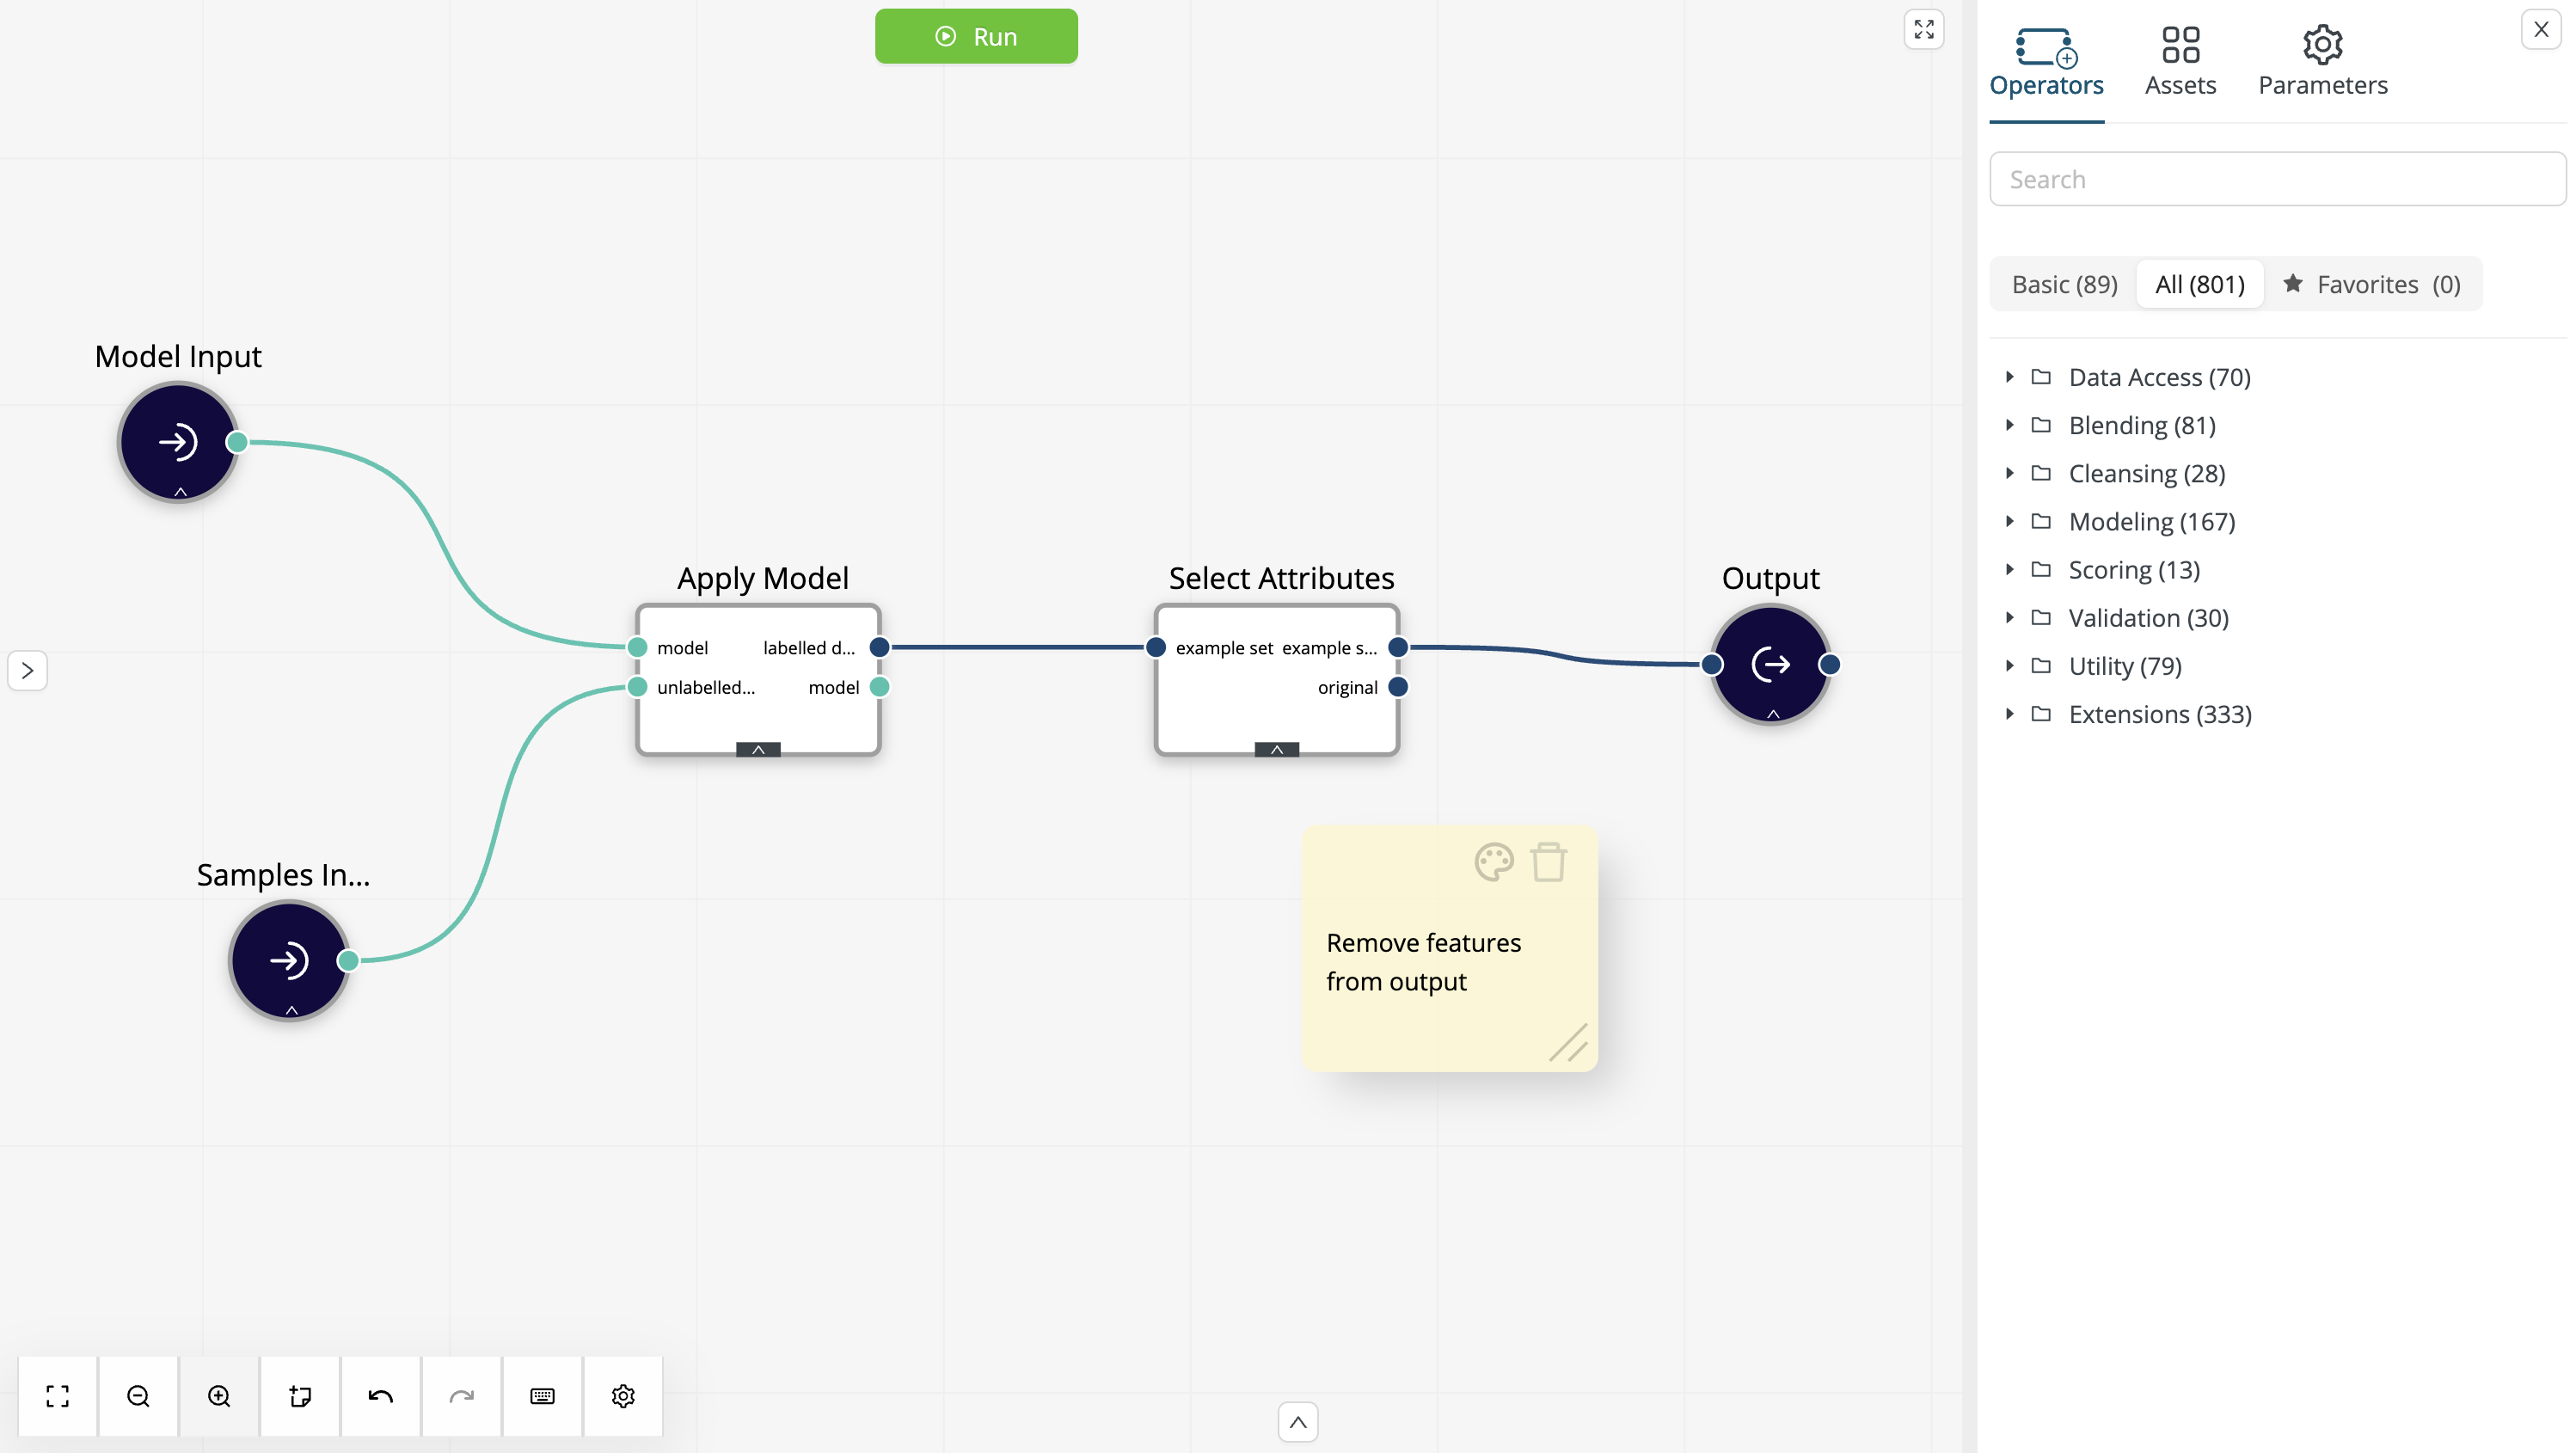
Make sure that the External Overwrite is enabled only for the input data.
While we want to overwrite the sample data with new data from the deployment, the model itself should always be loaded from the project.
The Select Attributes operator is optional, but given that we intend to use the workflow with a conversational AI assistant, there is probably no need to repeat the input data in the output. Instead, we can simply return the prediction and confidence columns:
At this point, we have the following items in the project content:
- Train Survival Predictor: the workflow training the model and creating the input sample,
- Apply Survival Predictor: the workflow applying the model to new data,
- Decision Tree: the machine learning model,
and a single item in the Data Assets:
- Titanic Samples: the sample input data.
We can now proceed with deploying the scoring workflow as an HTTP endpoint.
Deploy the scoring workflow
To use the scoring workflow as an MCP tool, we must first deploy it as an HTTP endpoint. Follow the instructions in REST API deployment and create a deployment named Predict Survival.
We can use the default settings with one exception: enable the Transformer feature to use the simple row-based JSON format for both inputs and outputs. The reason is that the MCP tool will inherit the schema from the deployment. Thus, we want a format that makes it easy for AI assistants to generate the correct input.
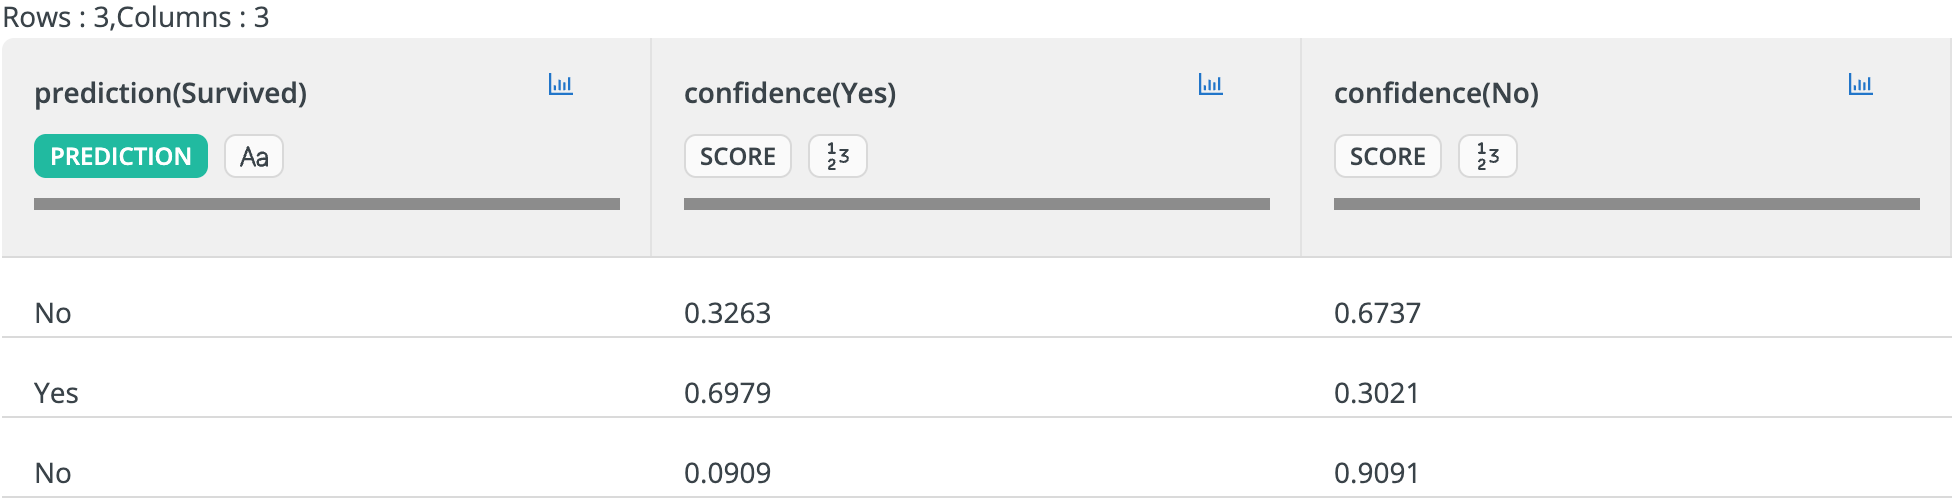
Once the scoring workflow is deployed, go to the deployment test page and select the Titanic Samples data set created earlier as input data. The test results should only show the columns selected in the scoring workflow:
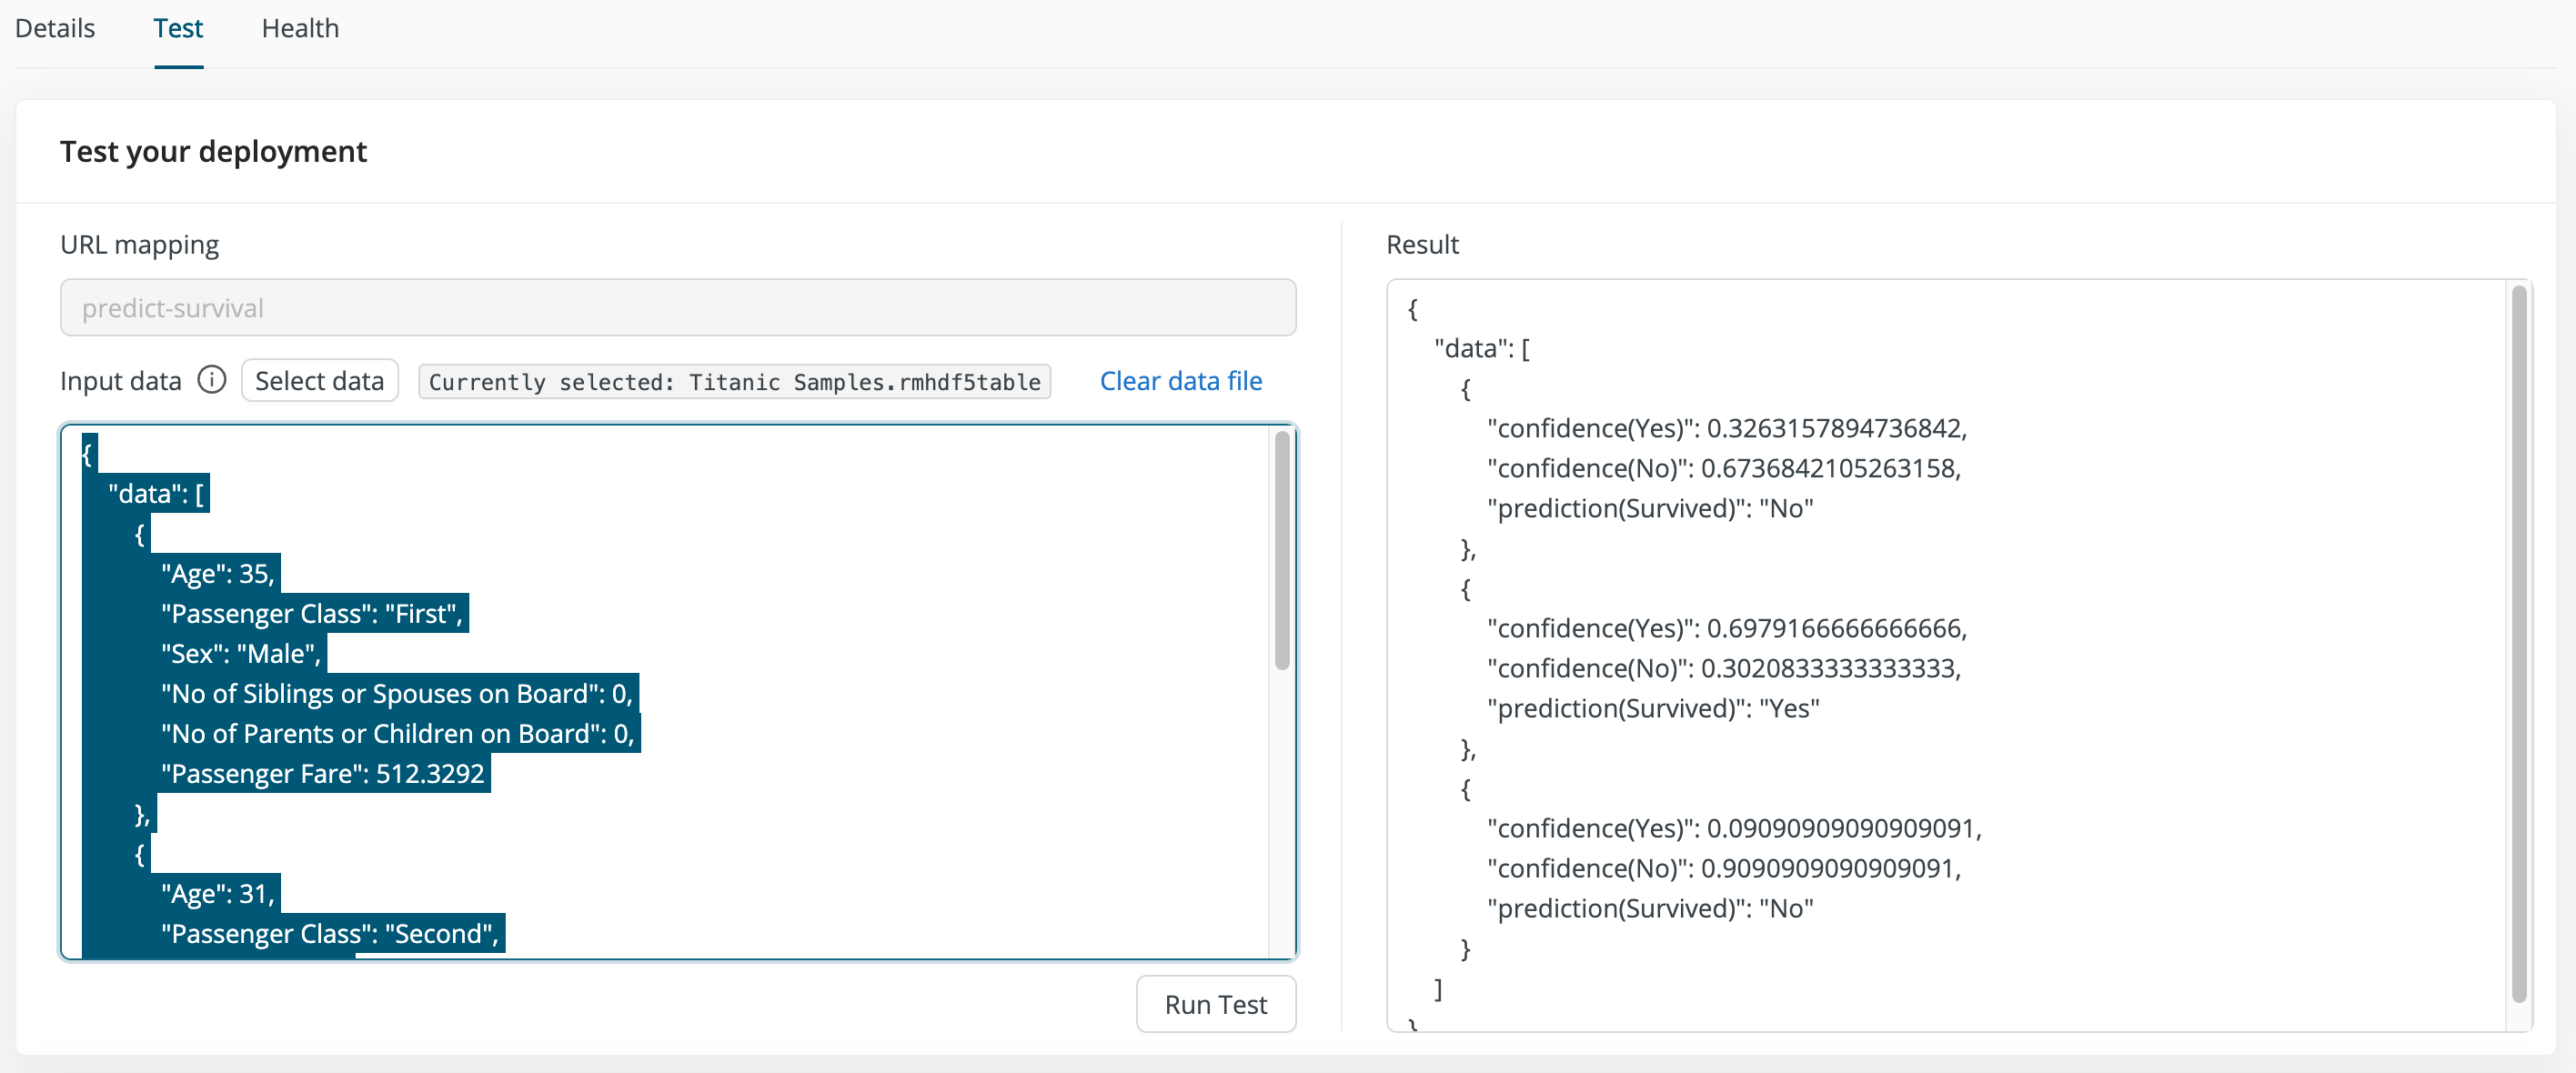
Before we proceed with defining the MCP tool, make sure to copy the JSON representation of the input data. We will use this representation in the MCP tool description.
MCP Tool Setup
AI Cloud allows you to define custom MCP servers with user-defined MCP tools, where a tool can be deployed in multiple servers. In what follows, we will define a single MCP tool and deploy it in a new server that contains only this tool.
Define the MCP Tool
To define our new MCP tool, of type Workflow Deployment, proceed as follows:
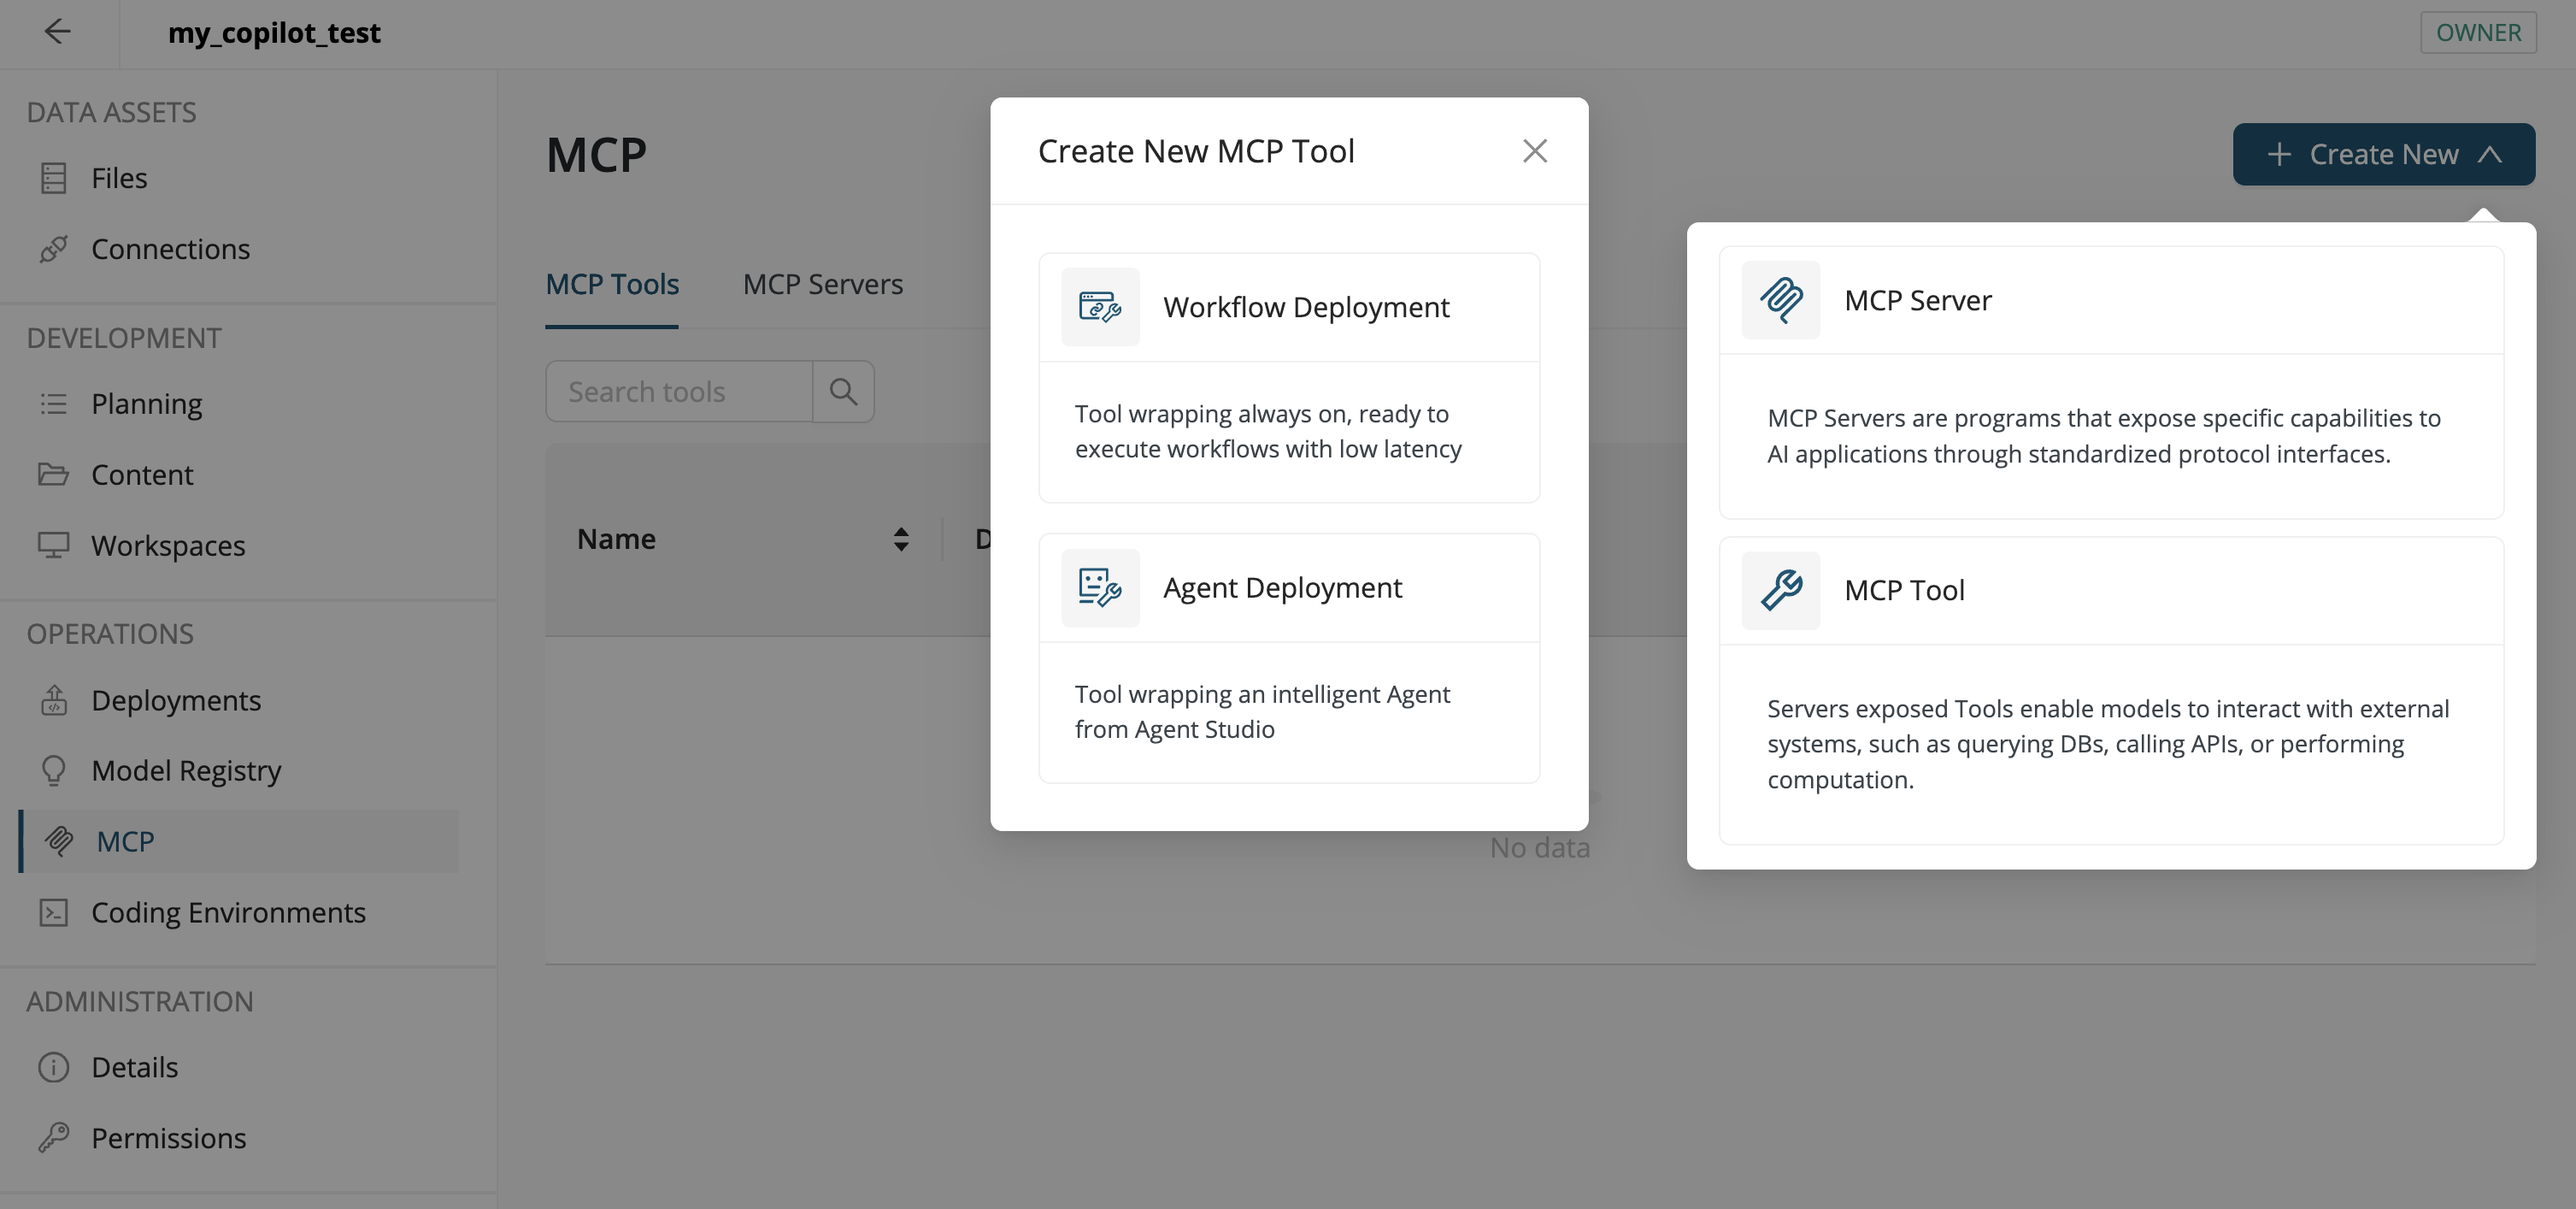
- In the left-side menu, go to Operations > MCP.
- Click the upper-right button Create New and select MCP Tool.
- Among the MCP tools, select Workflow Deployment.
Configure the workflow deployment tool:
-
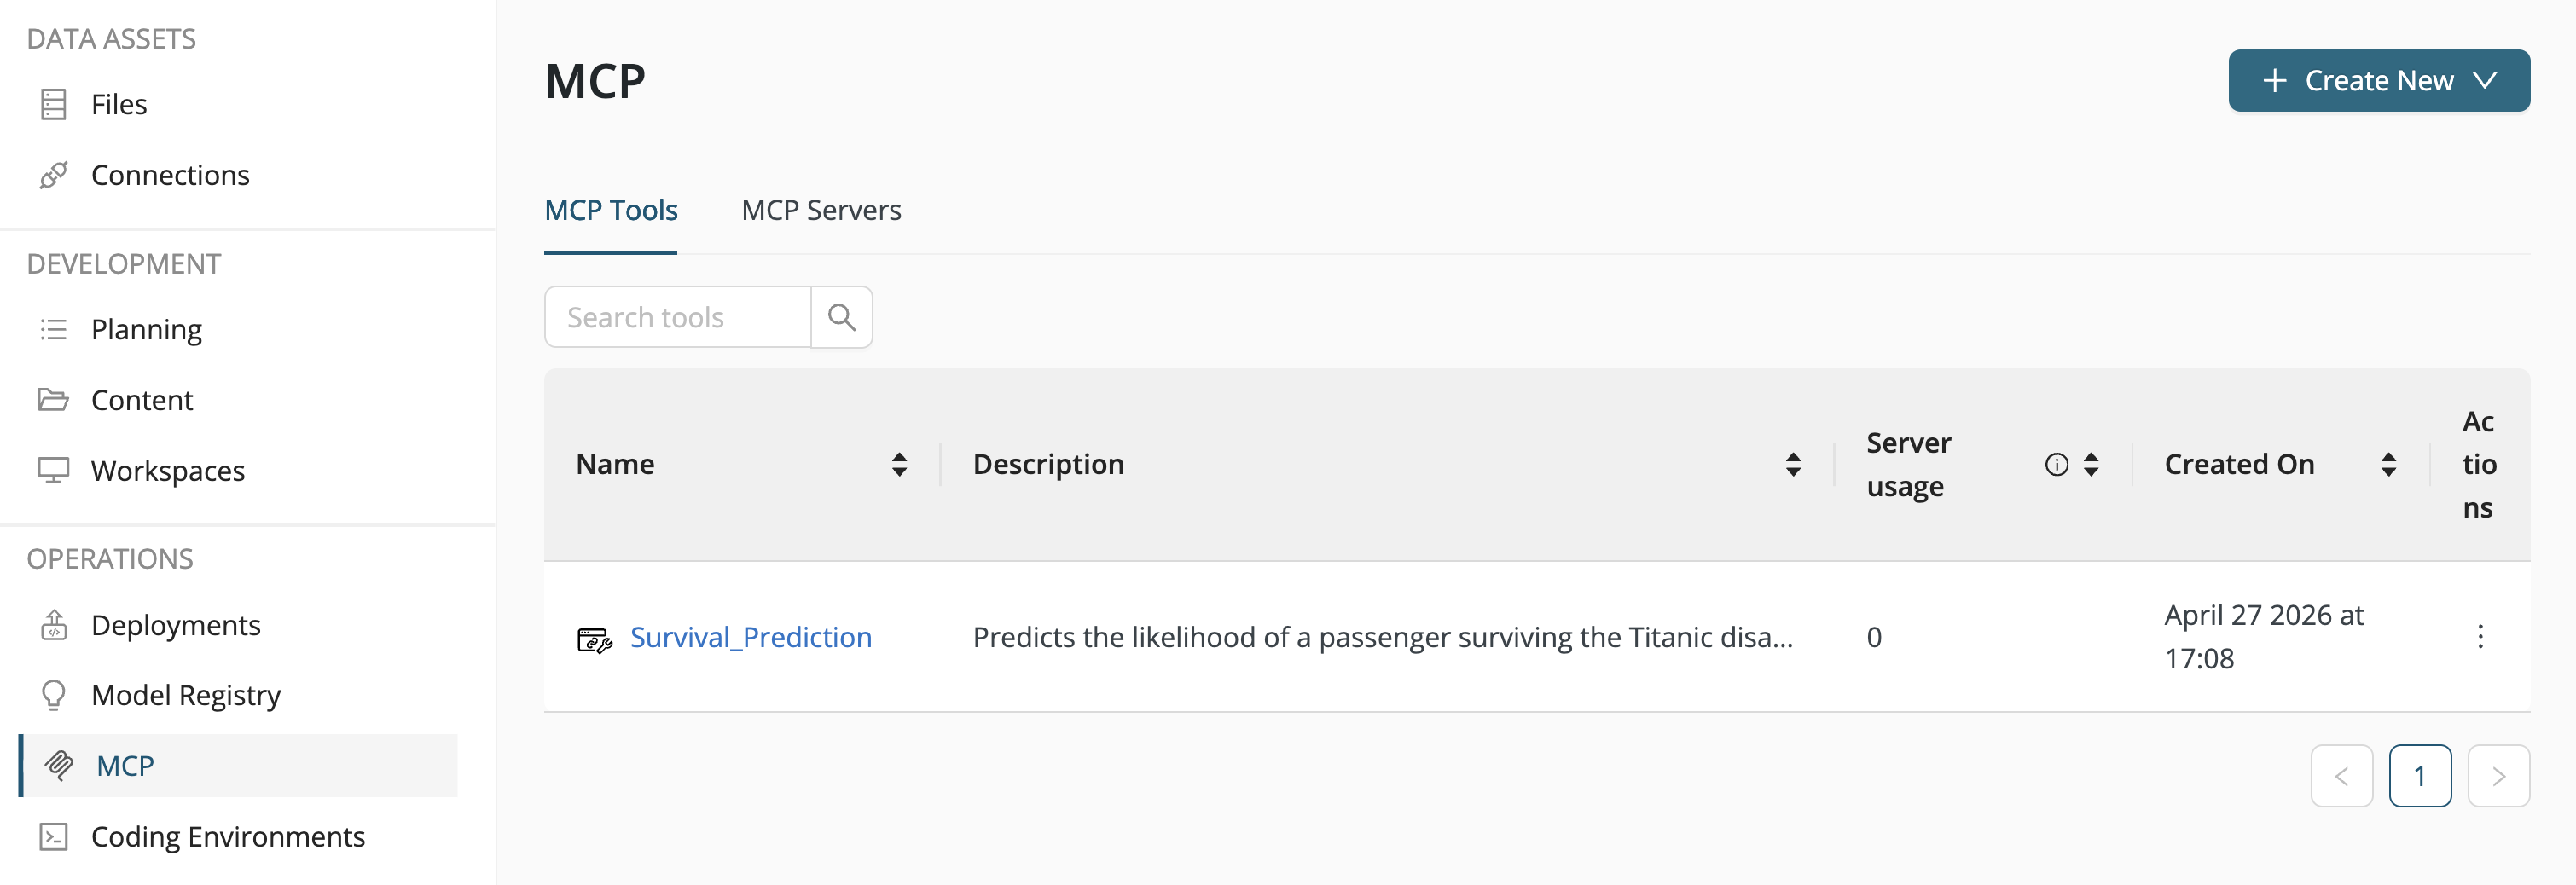
Name: Survival_Prediction
-
Workflow Deployment: Predict Survival
-
Title: Survival Prediction
-
Description: Predicts the likelihood of a passenger surviving the Titanic disaster.
-
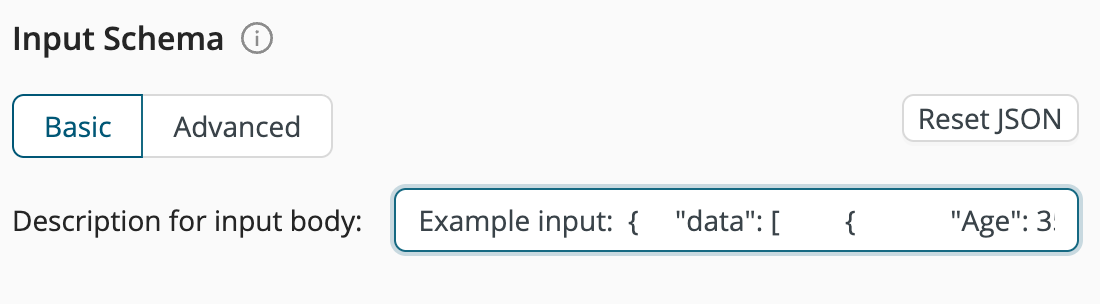
Input Schema: See the below JSON snippet, taken from the deployment test page.
-
Output Schema:
-
Annotations:
For the Input Schema, use the same JSON snippet as described above and shown below:
Example input:

{
    "data": [
        {
            "Age": 35,
            "Passenger Class": "First",
            "Sex": "Male",
            "No of Siblings or Spouses on Board": 0,
            "No of Parents or Children on Board": 0,
            "Passenger Fare": 512.3292
        },
        {
            "Age": 31,
            "Passenger Class": "Second",
            "Sex": "Female",
            "No of Siblings or Spouses on Board": 0,
            "No of Parents or Children on Board": 0,
            "Passenger Fare": 21
        },
        {
            "Age": 13,
            "Passenger Class": "Third",
            "Sex": "Male",
            "No of Siblings or Spouses on Board": 4,
            "No of Parents or Children on Board": 2,
            "Passenger Fare": 31.3875
        }
    ]
}
Click Create to complete the definition of the new prediction tool.
Configure the MCP Server
Create a new MCP server and add the Survival_Prediction tool to it. This server only provides a single tool, but you can add additional tools later on:
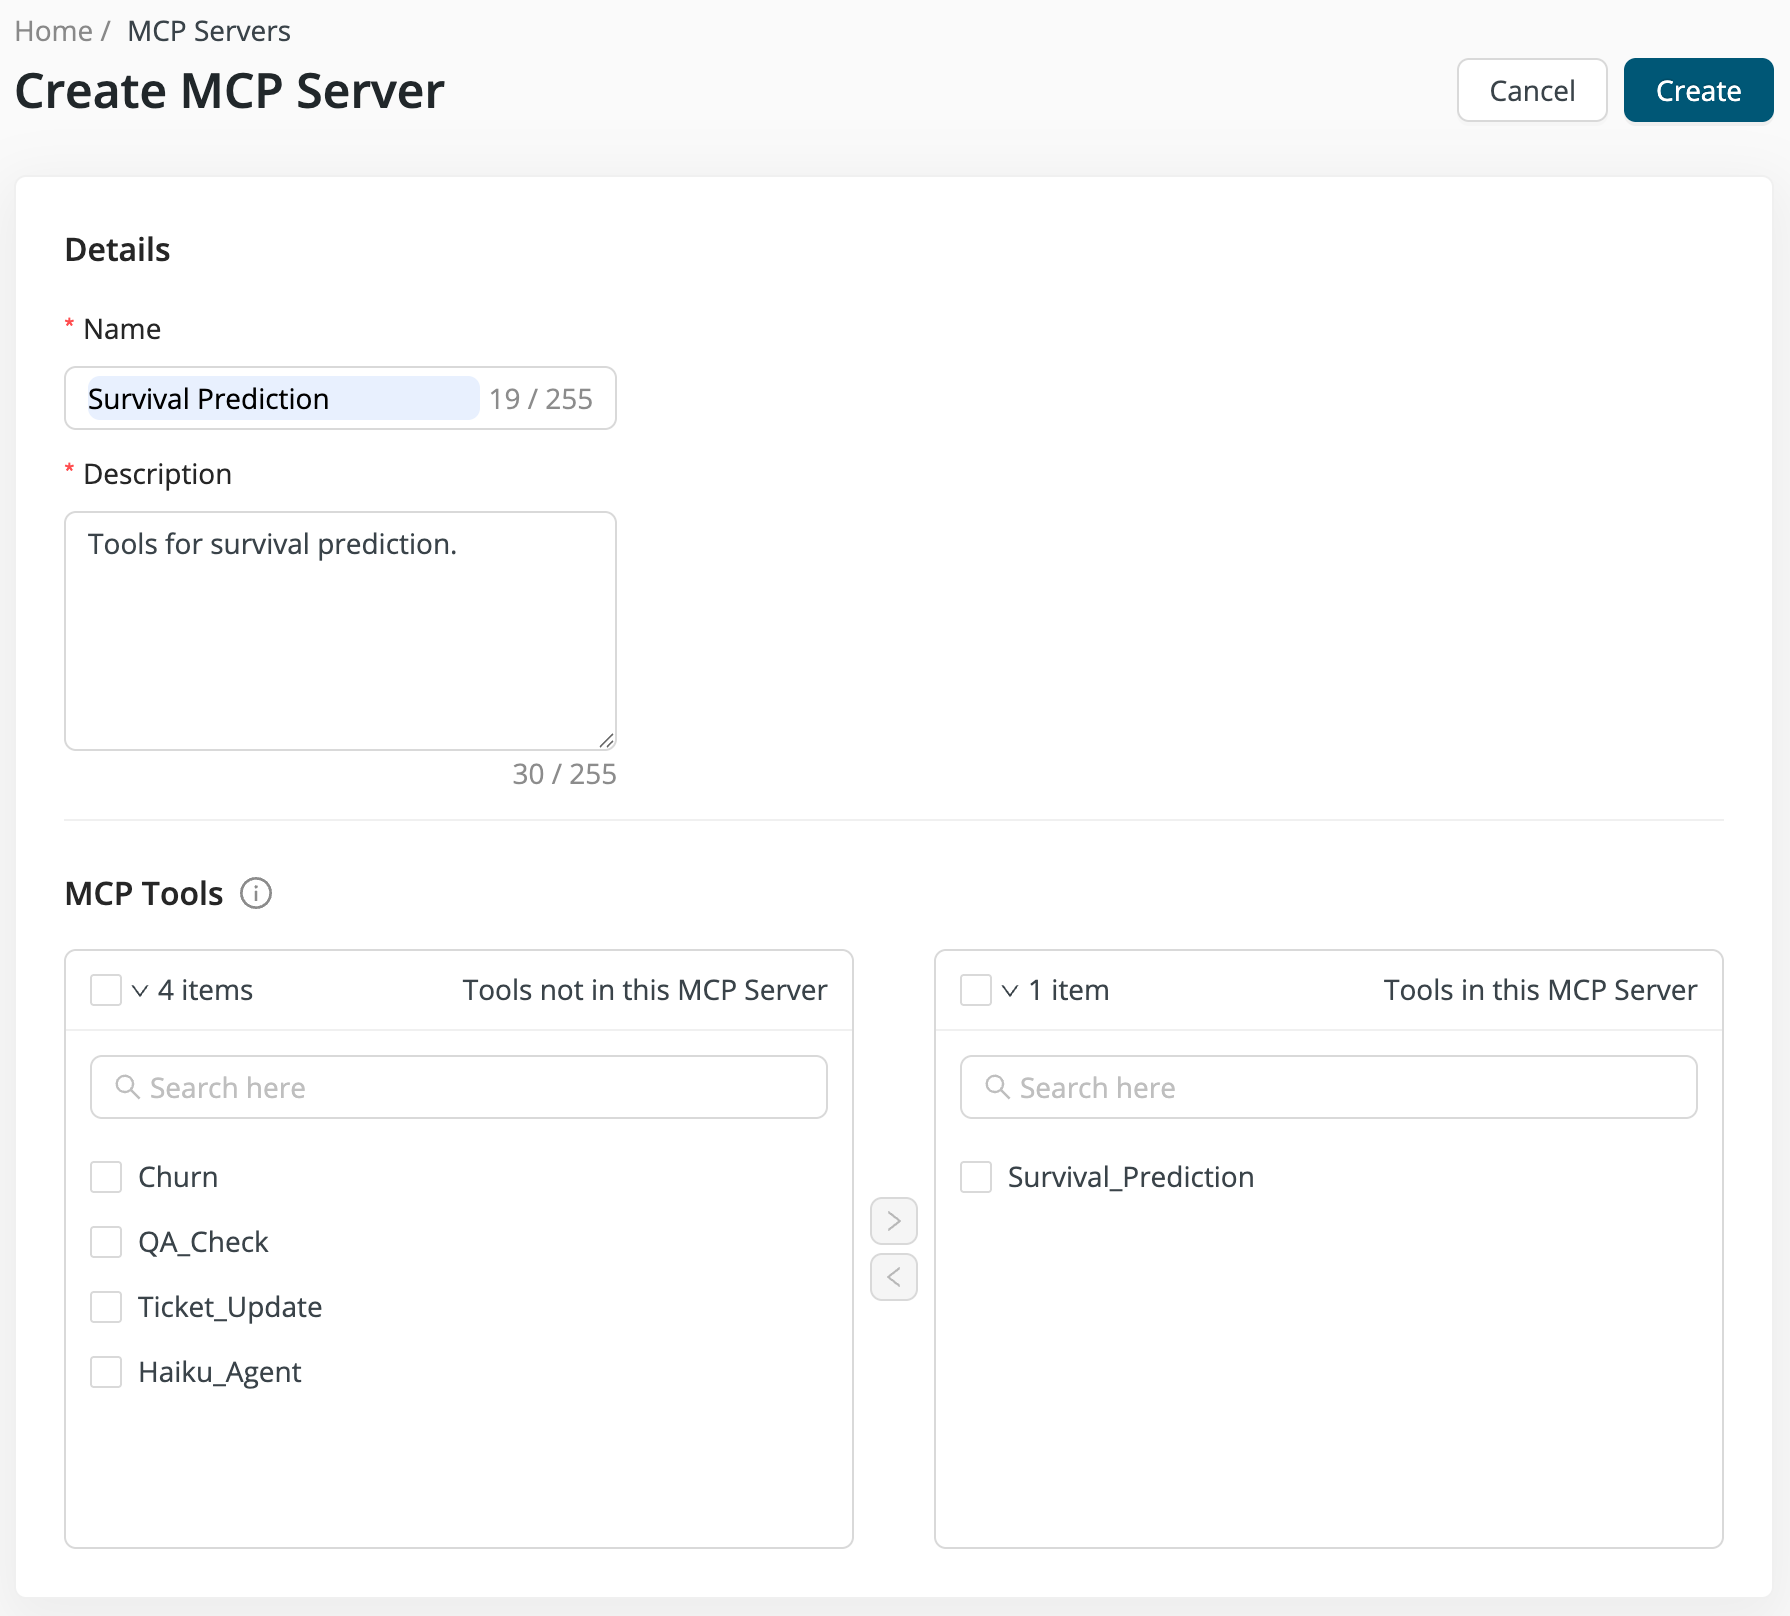
Once you click Create to complete the setup of the new MCP server, the server will be listed in the MCP Servers tab:
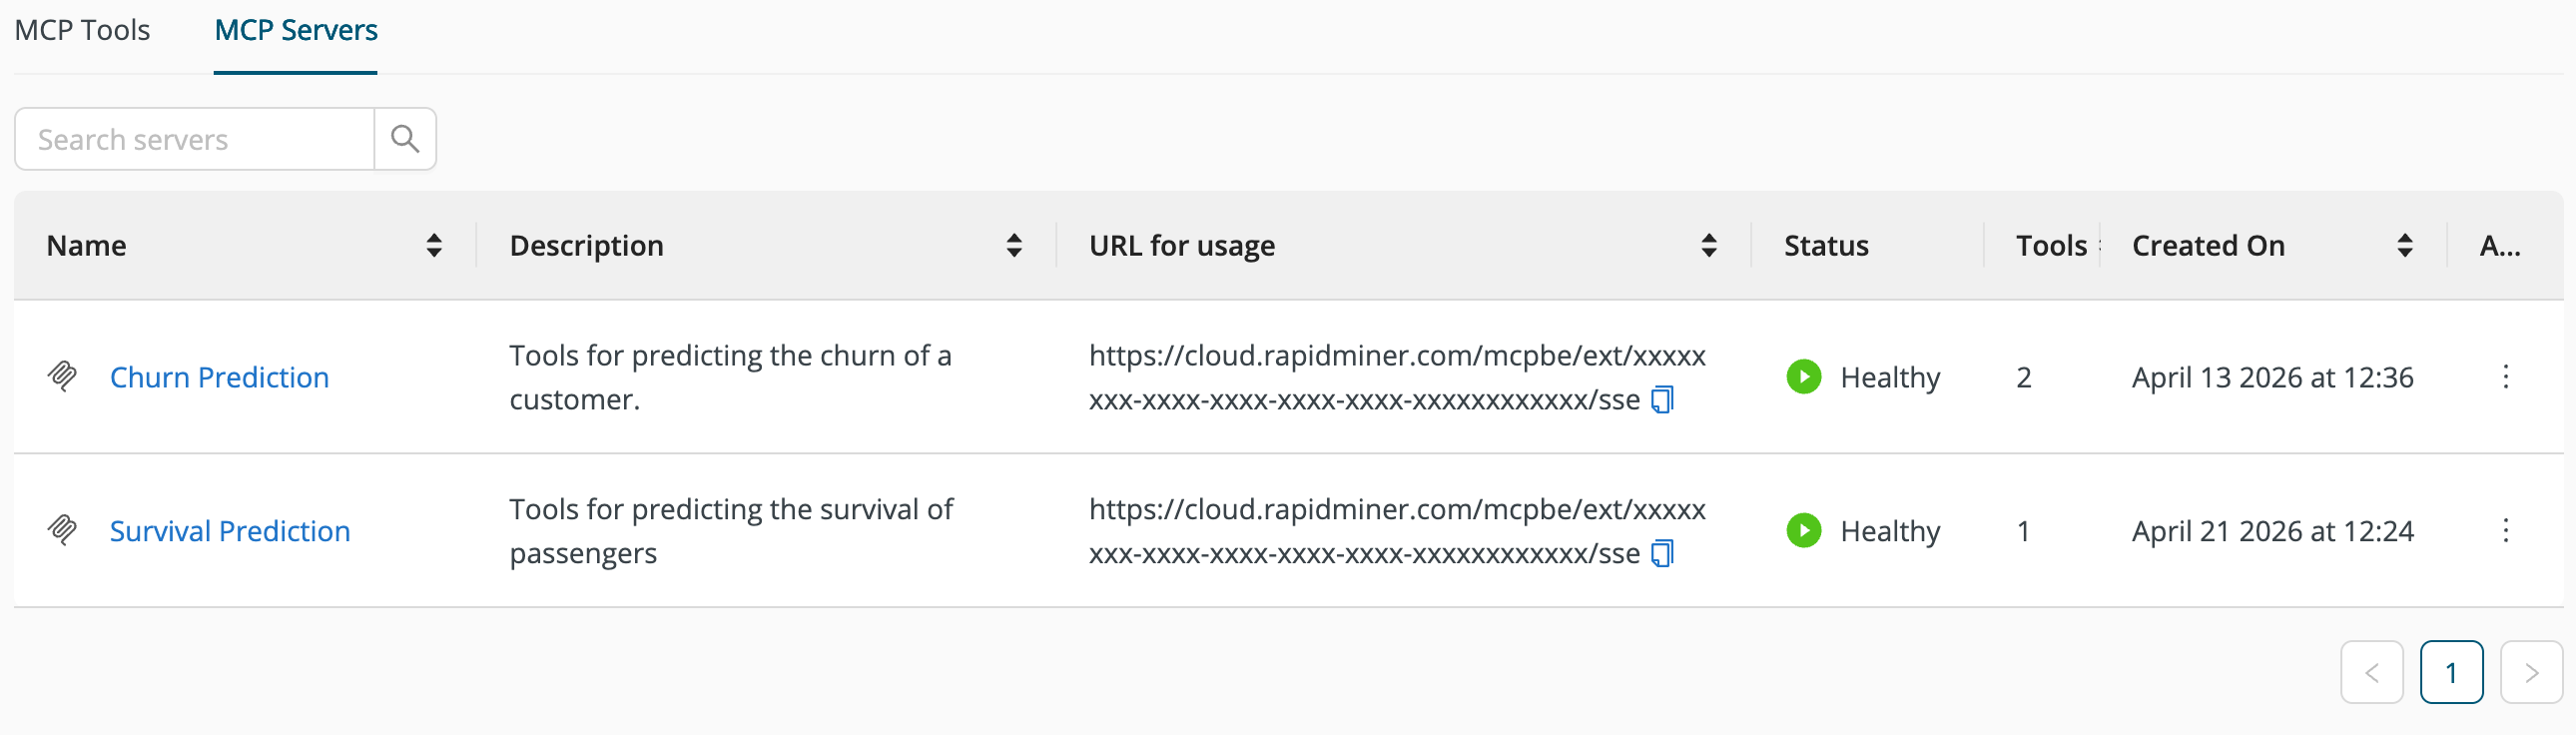
The MCP server is now available via the given URL.
Test the MCP Server
To test the MCP server you will need an MCP client. If you have access to a local client that understands MCP, you can use that for testing.
Alternatively, you can use Agent Studio to build a minimal agent that connects to the new MCP server:
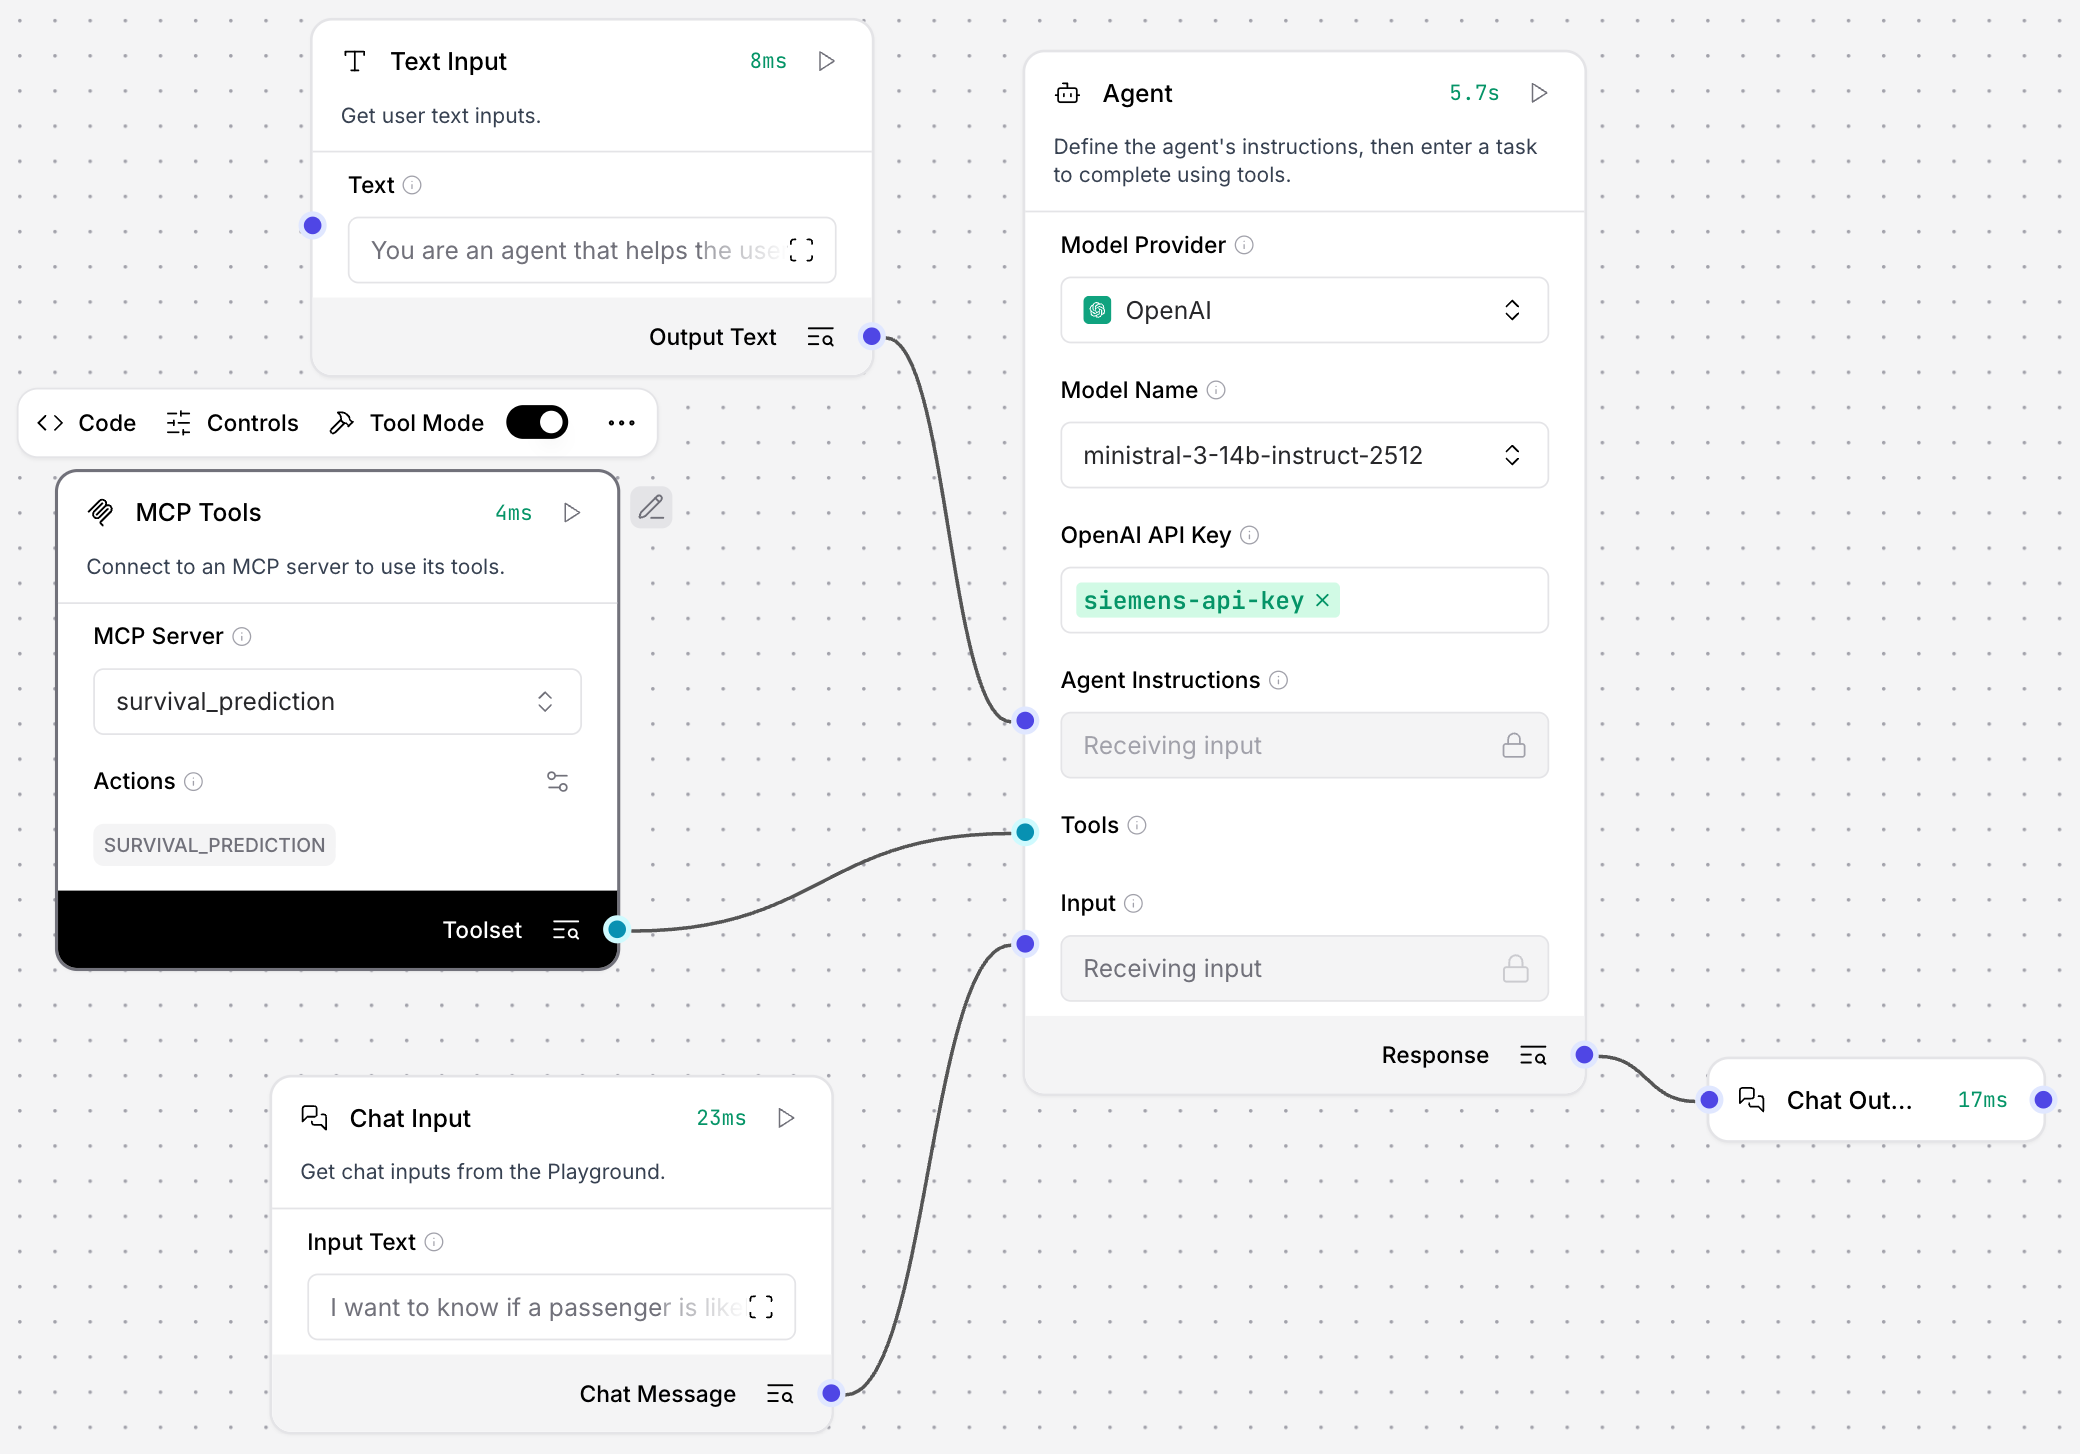
The agent instructions only tell the agent to use the MCP tools to help the user make a prediction. Everything else is derived from the MCP tool description.
For example, in this conversation the agent derives the questions from the input description of the MCP tool:
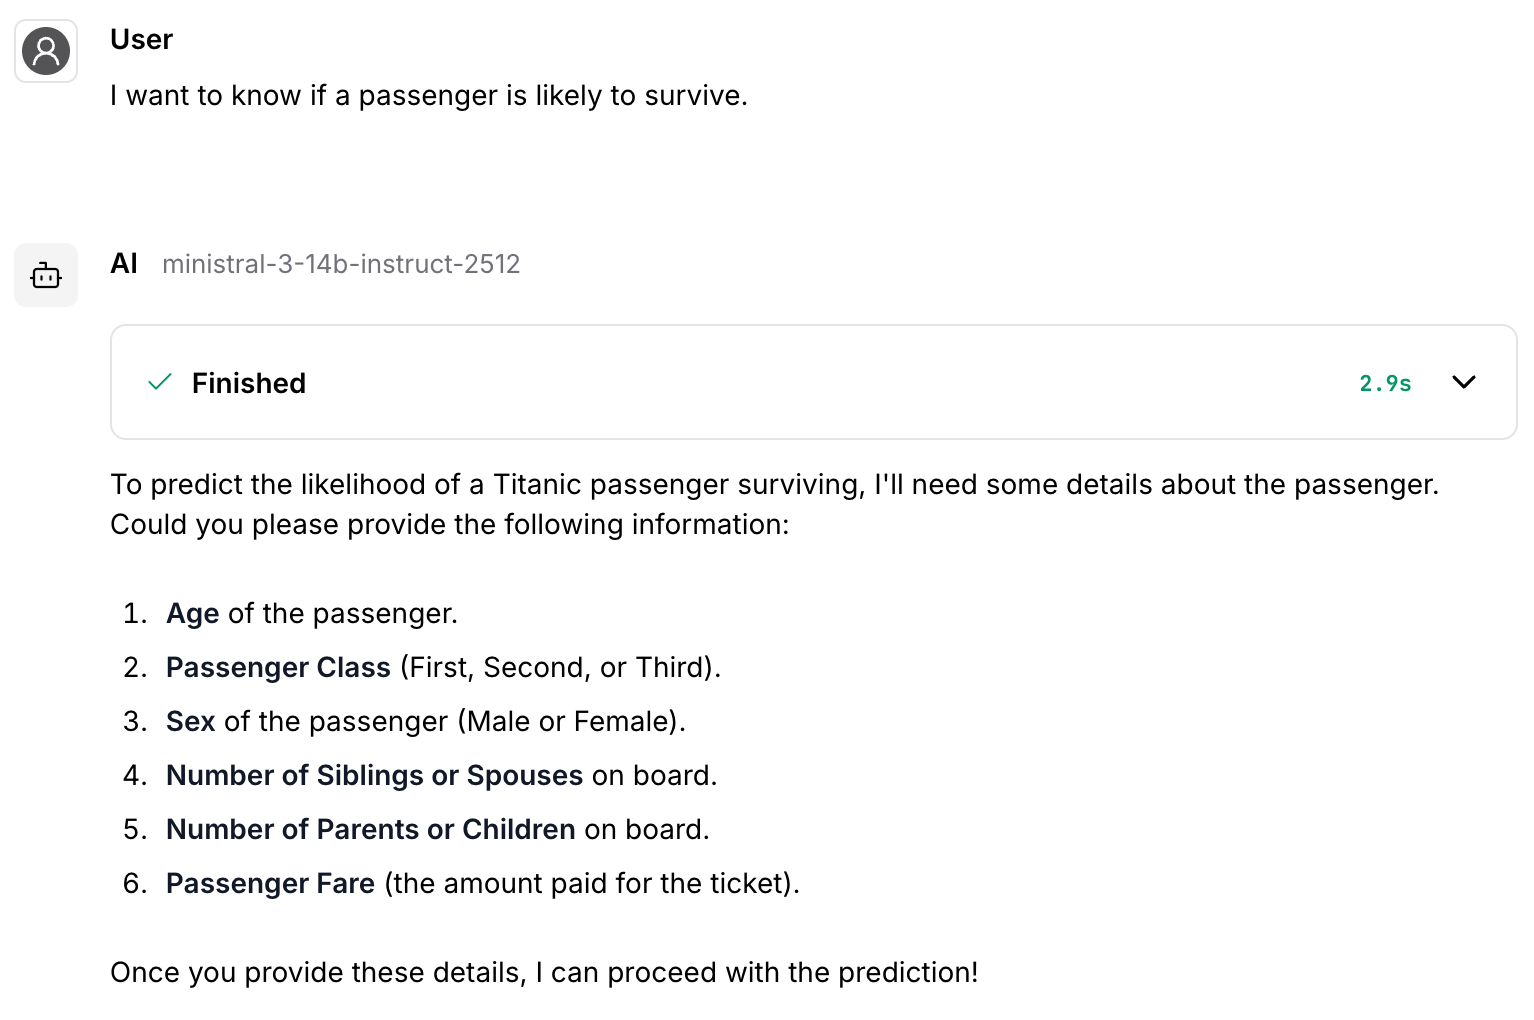
It can then use the same description to use the tool with the new data provided by the user:
