Azure Data Lake (Gen2)
The Azure Data Lake Storage Gen2 Connector allows you to access your Azure Data Lake Storage Gen2 account directly from AI Cloud.
Available Operators
The connector provides the following operators:
- Read Azure Data Lake Storage Gen2 – Retrieve data from your storage account
- Write Azure Data Lake Storage Gen2 – Store data in your storage account
- Loop Azure Data Lake Storage Gen2 – Iterate through files or folders
- Delete Azure Data Lake Storage Gen2 Resource – Remove files or folders
Prerequisites
Before you can use the Azure Data Lake Storage Gen2 Connector, make sure you have:
- An active Azure subscription
- An Azure Data Lake Storage Gen2 account (Storage Account with hierarchical namespace enabled)
- Appropriate permissions to create App registrations (for Service Principal method) or access to storage account keys
Create a connection
AI Cloud supports the Active Directory Service Principal and Shared Key authorization methods. Choose the method that best fits your security requirements and follow the corresponding setup instructions below.
Shared Key
Shared Key authorization uses the storage account's master key, providing full, unrestricted access to all data and containers. While simple to set up, it offers no granular control and is best suited for development and testing environments.
-
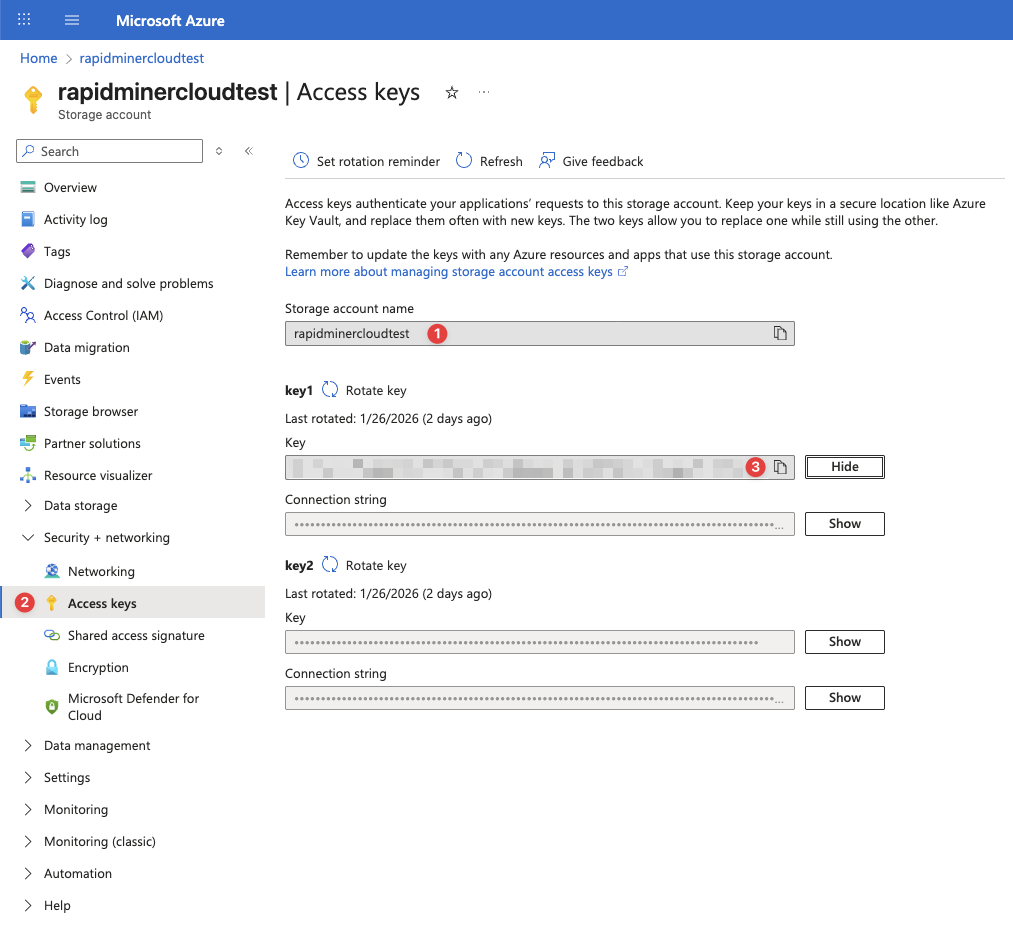
Log in to the Microsoft Azure Portal at https://portal.azure.com and navigate to the Storage Account you want to connect to. Note the name of your storage account as you need to enter that in AI Cloud.
-
Go to Security + networking > Access keys.
-
Click the Show button next to one of the keys and copy the value.
-
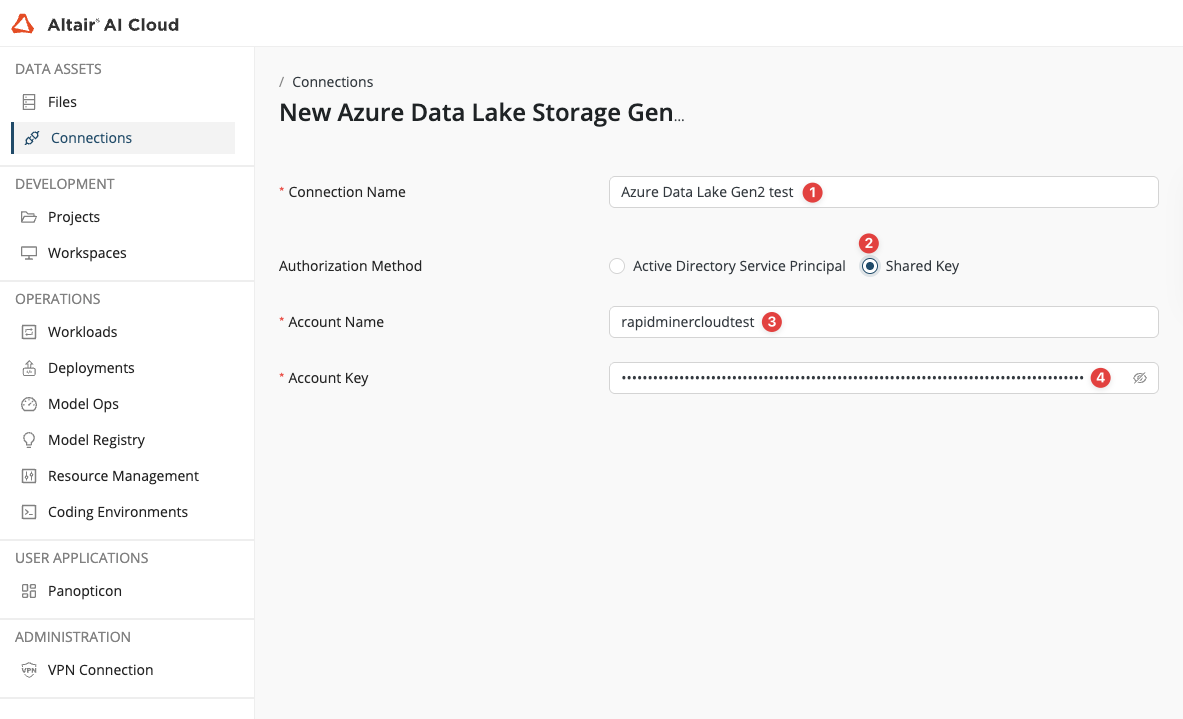
Create a new Azure Data Lake Storage Gen2 connection in AI Cloud.
-
Set a name for your connection.
-
Select Shared Key as Authorization Method.
-
Specify the name of your Storage Account via the Account Name field.
-
Paste the copied Storage Account Key into the Account Key field.
-
Active Directory Service Principal
Service Principal (Azure AD) authentication uses Azure Active Directory for identity management. It provides granular, role-based permissions, detailed audit trails, and better security through the principle of least privilege. This method is recommended for production environments.
-
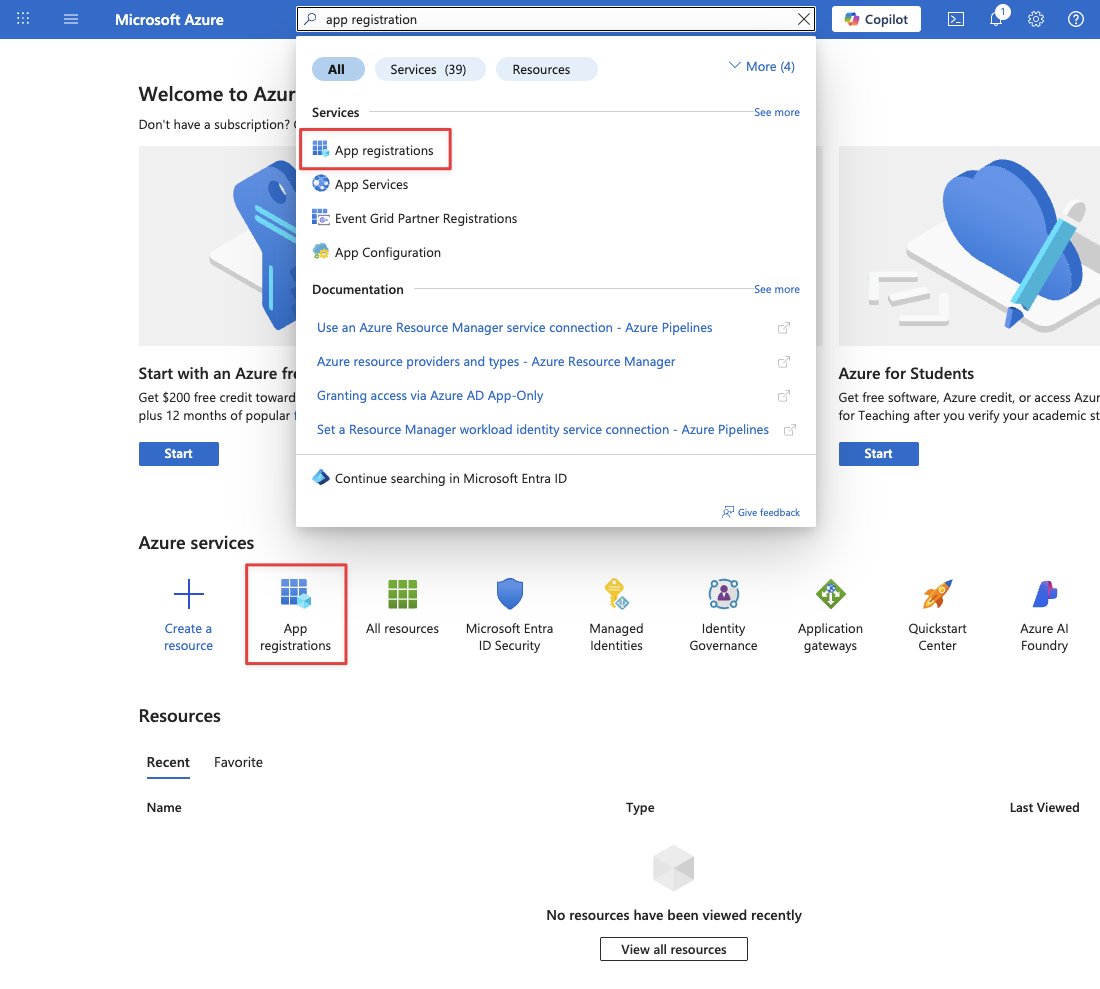
Log in to the Microsoft Azure Portal at https://portal.azure.com and navigate to the App registrations service.
-
Click New registration and fill out the form. You can skip the redirect URI section, as this will be configured later. Note the following values from the Overview page:
- Application (client) ID
- Directory (tenant) ID
-
Open the Certificates & secrets page of your App. Click the New client secret button to create a new secret. Save the Secret Value to a secure place, as you'll need to provide it when configuring a SharePoint connection in AI Cloud.

-
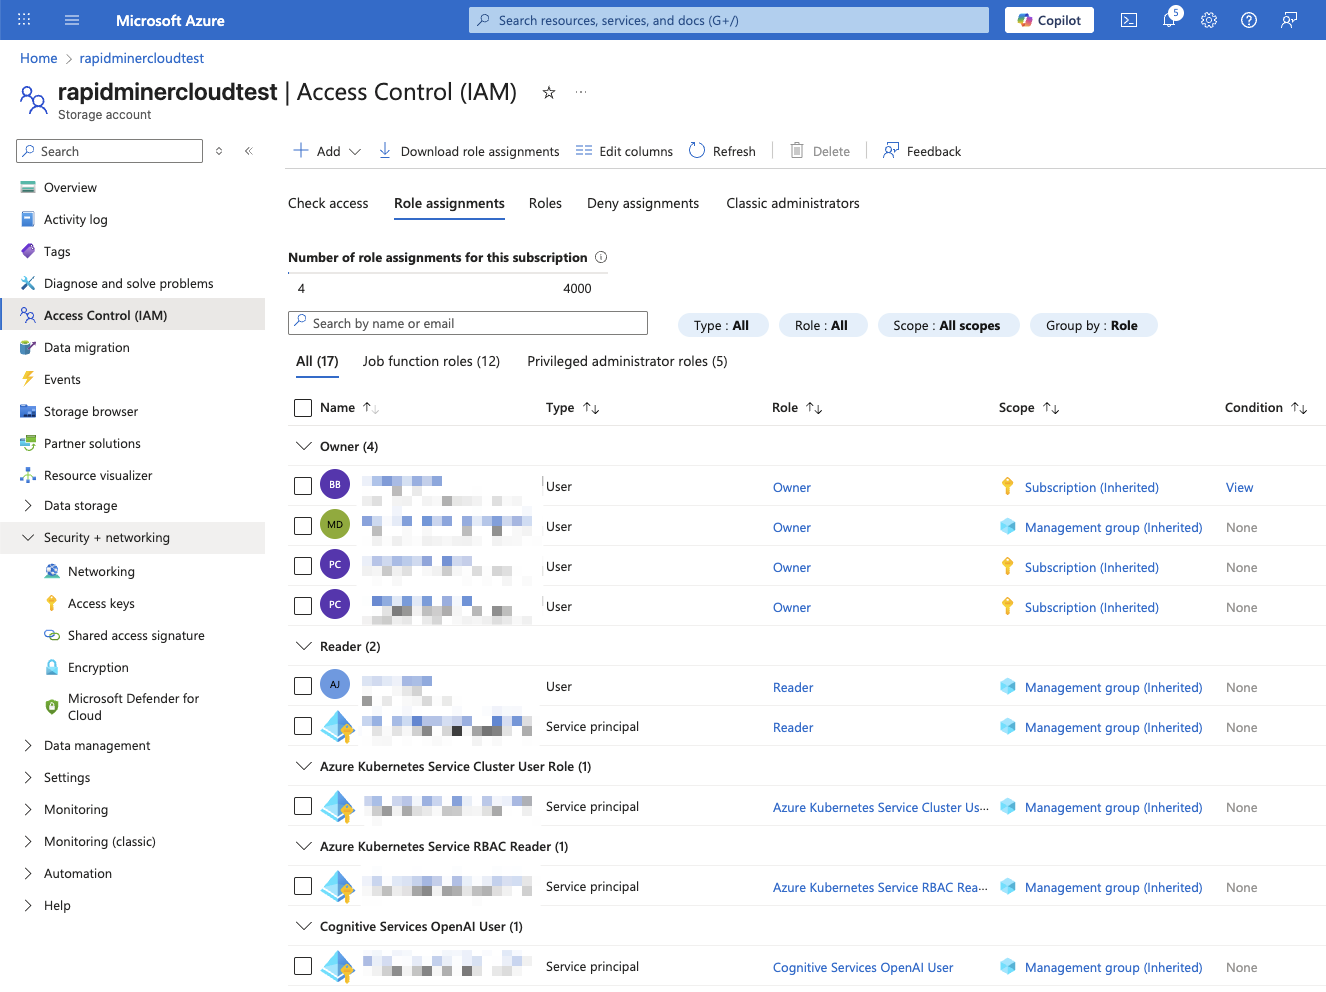
Go to your Storage Account and click Access Control (IAM). Click + Add > Add role assignment.
-
Select role: Storage Blob Data Contributor (or Storage Blob Data Reader for read-only)
-
Assign access to: User, group, or service principal
-
Select members: Search for the app you previously registered and save. Wait 5-10 minutes for permissions to propagate!
-
Create a new Azure Data Lake Storage Gen2 connection in AI Cloud.
-
Set a name for your connection.
-
Select Active Directory Service Principal as Authorization Method.
-
Set Directory (tenant) ID as Tenant ID.
-
Set your Storage Account Name as Account Name.
-
Set Application (client) ID as Client ID.
-
Set the Client Secret Value as Client Key.
-
